Translate This Page
TECHNICAL
If you are doing a restoration, please send us your hints and tips to publish.
Engine Oil = SAE30 - API SA/SB/SC Non Detergent.
The Oil should be replaced every 3,000km/1,800miles. Half that interval if you regularly drive in town or only drive short journeys.
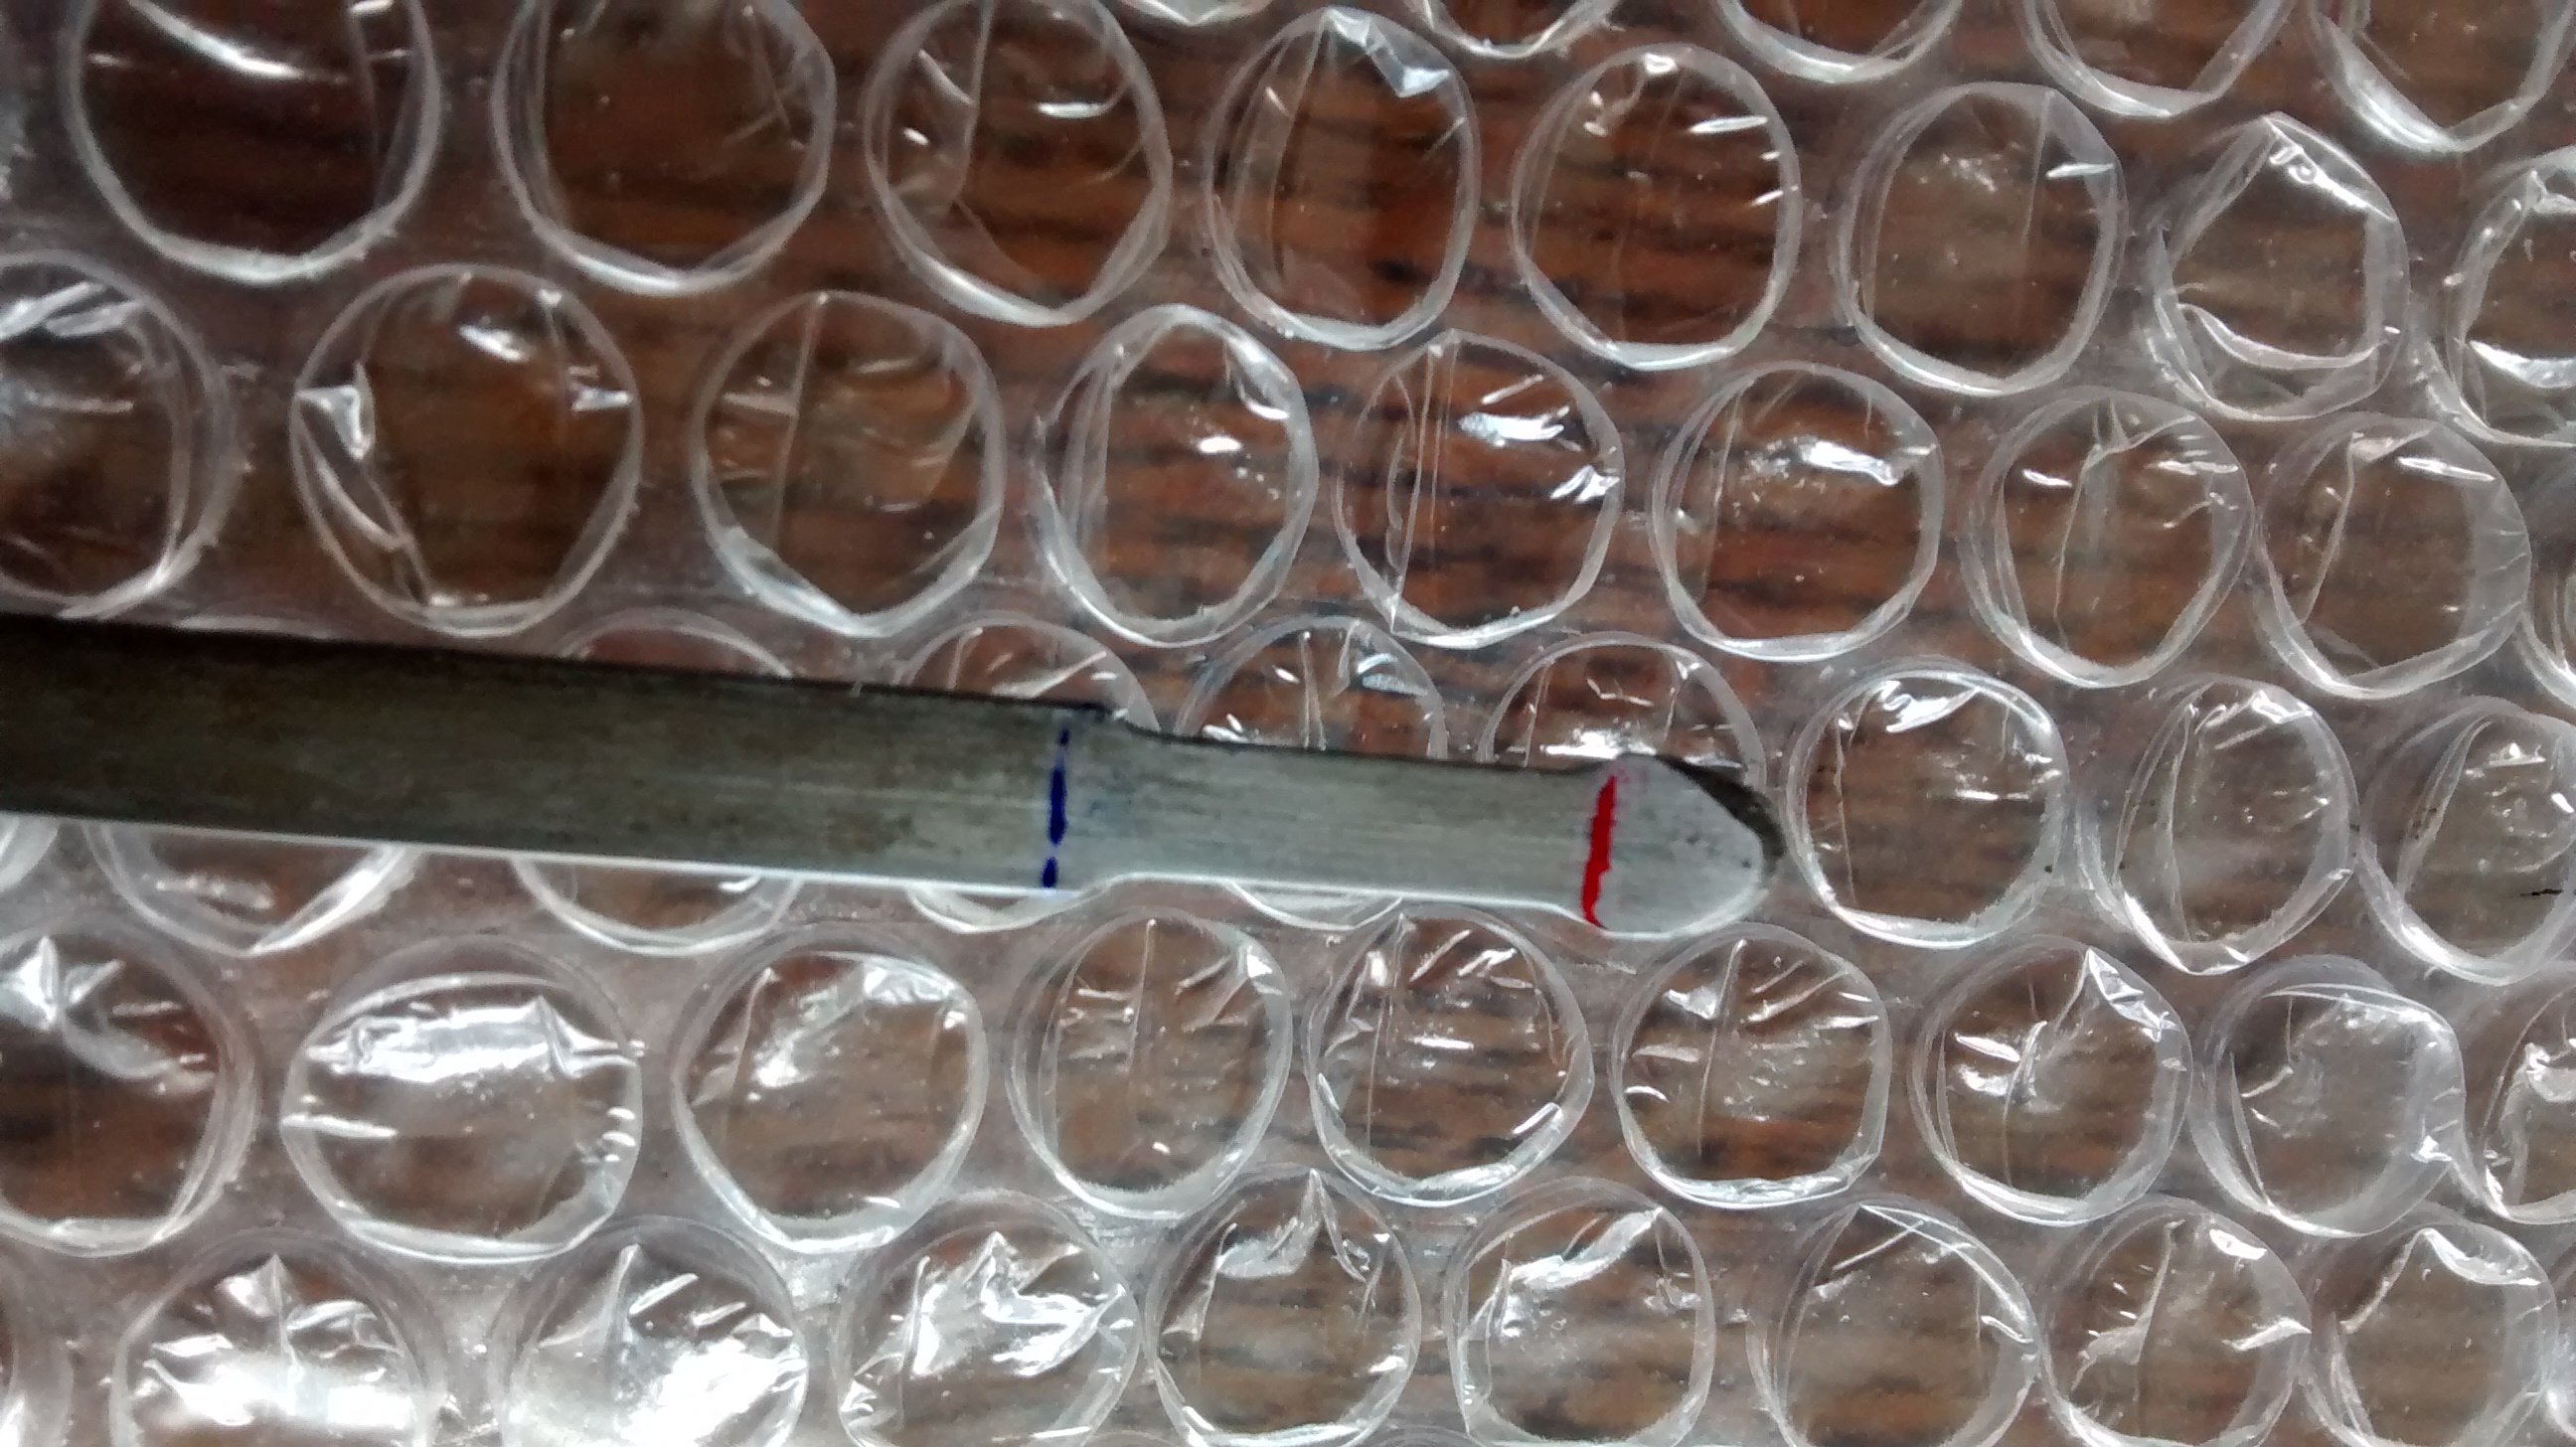
Oil level should be below the part of the Dipstick where it tapers in (where we have drawn a Blue line) and above the lower part of the Dipstick where it tapers out again (where we have drawn a Red line). This check must be done only on level ground and after the engine has been stopped for at least 5 minutes. Don't let it drop below the Lower level or Engine damage may result. Overfilling it can also lead to engine issues.
SERVICING :
These vans are from an era when servicing was a very regular thing as the Brakes are not self adjusting, nor is the Clutch. The Oil life was short (partly because there was no Oil filter), the points based Distributor started to deteriorate from the moment it was set-up and by 2,000 miles was causing misfiring, high fuel consumption and poor starting. The Chassis had multiple Grease points which needed doing.
So servicing every 3,000km/1,800miles was essential and not just to keep the Brakes effective.
CLUTCH ISSUES : We are seeing a number of vans in with Clutch failure from a worn out Clutch Release Bearing.
On a H van, as on all Vintage vehicles, if you sit with your foot on the clutch while at the Traffic lights you will wear out the release Bearing in months.
The Carbon Face of the release Bearing wears whenever the Clutch pedal is depressed, suffering degradation all the time the Clutch pedal is to the floor.
This in turn will wreck the Clutch cover and leave you with a £900+ bill. It is important that you only keep the clutch Pedal depressed to the floor for the minimum amount of time.
Always take it out of Gear and let the pedal back up when you stop, even if only for a few seconds.
A modern Clutch release bearing is a really tough beast (like on our Ford Transplants) and will tolerate the Clutch pedal being depressed for several minutes while you sit at Traffic lights.
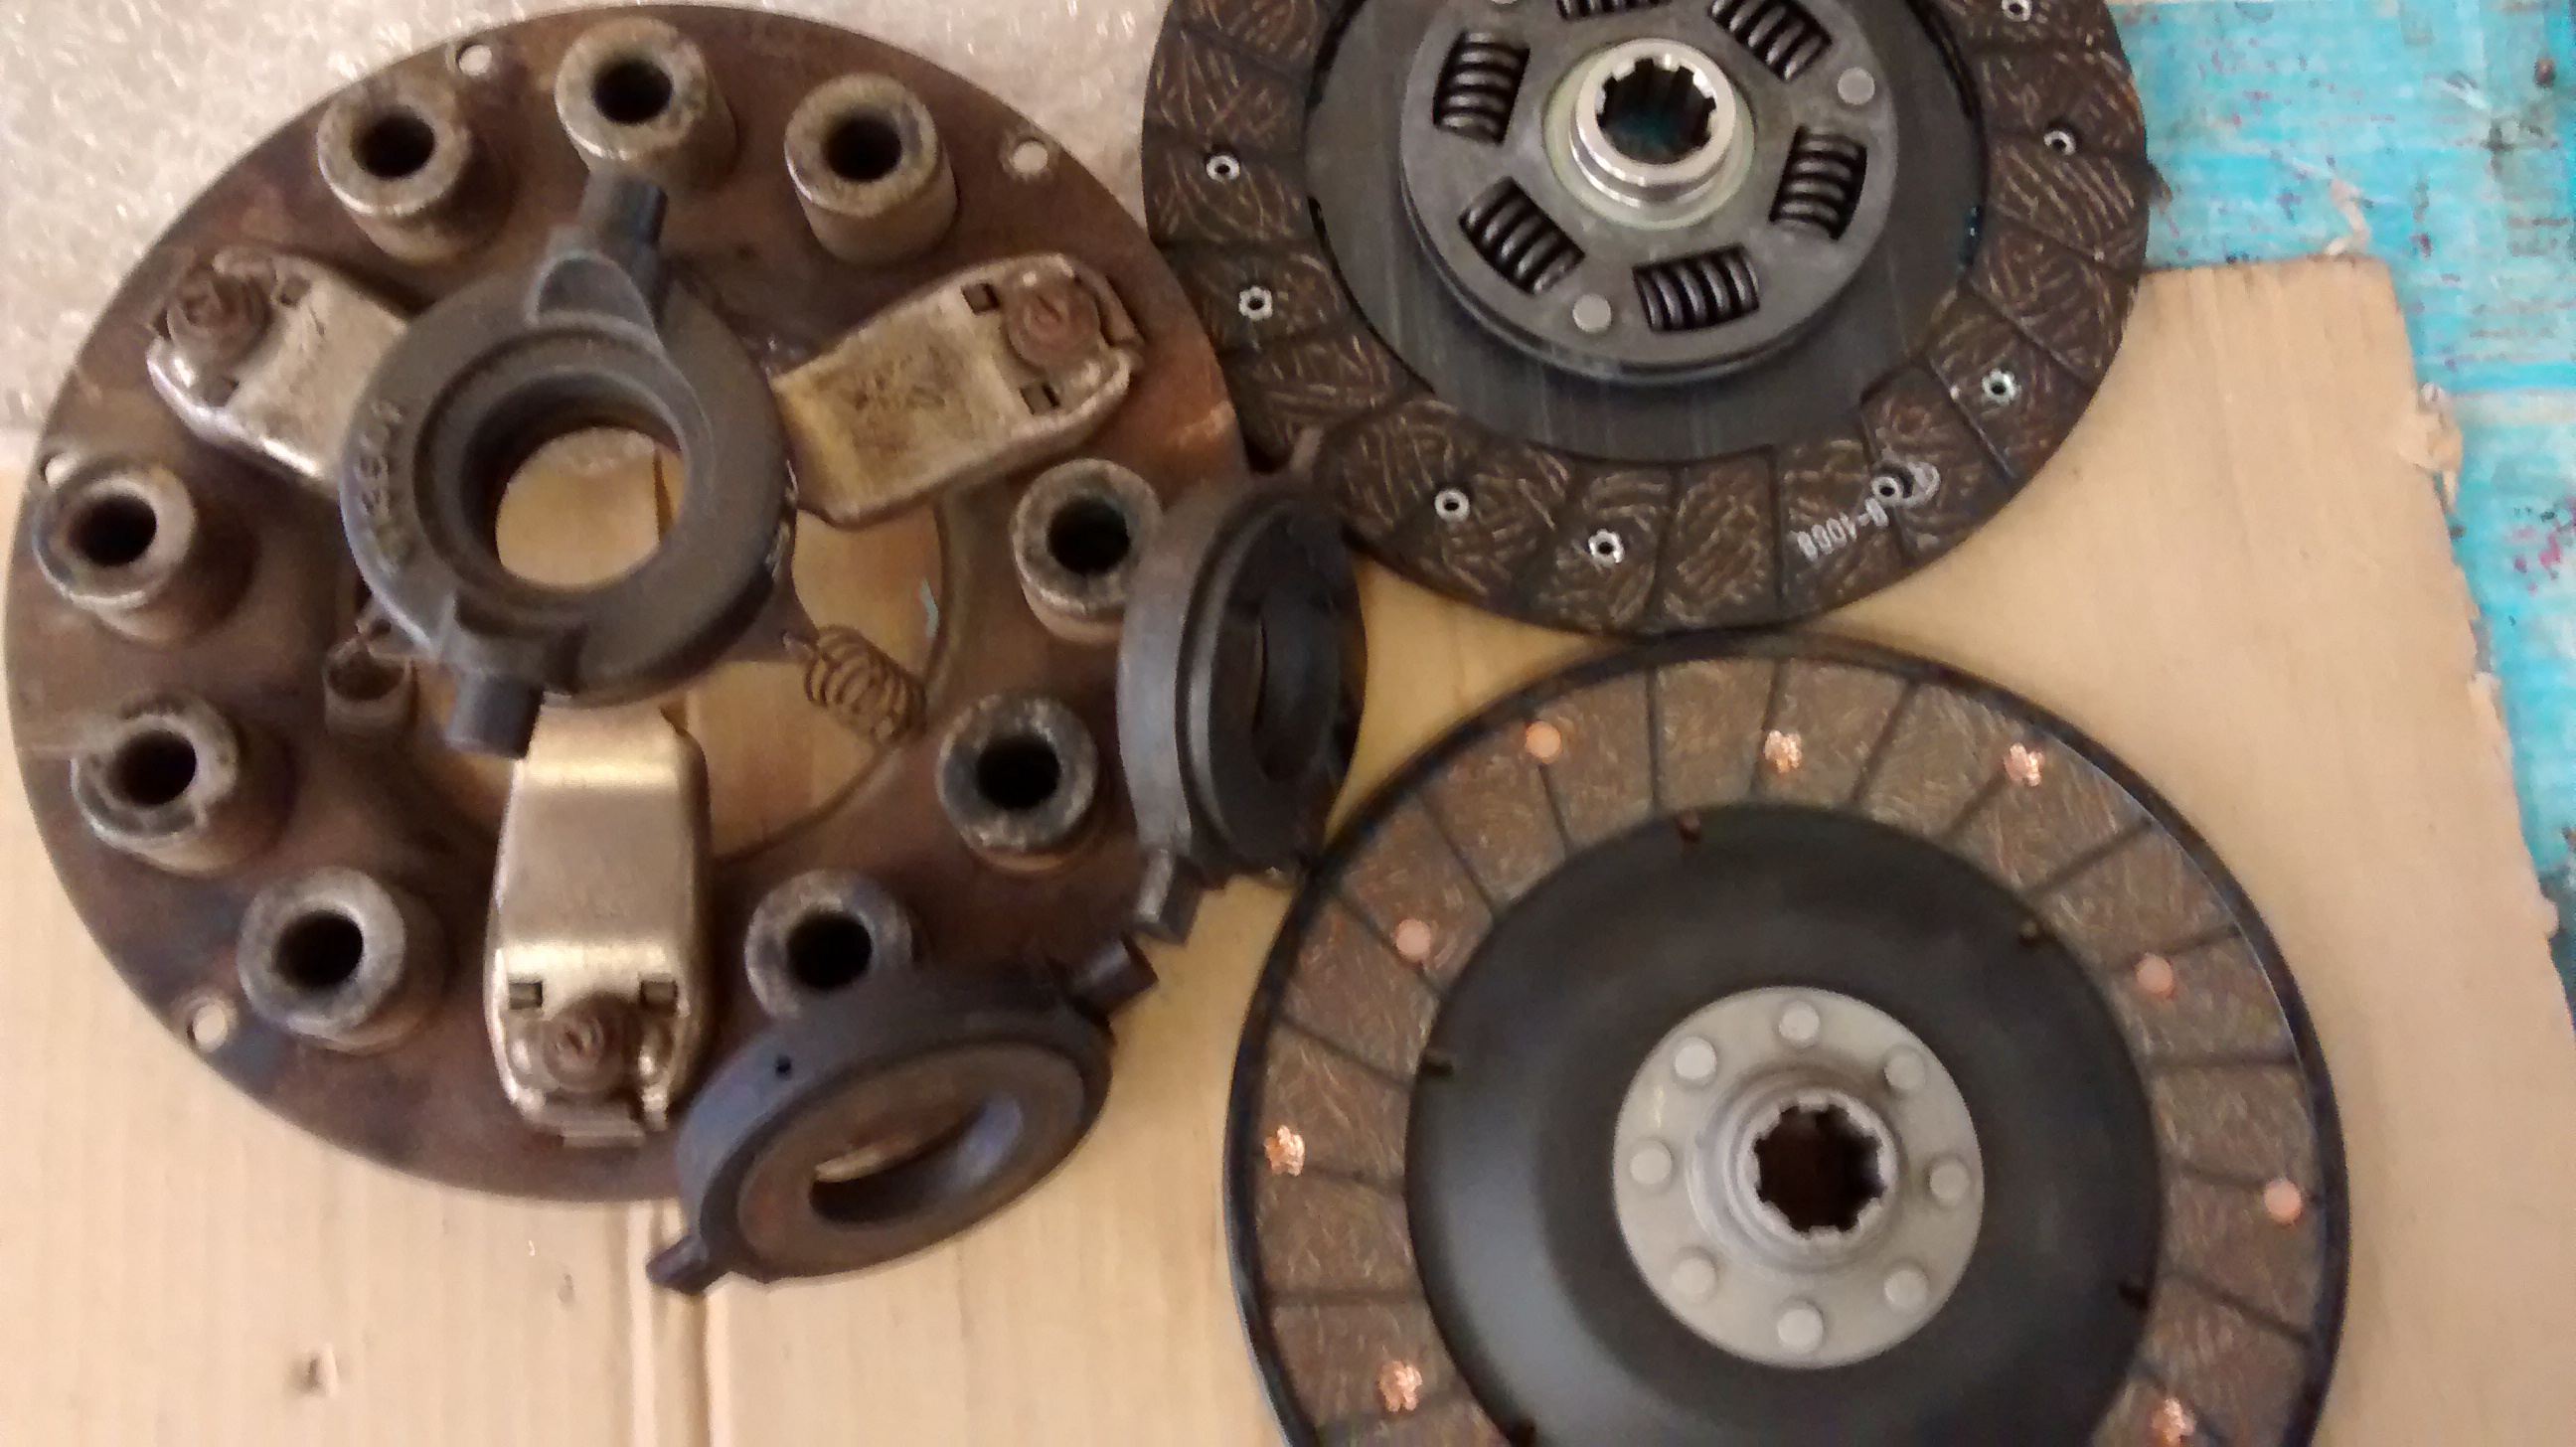
In the photo below you can see the later type Friction Disc (top Right) the Clutch Cover or Pressure Plate (top Left). Two release bearings (middle) the upper one can be seen to still have a few millimetres of Carbon Thrust Face left, whereas the lower one is almost down to the metal housing.
See the old, early style Clutch Friction disc Bottom Right.
As part of a service the Garage should check the amount of Carbon Thrust material left on the Release Bearing and report when it is likely to require renewal. However, most don't realise it wears down so don't know to check. We suggest you ask for a report on this item as part of each service?
When the Release Bearing wears down, it wrecks the Clutch Cover leaving you without the ability to select gears. It is an Engine out job to replace it, hence the high cost. A new Clutch cover, Friction Disc and Release Bearing will be about £550 without the 1.5 days labour.
The picture below shows a Release Bearing taken out of a H van with a failed Clutch (it is slightly different to an original Citroen item, we think from a Tractor?) where the Carbon ring broke up shortly after installation.
You can see that the piece of Carbon found in the Gearbox Housing has not worn down much before breaking up, but the metal retainer has.
Clearly poorly made and additionally not Citroen original.
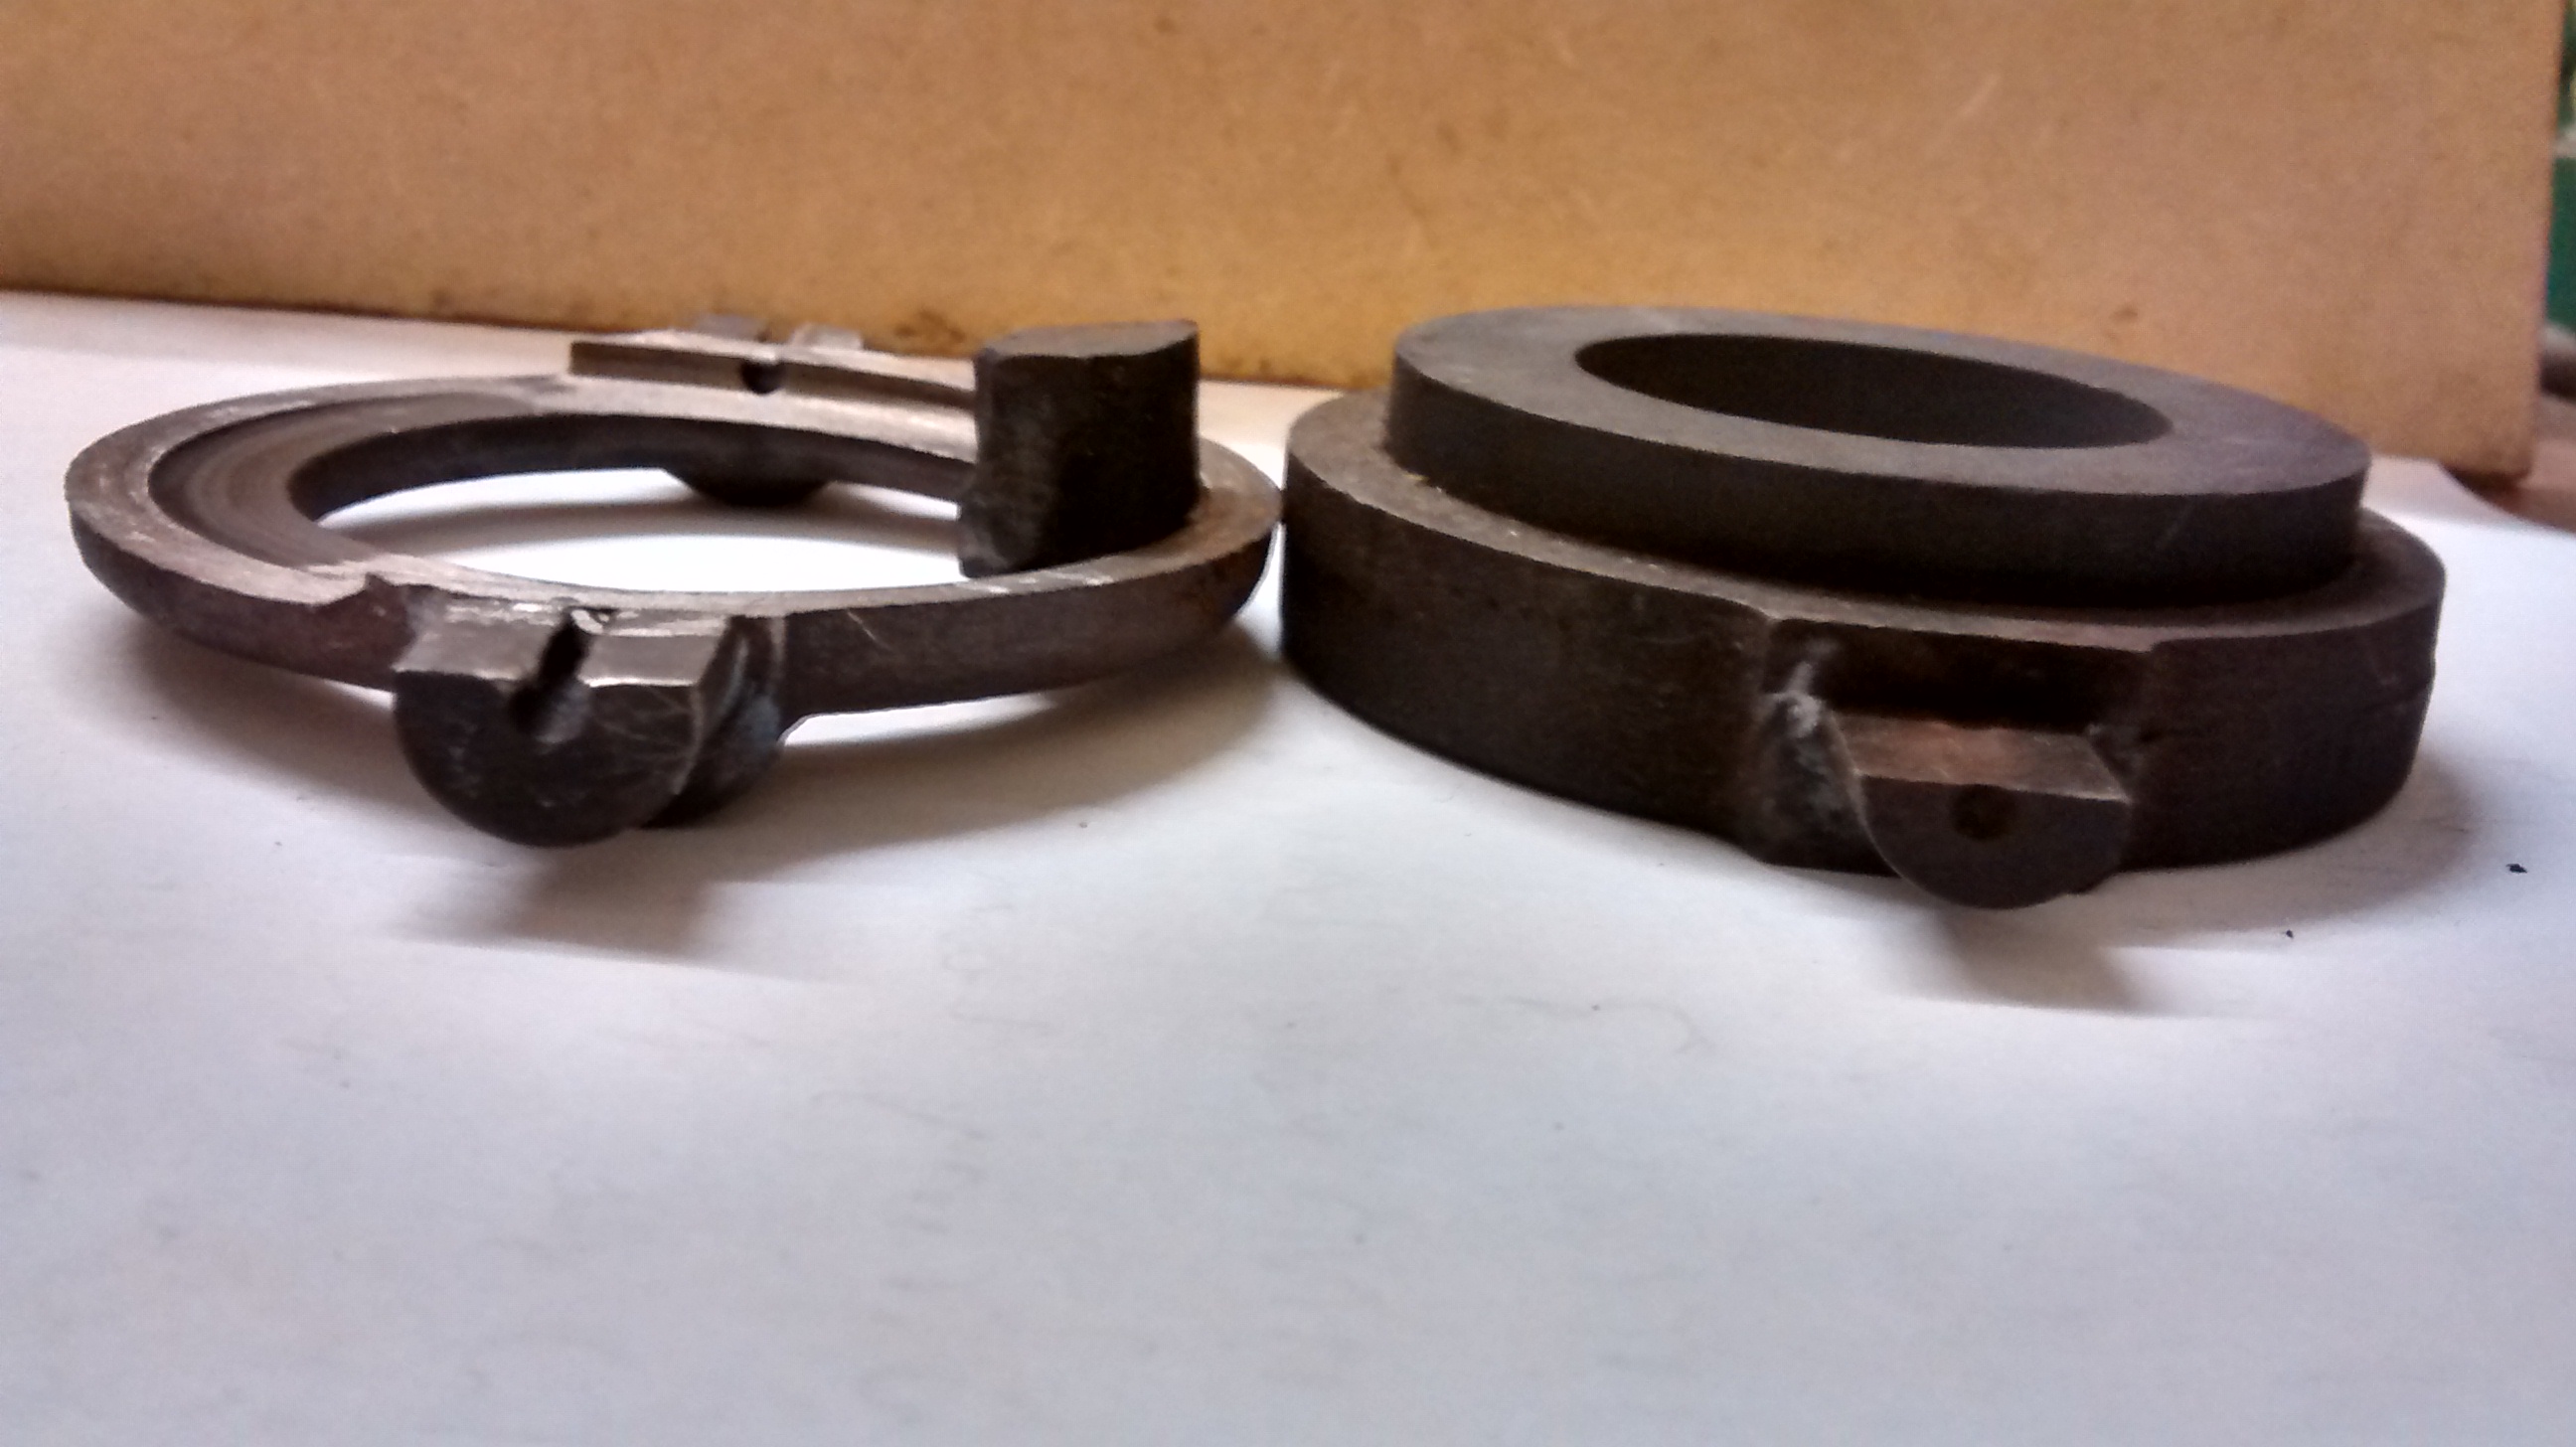
Look at the picture above and you will see the original Citroen item on the right sits flat on the desk but the Tractor version has as two rounded lumps near the retaining lugs.
Note also that the operating/retaining lug is thicker/deeper on the none original item which we think prevents it pivoting correctly in the Clutch Fork, so loading up one side more than the other. We think this is putting a greater force on one side of the Carbon thrust surface than the other causing them to spin and break up.
The none original 'Tractor' item is almost £70 cheaper than the correct Citroen part, but the Garage in Liverpool charged the customer above nearly £2,000 to fix it, even though they had fitted the non standard Tractor Release that caused the problem in the first instance!!
This page mostly covers Citroen H van petrol engines HY72 (1,628cc) and HY78 (1,911cc) from 1963. For more Information on the earlier Engines petrol engines and later diesels, such as performance and Top Speed, see the lower part of the page.
HY72 HY78
Bore 72m (hence the designation HY72) 78mm (designation HY78)
Stroke 100mm 100mm
Horsepower 45 @ 4,200 58 @ 4,000 rpm
Torque 11.5 m kg(83ft lbs) @ 1,450 rpm 14 m kg(101 ft/lbs) @ 1,750 rpm
Compression ratio 7.5 : 1 7.5 : 1
Firing order 1 - 3 - 4 - 2
Static Timing 12degrees before TDC
Distributor Ducellier 4134B SEV A180 Ducellier 4134A SEV A117
Carburettors Zenith 28 INL, 28 INR, 28 IN 2. Zenith 28 IN 2 R
SOLEX 32 BIC, 32 RBIC, 32 RBI SOLEX RNIC, 32 RB 1
Intake tappet clearance 0.20mm (HOT) 0.20mm (HOT)
Exhaust tappet clearance 0.25mm (HOT) 0.25mm (HOT)
Clamping yoke screw torque on a cold engine on both engines 1st tighten 3 m kg, Final tighten 6 m kg
The above data is taken from l'expert automobile printed 1972
Antifreeze should be a basic Glycol (Blue) product, do not use a long life OAT or HOAT (usually Red) type antifreeze as they can attack the metals that have been banned from use in modern production cars like the Lead Solder in the Radiator, etc.
The Glycol Blue type of antifreeze generally has a short life in terms of anti corrosion capability (it may still have some frost protection although this will also be significantly reduced) so should be changed every 2 years to prevent the cooling system from damage. Especially important in post 1962 engines with the Alloy Head.
Brake fluid should be DOT4 and changed at least every 2 years. Changing the Brake Fluid very regularly is a pain but Brake fluid absorbs water which then rusts out the Brake Slave Cylinders. Changing the Fluid every two years will ensure that once the Brakes are rebuilt, the Slaves Cylinders won't rust and seize. Front brake Slaves Cylinders are being sold in Holland for 550euros a set plus fitting costs, so the small cost of changing the Brake fluid every two years is money well spent.
Never reuse Brake Fluid as the water it absorbs turns to steam under the intense heat of extended Brake application, like travelling down Hill. This steam in the brake lines then prevents the Brakes from working effectively as the Brake fluid just compresses the Vapour without applying any pressure to the Cylinder Pistons.
Brake 'Fade' from water in the Brake fluid is a rare happening with modern cars that have cooler running Discs, but back in the 1960's it was a big problem causing apparent 'Brake Failure' on Brake Drum equipped vehicles. The hotter the Brakes got, the more Water vapour that boiled up so the less effective the brakes became. By the end of a long descent down a Hill there would almost zero Braking effort.
We can't stress enough the importance of changing the Brake Fluid every two years and never, ever re-using the old Brake fluid.
Engine Oil/Flush
Do not use an Engine Flush/Cleaner, see note below on Oil. A Flush/Cleaner is designed to clean up all the debris from the sump and carry it to the Oil Filter. Problem is the HY doesn't have a filter, the rubbish circulates around the engine wrecking the Crankshaft bearings.
The workshop manual suggests replacing the Distributor Cap and Rotor arm every 20,000 miles,
Ducellier straight Cap + Rotor VALEO item number "D104
Ducellier angled cap VALEO item number "D805
Ducellier rotor ONLY VALEO item number "D911 Note Rotor fits both cap types
Here is the ordering info for the SEV Marshall cassette
SEV Cap + Rotor VALEO S122 (Not sure which years this covers I think 1965>
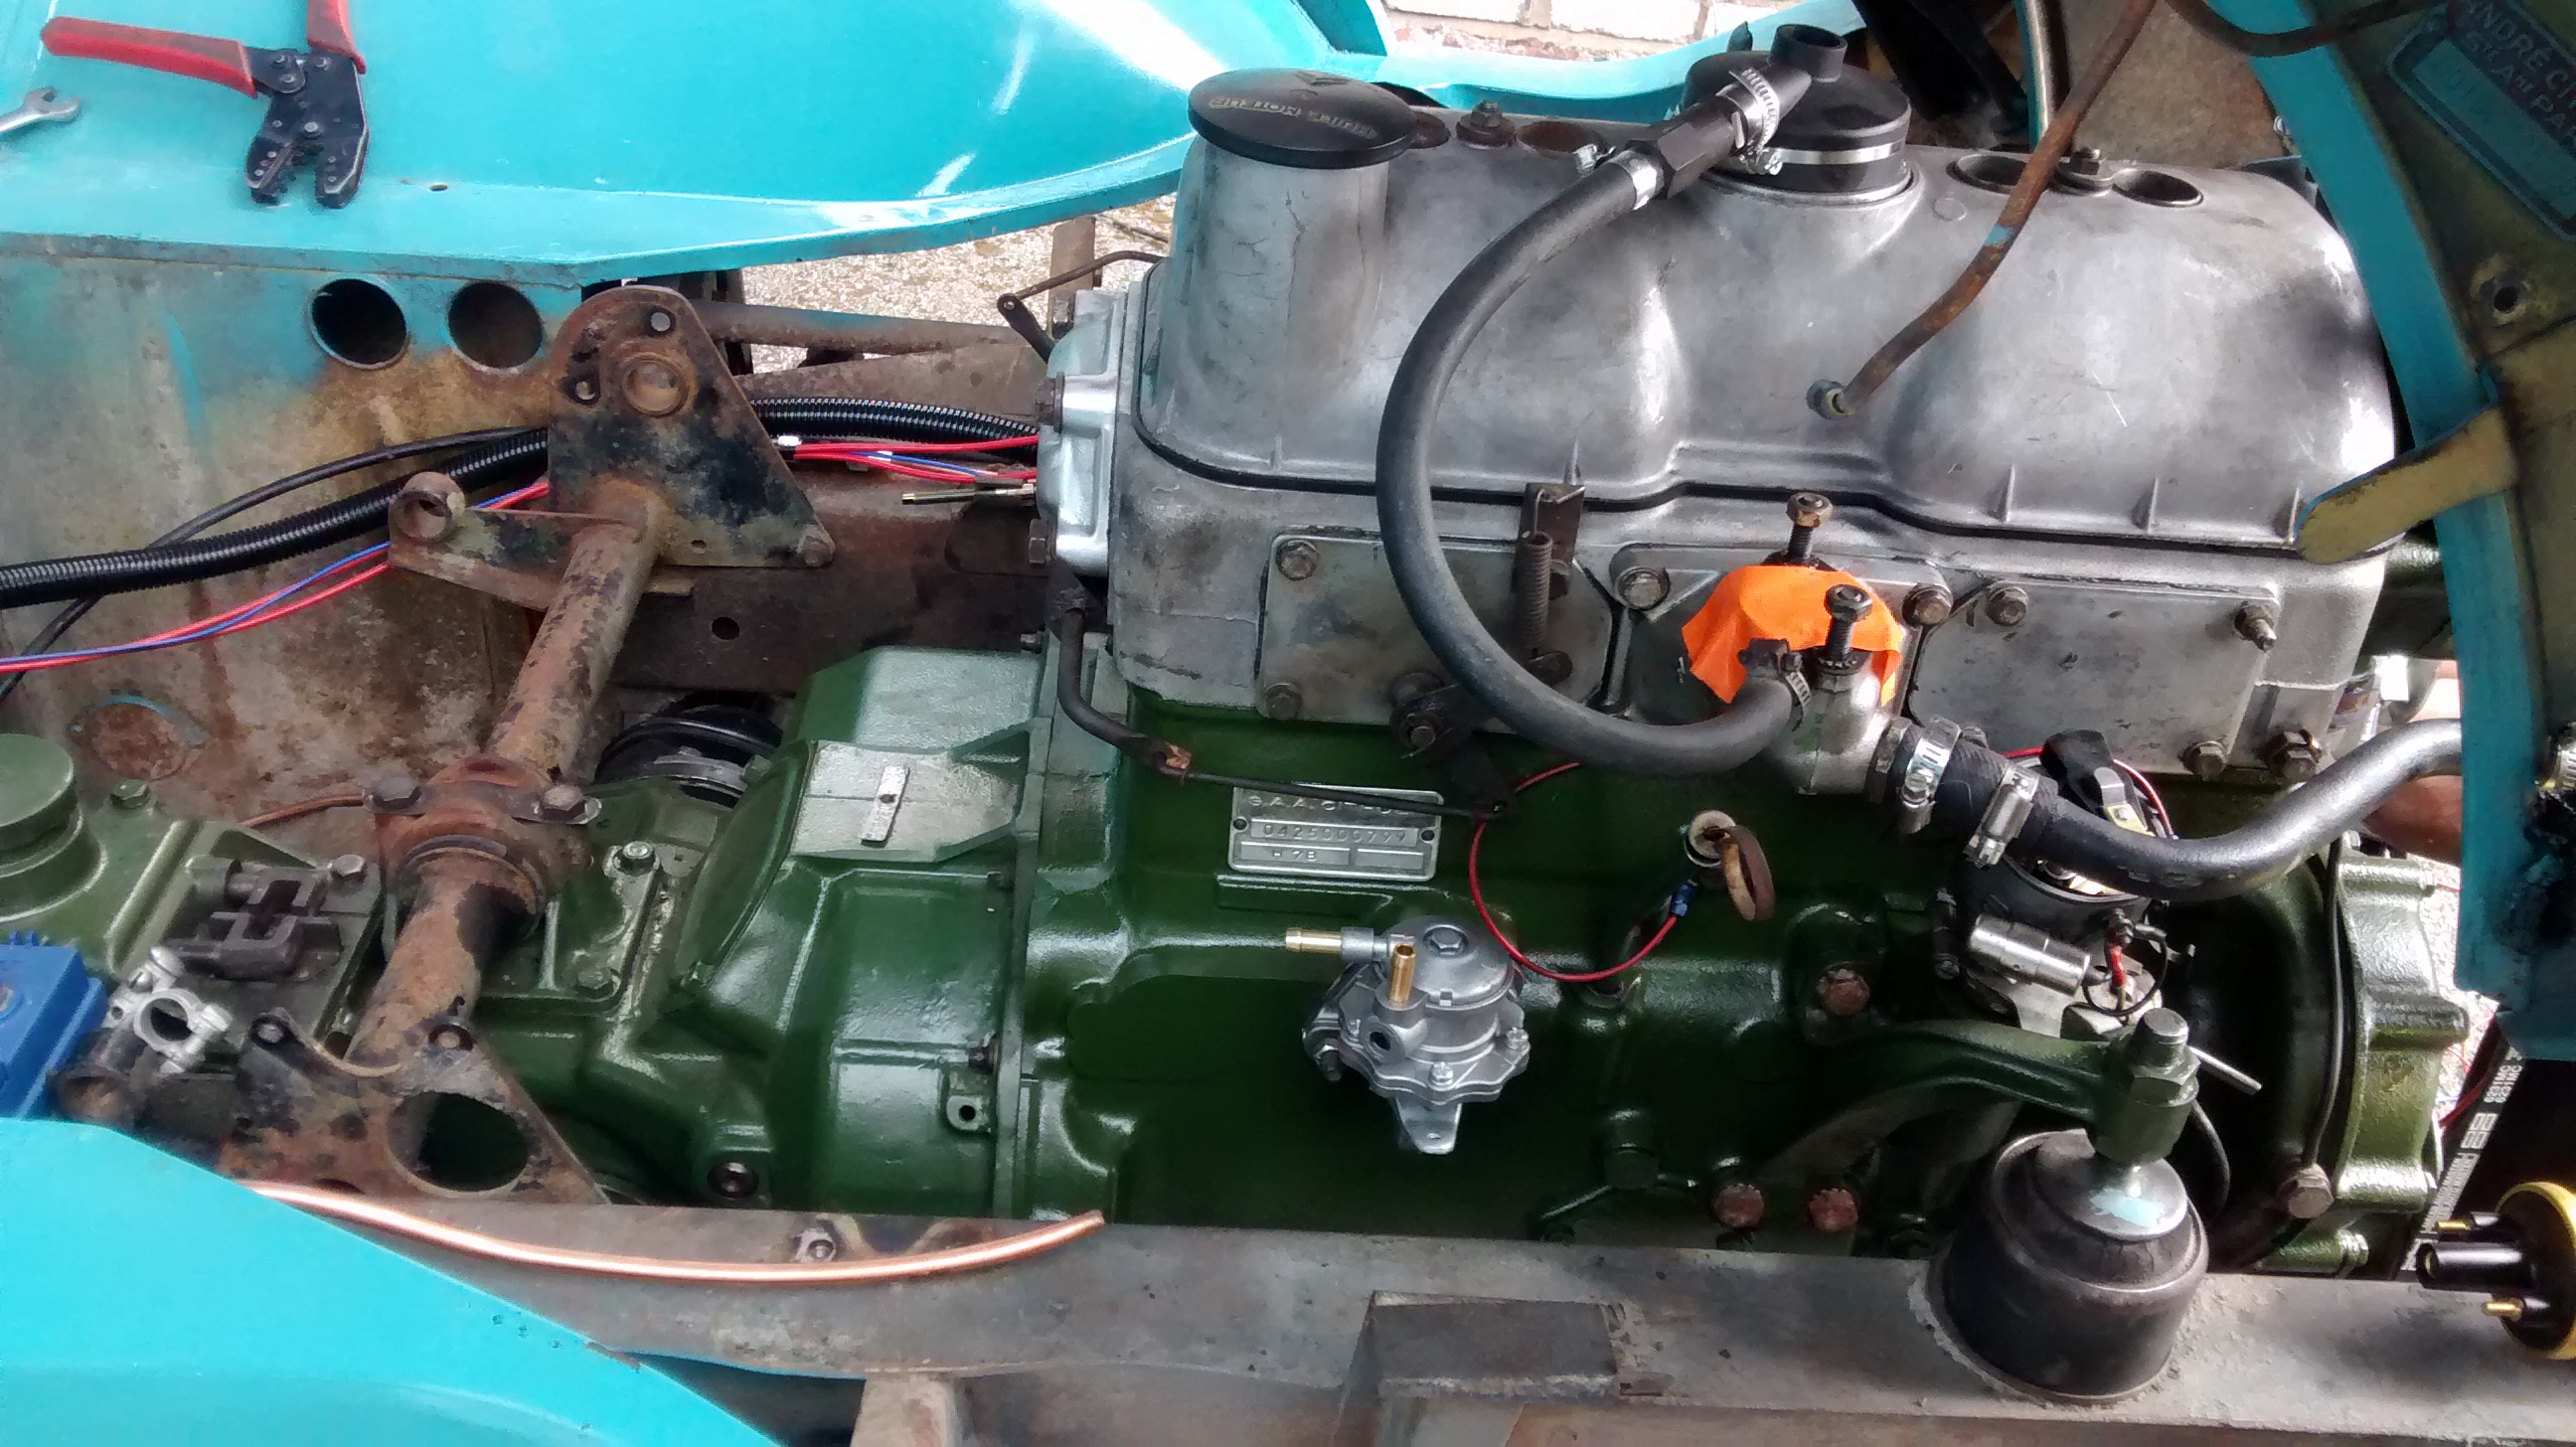
Below can be seen a photo of one of our rebuilt engines and Gearboxs we fitted into a Citroen H van for the French Owners. Note that we did not restore the bodywork, just the mechanics on this particular van.
Tyre pressures
Tyre pressures : HZ HY (1,500) Betaillere
Front (psi) 40 43 44
Rear (psi) 40 45 49
Spare Tyre at 45psi
Note the higher pressures for the heavier vans, if you have a lot of Catering Stock, Water, Heavy Stainless Steel fit-out, refrigerator, food, Gas, etc you probably have a van heavier than a Betaillere carrying 2 horses!!
THE TYRES MUST BE FITTED WITH TUBES ESPECIALLY WITH TUBELESS TYRES. The wheel rim is not designed for tubeless tyres a mteric size that is smaller than the normal 16" wheels so Tubes are essential to help locate the tyre on the rim. It is a hazard to fit tyres to these rims without an Inner Tube.
BATTERY
Always use a quality battery, these vans are not the best starters because the fuel tends to drain back to the tank requiring long cranking times to get them going. When we started working again on engines with Carburetors and Distributors after so many years of Fuel Injection and Electronic Ignition we couldn't believe the difference a quality battery made. On a Points Based Distributor, the Battery quality and condition is crucial. Please don't buy a cheap make, it won't last and will cost more in the long run.
If the Battery is really good the Starter will spin faster, drawing less current leaving a healthy chunk of power for the Coil/Points. This in turn gives a good Spark and the van will start in about 2 seconds. If the battery is a budget make/poor quality, the power might only be enough to power the Starter at medium speed, there will be little reserve for the Coil/Points so a weaker Spark. Starting can then take 15 seconds, with the resultant toll on the Starter Motor and the Battery which will be a little less good the next time.
Of course churning the Starter for 15 seconds will also cause the battery to run down more, which then places a bigger load on the Alternator, wiring, Black Box, fan belt, etc to charge it back up. The engine then has to work harder to power the Alternator for longer so uses more fuel at a time when it has just started and on Choke, etc, etc.
A Dutch company sells rebuilt Starter Motors for 390euros, so do everything you can to look after the one you have.
A poor quality/tired battery can have a big impact, it can shorten the life of these Starter Moters to less than 6 months.
The 6v battery for vans prior to 1961 is very hard to obtain but a quality battery is even more vital than on a 12v system if you want your van to Start well. We have seen some awful new 6volt batteries that have poor output and don't last 9 months, you will save a lot of pain and money by getting a quality battery.
The 12v battery is unusual as it has the terminals on the opposite sides to the norm so not always easy to obtain. We suggest a Varta E24.
Ignition Firing and Plug Lead layout
In order to work out which plug lead goes to which cylinder :
Remove the rear-most spark plug, No1 cylinder at the flywheel end.Either remove the rocker cover or have an assistant look down the oil filler at the rear most inlet valve.
Put a long screwdriver or similar down the spark plug hole so that it rests on the top of the piston. It must be perfectly straight or it will get snagged as the piston rises.
Turn the engine slowly by hand (not the Starter) until the screwdriver (piston) is at the top of the stroke after the inlet valve has closed.
The rotor arm in the distributor should now be pointing at the plug lead which goes to No 1, the rear-most, cylinder. If it's not shuffle the leads around on the distributor cap until it is and check that as the rotor turns away from No 1 it points at 3, then 4, then 2.
Double check all is correct by putting the peg through the hole in the bell housing to ensure the distributor body in the right orientation.
Ignition Timing
For both early and late petrol motors, note the position of the ignition wire to the number one cylinder.
Remove the distributor cap and turn the engine so that the rotor points to the number one
cylinder position, as previously noted. Insert a 6mm (15/64 inch) pin or drill bit into the
timing hole. Now carefully turn the engine until the pin engages the hole in the flywheel. The
engine is now at the static timing point, near the end of the compression stroke for the number
one cylinder. This point corresponds to 12 degrees before Top Dead Center.
Remove the Timing hole Locating PIN/Drill
Remove the Timing hole Locating PIN/Drill
Capacities
Fuel tank capacity - 60L
Gearbox Oil 3L Hypoid SAE90 gear oil. DO NOT USE GL5 EP Oil, it may attack syncro rings, bearings, etc. Use a 90 weight oil with low Sulpur and Phosphorus content suitable for Classic Gearboxes. Later boxes used a SAE 80 GL4 which improves the Gear change action.
Brake Fluid 0.5L DOT 4 or better
Coolant/Antifreeze (Not OAT or HOAT) 10.1L Propylene based Anti-freeze is ideal.
Engine oil 3.7L SAE30 Non DETERGENT Vintage Oil, see Servicing & Maintence section below. Please read the Servicing and Maintenance OIL SPECIFICATION section below on what oil to use and where to buy it.
DO NOT USE ORDINARY SAE 30 AS IT USUALLY CONTAINS A DETERGENT.
Checking the Gearbox Level/Draining and Refilling.
Note that you can top up the gearbox oil as there is a level plug on the left side of the box which often looks like a bolt with a T bar welded on. There is also a screw on filler cap (Engine oil filler style) on top of the box under the floor. Because the Gearbox design is prone to allowing water ingress that can write off the box, you should change the Gearbox Oil every year or at least every other year. This also helps flush out damaging metal particles which break off the non synro 1st Gear when used on the move without double de-clutching.
Dimensions :
Special note on transporting HY's the wheel track is 6ft 2in so your trailer transporter must have a bed of at least 6ft 3in wide. Many for hire are only 6ft. Note that the track on the van is wider at the rear than the front.
The wheel base on ALL is 1 inch longer on the offside than the nearside. Please see the section on Weights and Towing on the HY Dimensions page as many of the Catering converted vans will be breaking the law if moved on a Trailer towed by a Car/SUV/4 x 4.
Fuel :
The 1,911cc and 1,628cc petrol engines from 1963 (alloy crossflow head) might run ok on Unleaded fuel, we have not seen any evidence of damage on engines we have stripped down. However on the earlier pre 1962 engines might suffer valve seat recession and burnt valves. Check the Valve/tappet clearances at least every 3,000 miles.
Spark plugs :
Both HY 72 and HY78 engine - Bosch 225T1, Marchel 35b, AC 43F, Champion L85 (Country driving) or L92Y (City driving), KLG FF70, Lodge HN or Lodge CN. NGK BP6HS.
Dynamo/Alternator Belt :
We have not seen anything other than 1275mm x 9.5mm from 1963.
The early vans with Dynamo (both 6v and later 12v) have a Dynamo belt at 15mm wide.
Note that you cannot just use a later Alternator to replace an early Dynamo as the mountings are different and the Alternator belt width only 9mm, not 15mm.
However, we do have a special build modern Alternator/Pulley combination of 70Amps that is a direct replacement for the 6v Dynamo.
We also have a 70A Alternator kit to replace the standard 30a 12v Alternator. Unlike the other 'modern' versions ours includes the correct Pulley, wiring, instructions. It does not require the separate, unreliable, black box regulator unit that sits behind the Gearbox. It is perfect for charging a Catering area battery.
COOLING SYSTEM
The Cooling system on pre 1962 vans was an 'open' system, i.e. not pressurised, hence not having a pressure cap, but a screw top with a small pressure/vent hole to one side. On all vans from 1947 to 1981, it is a total loss venting system in that any excess water is just dumped on the road so regular, minor topping up will be required.
On all systems the fluid expands quite a bit when hot so there must be room in the top of the Radiator for this expansion. When cold the cooling fluid should be about 15 - 20 mm above the 'fins/tubes' you can see inside the Cap. DO NOT FILL THE RADIATOR TO THE TOP. The screw caps (not the later van 'half turn' pressure cap) do not seal the cooling fluid, some will be lost even when tight.
A lot of water will be discharged if you overfill it or it overheats.
Pressurised systems are more effective in helping to stop vans from overheating. The lack of pressurisation can be a major handicap on a pre 1962 van being asked to carry a lot of weight.
The early cooling systems were ok on a light weight van used in most circumstances, but if you throw a ton of Stainless Steel into the back of a van, 300kg of water, 100 Cans of Diet Coke, a gas bottle or two, a fridge, cooker, coffee machine and all manner of other things the strain on the engine (and cooling system) will be significant. If the Water Pump and Radiator are less than ideal you can expect overheating and blown head gaskets, especially on the Long Wheel base vans.
Counter this by fitting one of our uprated thicker Core radiators to prevent overheating and Cylinder Head Gasket failure.
Thermostat
The early vans up to 1963 do not have a thermostat, you regulate the engine temperature in Winter with a 'Bonnet Blind' type cover, as was the norm in the 1930's when the eraly engine was first designed.
The later engine from around 1963 on had a thermostat inside the Radiator top hose. Yes it actually slides up inside the top hose itself. They deteriorate with age, so should be renewed every 10 years or so.
Remember that the Water pump is driven by the fan belt, if this is loose or breaks the water will not be circulated around the engine which will cook. Make sure the fan belt is 100%, not like the one below.
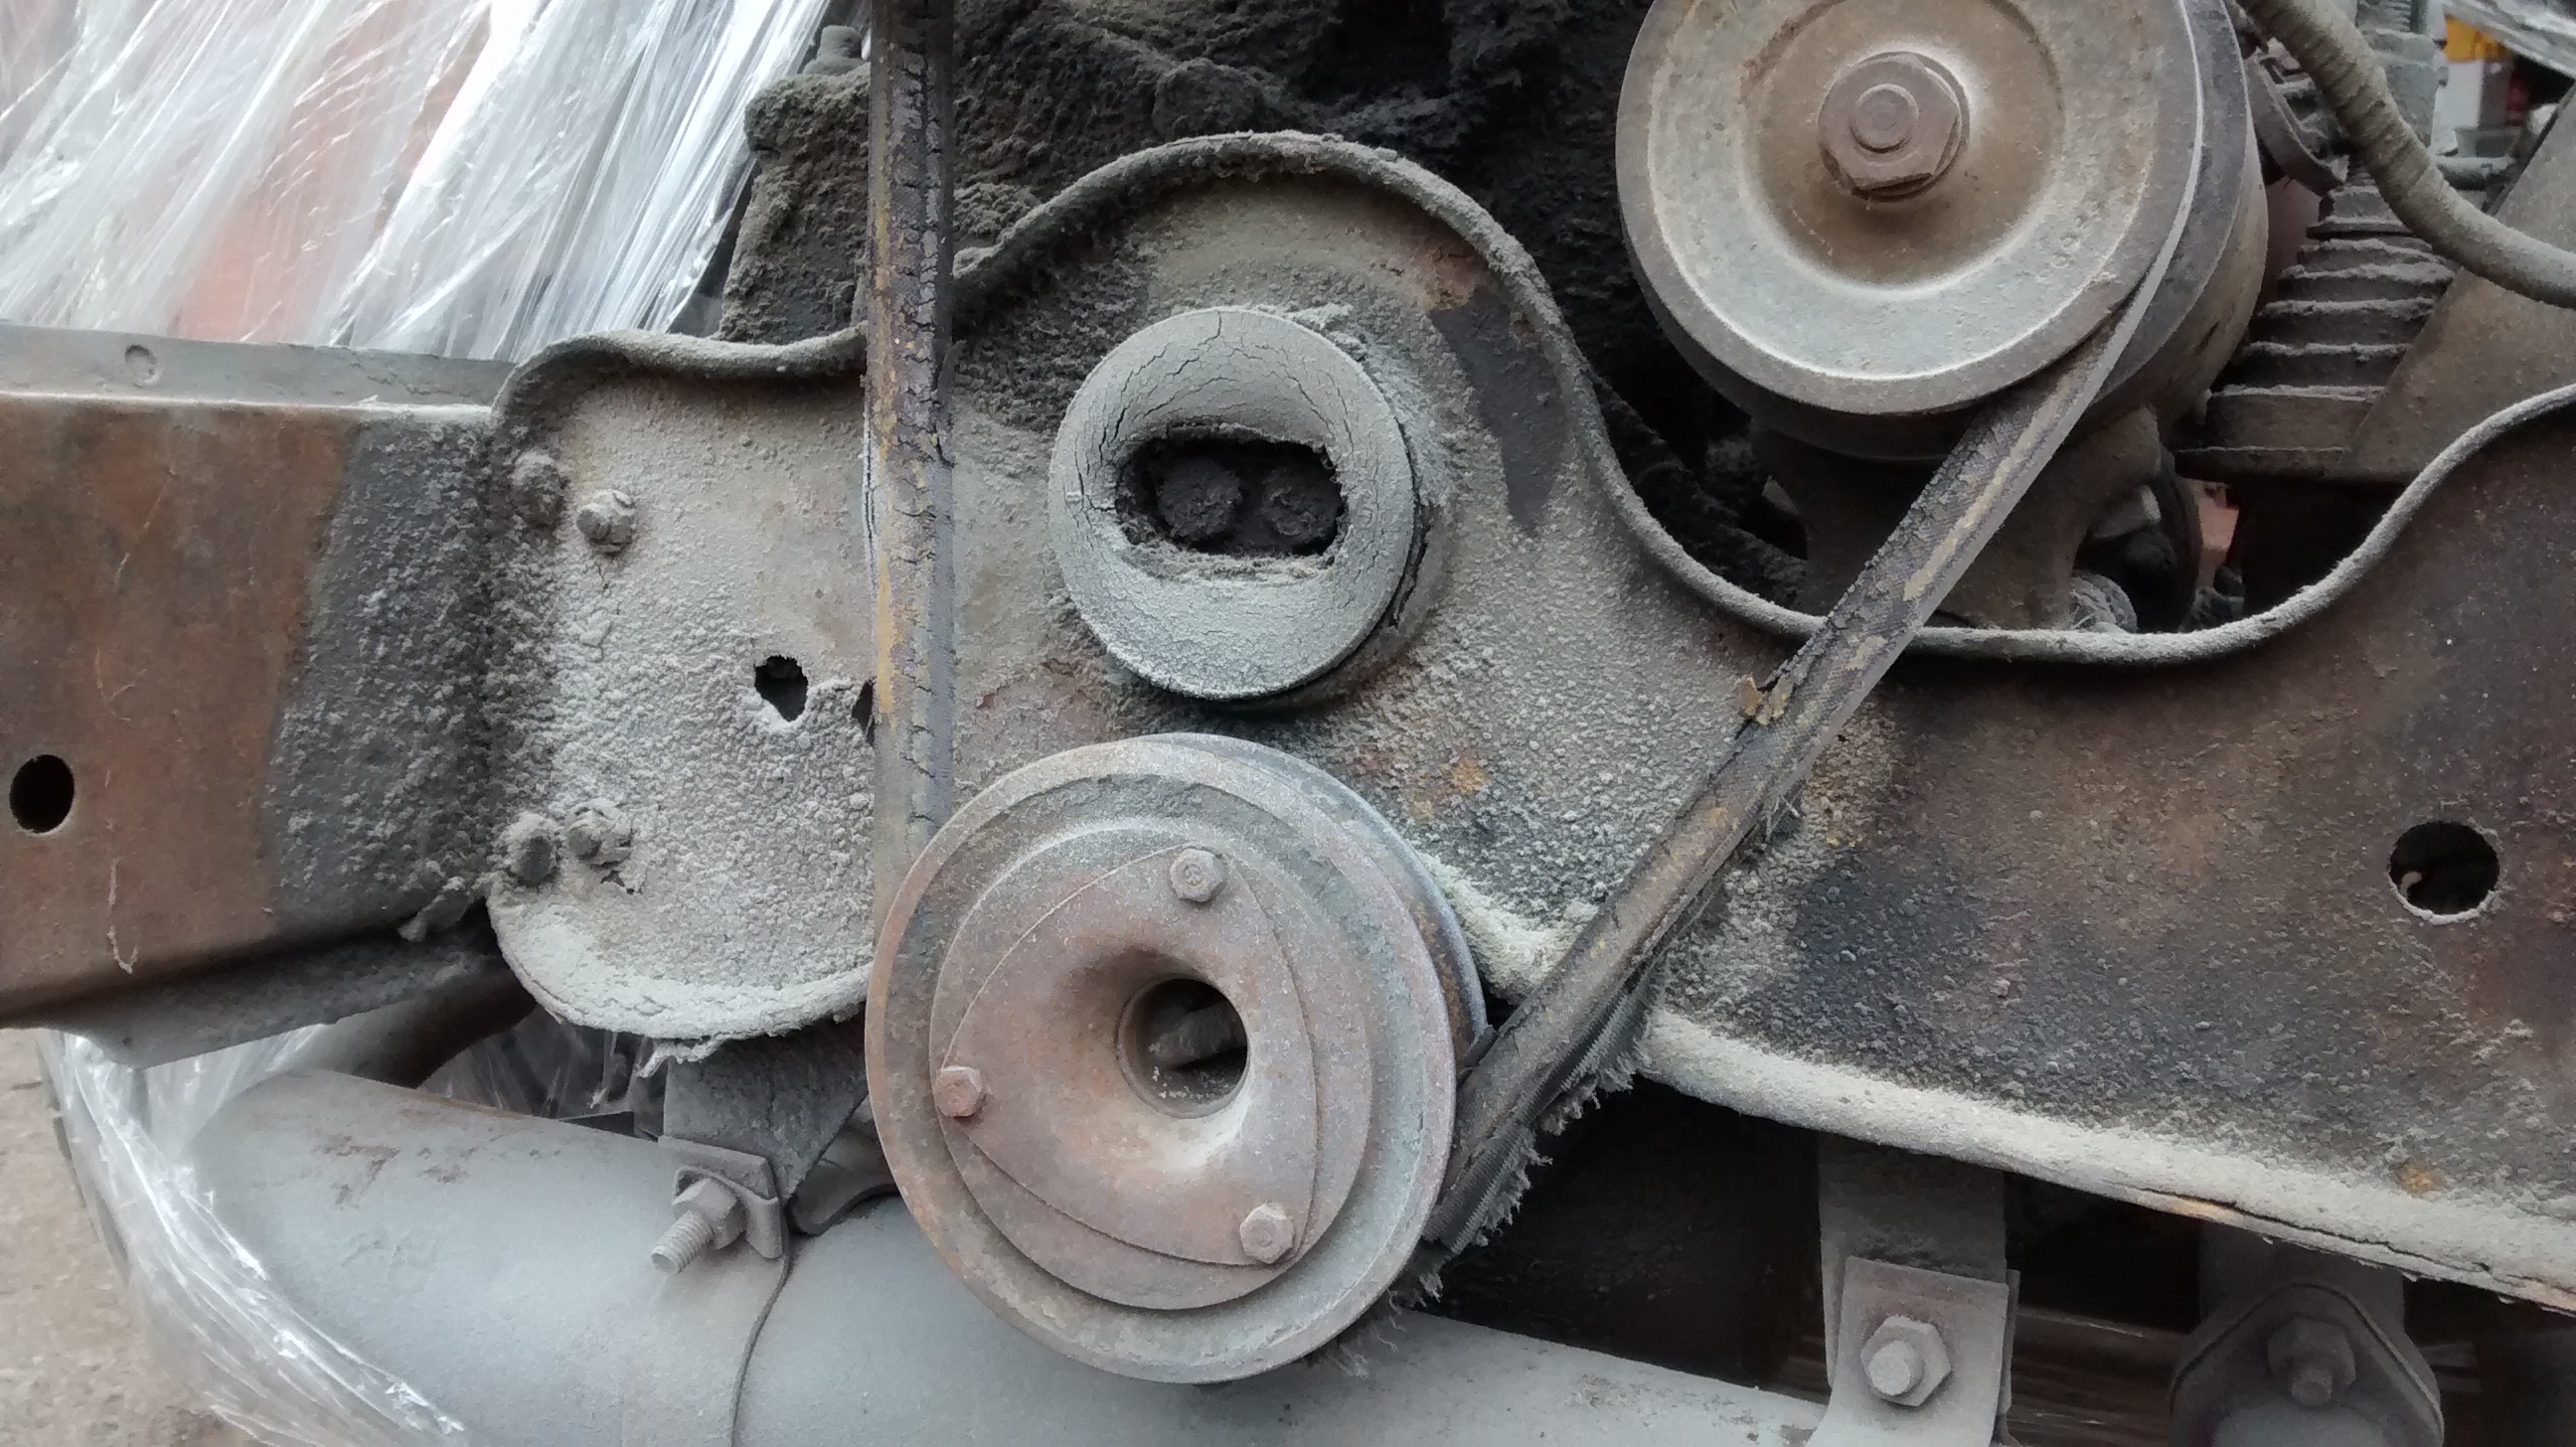
Would you be surprised to hear the van above had overheating issues with that fan belt?
Both early and late Radiators have a very narrow waterway Core system that is prone to becoming blocked leading to an overheating engine. We have seen them with nearly half the Cores blocked. If the Radiator is the original, don't be surprised if water gets forced out the top of the Rad as it is likely to be below par and run hot.
Because of the extra power of our Ford transplant, which generates more heat, we have had to develop more efficient radiators to replace the old originals. Our rebuilt Radiators have larger waterways to reduce the likely hood of blockage plus the cooling capacity is over 35% greater yet they look similar to the original. We have two versions, one for the early engines up to 1962 (this replaces both the very early Radiator and the Intermediate Radiator) and a second version for all the post 1962 vans.
Our uprated, large Core Radiators are especially effective on the Long Wheel base vans where the engine is often pushed to boiling point on a regular basis.
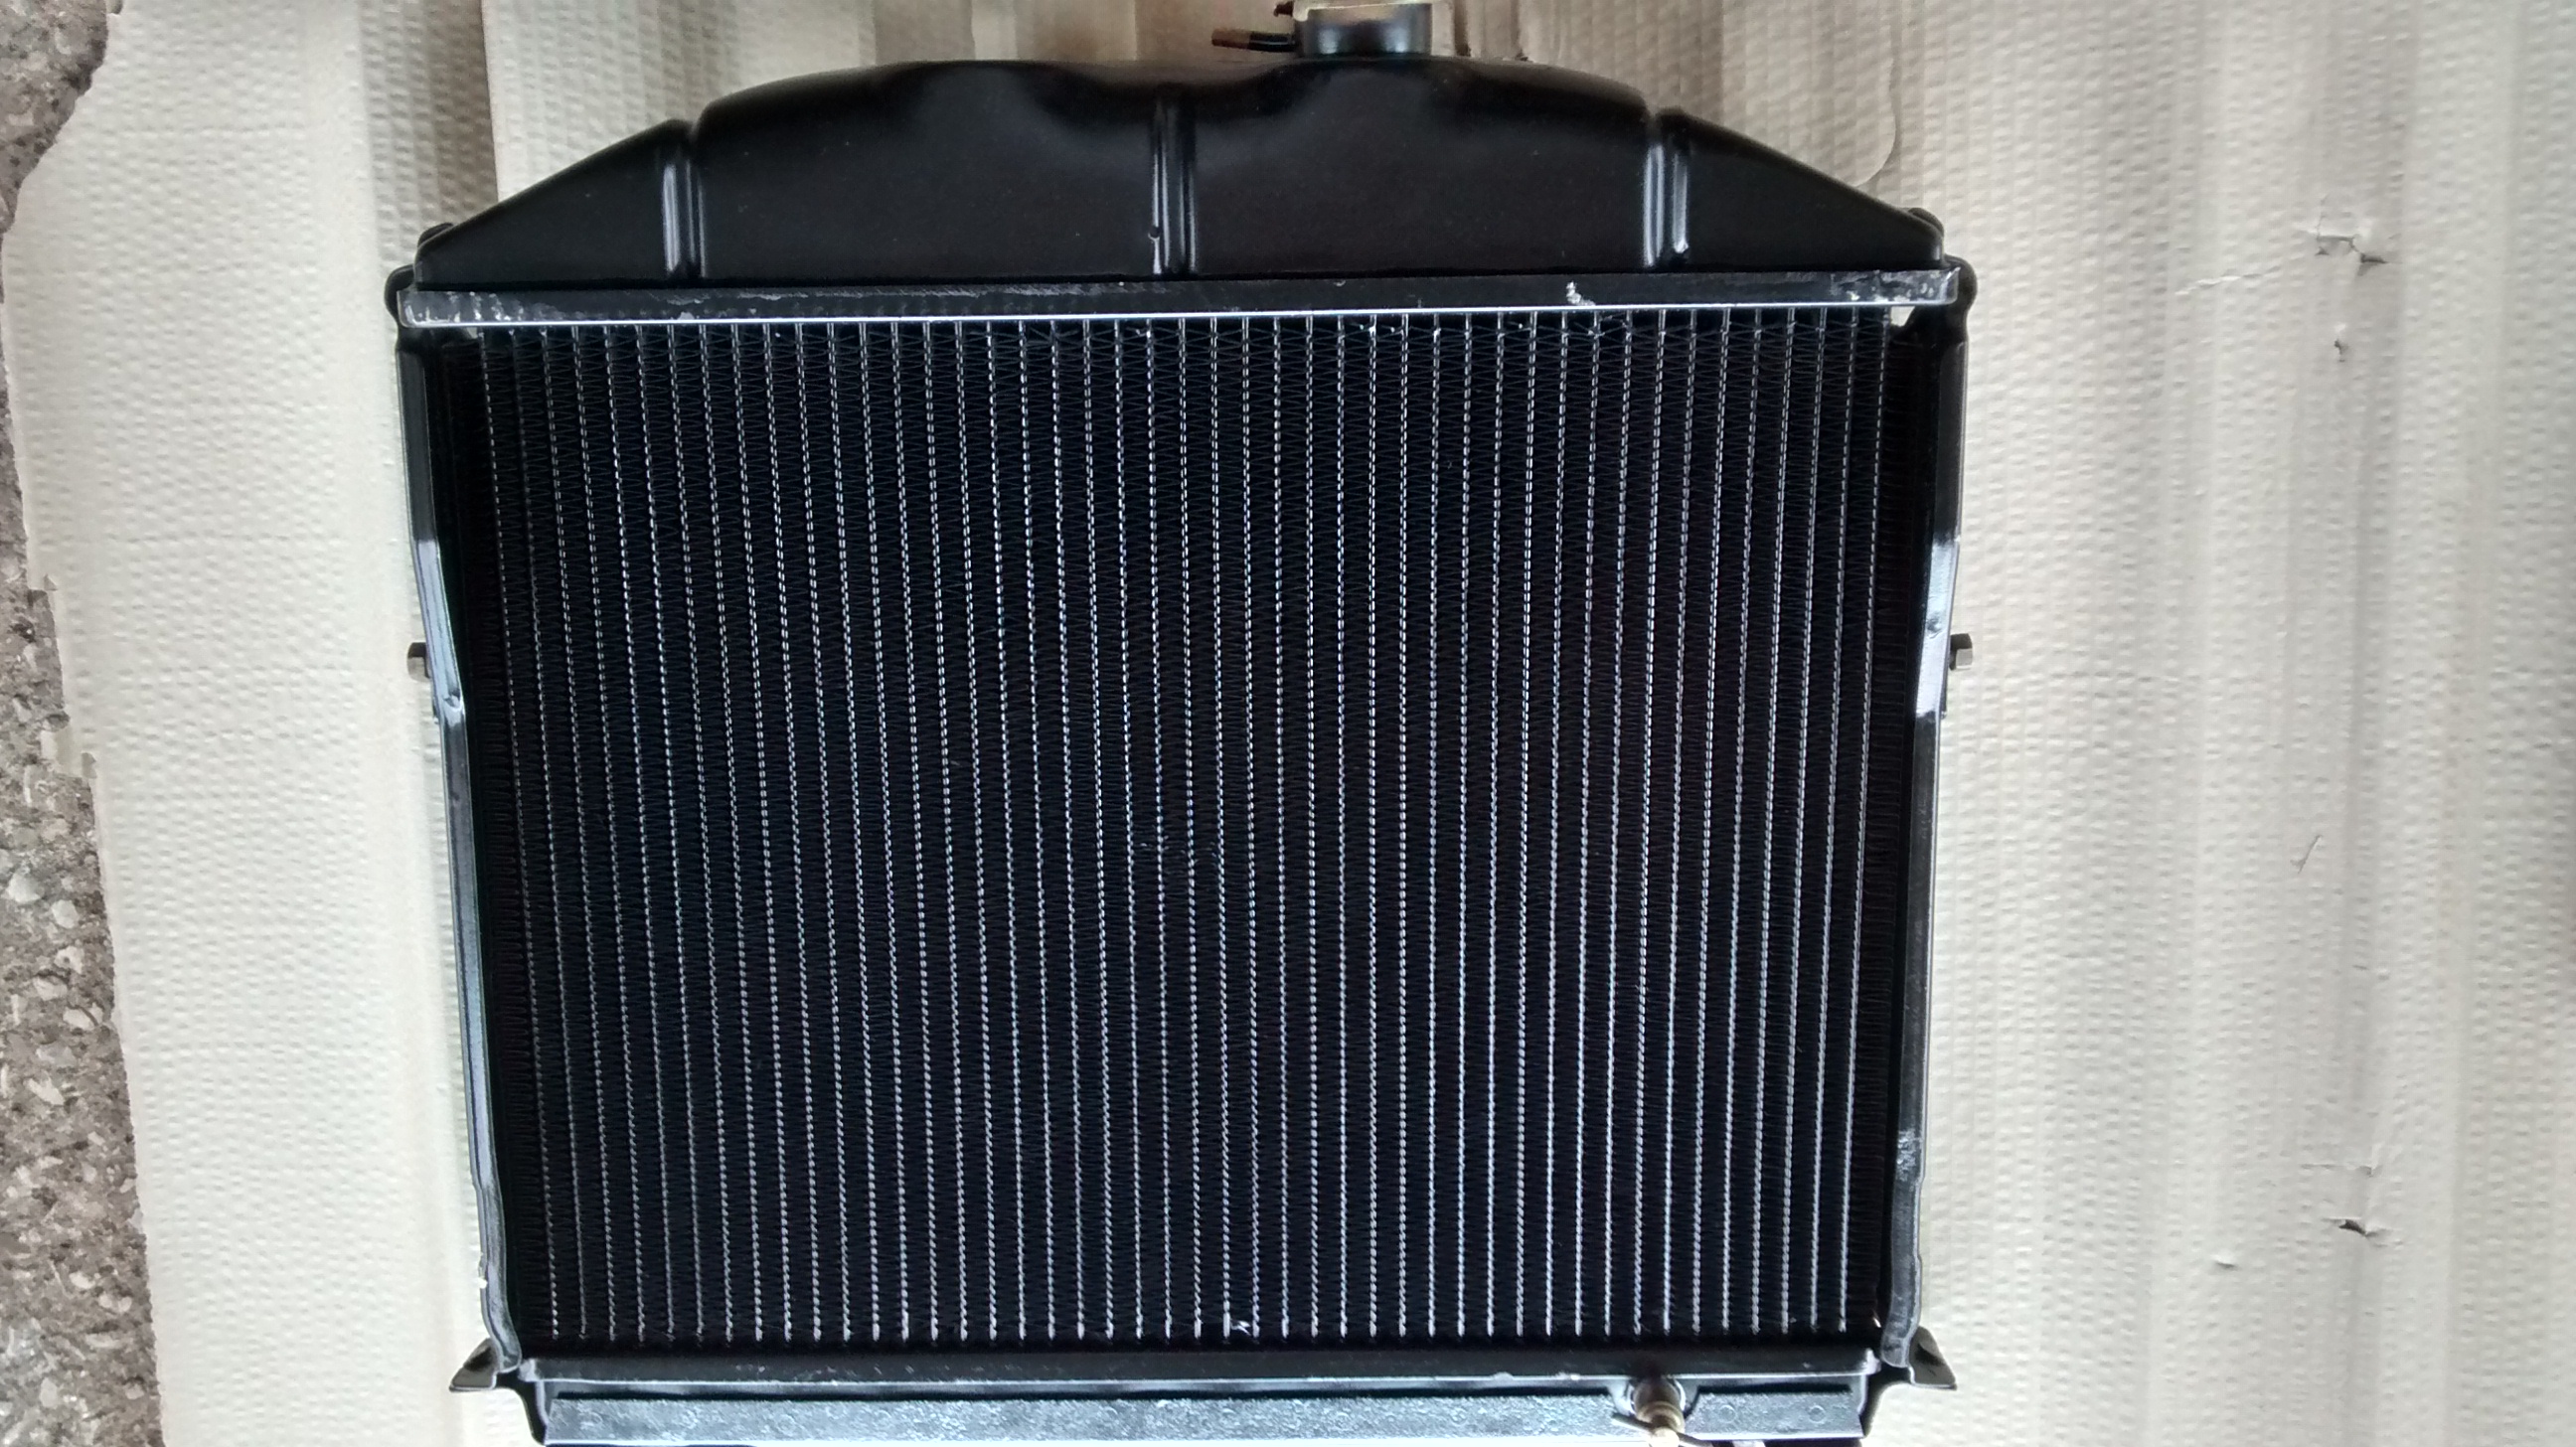
The above is a rebuilt, uprated intermediate petrol engine Radiator (without the fan cowling) which is wider than the later Radiators but not as tall. It fits all the earlier Cast Iron Head engines and the first of the Alloy Head engines.
The Diesel vans have a radiator similar to the post 1963 Petrol, but the Hose positioning is different. They are not interchangeable.
Note that each Radiator has a specific mounting plate that runs between the subframe cross members. It ensures the fan cowling at the back of the radiator is in the centre of the Fan. You cannot fit a late Radiator to an early van without the matching bottom crossmember/bracket.
If the Van has had issues with a Blown Head gasket and someone has added a liquid Head Gasket repair (which in our experience don't work) then it is likely the Rad will be suspect.

The above shows the waterways blocked by a rather excessive use of Head gasket sealant which has probably blocked the leak in the Head Gasket by blocking all the Waterways!!. In the photo below the clean cylinder head sitting on top of the engine shows how it should look.
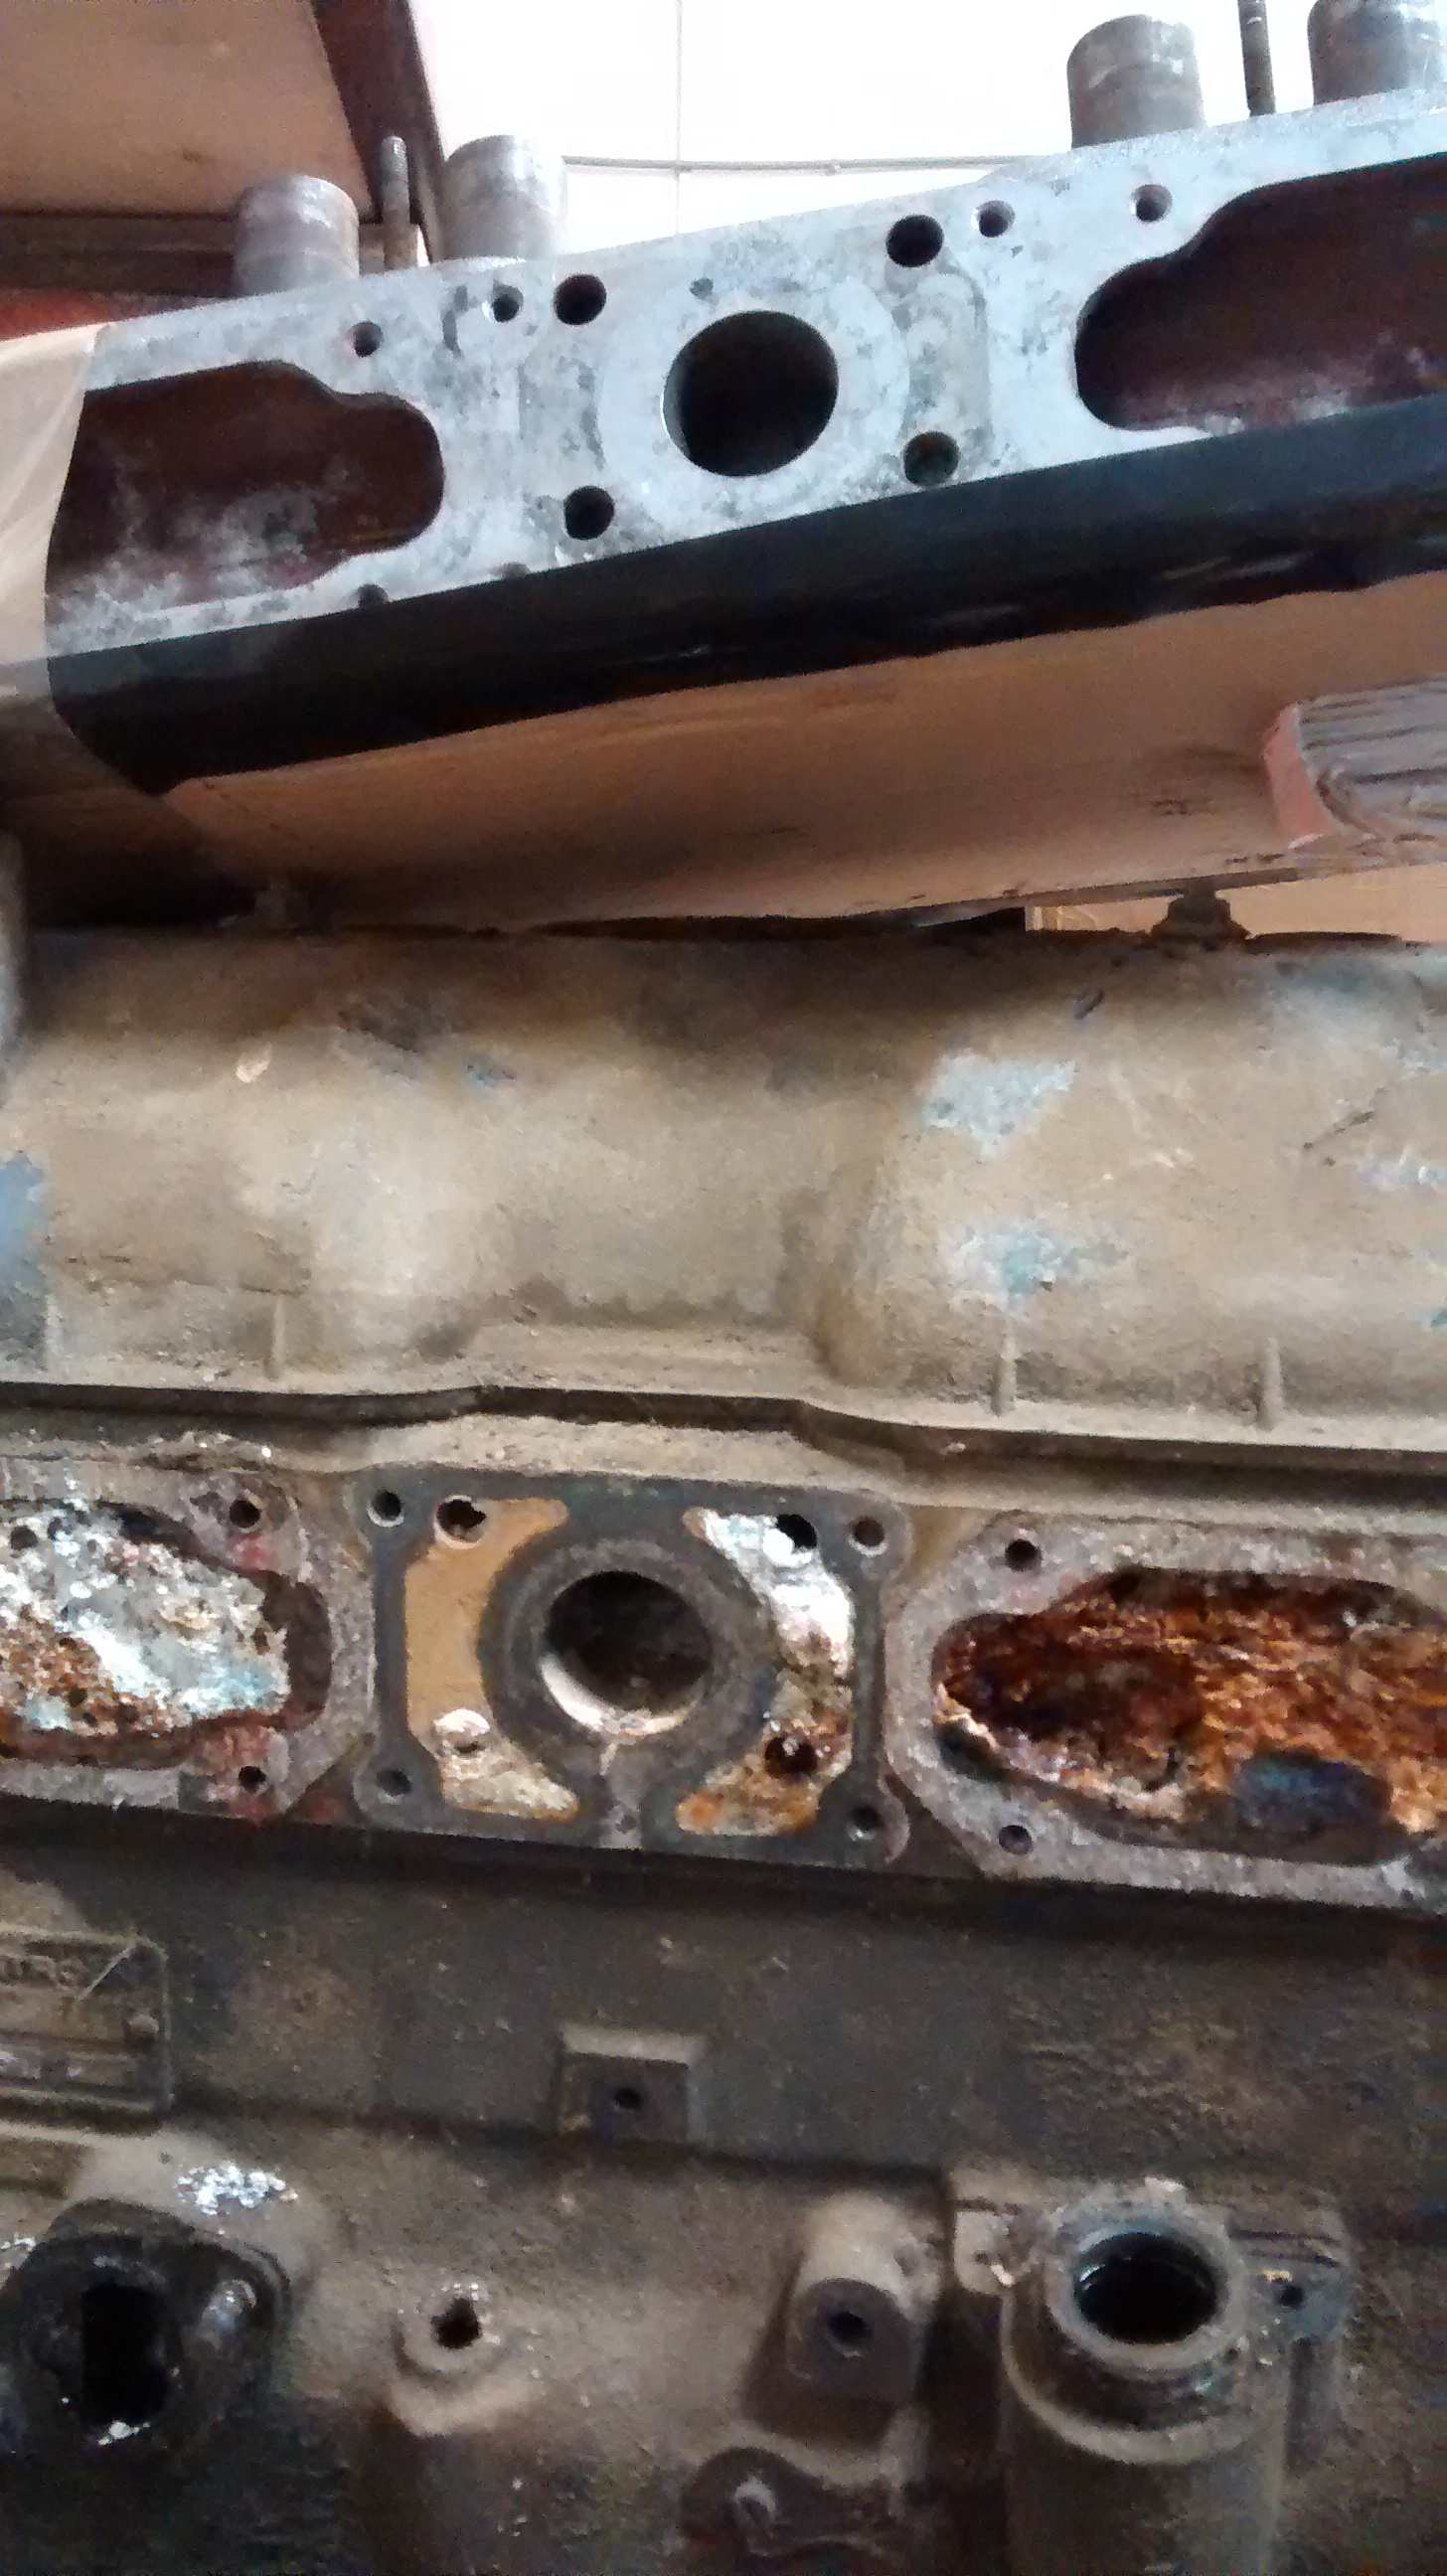
Now imagine what the small passageways inside the radiator are like?
Technical manuals :
http://www.classic-citroen-tech.co.uk/models/H-van/model-specific-cct-H-Repair.htm
Technical
Adjusting the brakes :
http://www.schaalbouw.nl/citroen/hyfbrakes.htm
Servicing and Maintenance
OIL SPECIFICATION.
The H van engine is a low reving engine and is not equipped with an Oil Filter, if you want the engine to last then use SAE 30 Oil non Detergent Oil API SA, SB or SC. The OIL should be replaced every 3,000km/1,800miles. Half that interval if you regularly drive in town or only making short journeys.
It must be a Non detergent Oil suitable for Vintage Cars and Vans from the 1940's, not a Classic car Oil. A modern detergent Oil will just clean up all the rubbish it finds in the engine and carry it to the Filter where it would normally be deposited. But in an H van the lack of filter means the rubbish is carried over and over again through the Bearings resulting in a very broken engine that is often beyond economic rebuild.
Maintenance.
The whole of the Cab floor lifts out in 4 separate pieces, along with an engine cover to reveal almost all the engine, gearbox, driveshafts and suspension.
This makes it easy to work on the gearbox. The entire front subframe assembly with engine, gearbox, suspension, Steering, Radiator, etc is retained by just 4 large primary nuts/bolts and can be moved forward out of the front of the van fairly easily for maintenance, see photo.
The downside of this method for an ameteur restorer is that once the engine/suspension assembly is out the body can not be easily be moved around. Also you can see that the body has to be raised very high off the ground to clear the steering wheel as the assembly is drawn forward. Something not possible in the average enthusiasts workshop.
Alternatively the engine and gearbox can be unbolted from the driveshafts, then from the mountings and then the gearbox and engine held steady while the Van is pushed backwards. The clutch cannot easily be replaced with the engine in situ, it is possible by sliding it forward. However so much has to be removed to get access it is actually quicker to remove the engine and box as one and then work on the bench. This way it is also easier to set up the Clutch Cover pressure Springs that should be done on every clutch overhaul. You can't just fit a new Clutch Friction disc into the old Clutch Pressure Cover, the Cover Spring force MUST be setup each time otherwise Gear engagement can be difficult/impossible.
What surprised me was the inclusion of an Oil filler cap on the top of the gearbox. I am not sure if this means it needs filling regularly because it leaks or if it was just a nice maintenance feature?.
Citroen HY Gear Oil is a GL4 Hypoid SAE90. Do not use a GL5 Oil as these can contain additives that attack the metals found in Classic vehicles.
This site http://www.amsoil.com/articlespr/2007/article_gearoilbasics.aspx contains a great explanation on gear oils and the difference between GL4 and GL5.
Tuning the Engine/Boosting Engine power.
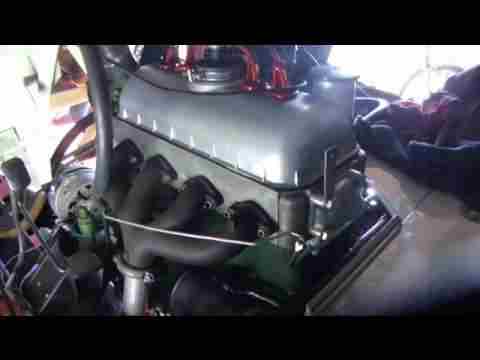 A shot of the Alloy head engine in situ.
The HY engine can be given a noticable increase in power by the fitment of Higher Compression Pistons which work by improving engine efficiency so there is no increase in fuel consumption. All our rebuilt HY engines are fitted as standard with High Compression Pistons for more power.
1,628cc Engine
The liners and pistons are the only difference between the 1,911cc and the 1,628cc Alloy head engine. So the best way of boosting power on the smaller engine is to fit the 1,911cc liner and piston kit.
With the high compression, 1,911 piston/liner kit the 1,628cc engine becomes 1,911cc and will feel twice as powerful, but fuel consumption will be only slightly higher due to the greater efficiency of the higher compression pistons. With these modifications the engine power output will be around 60bhp at 4,100, up from 45bhp at 4,200.
Our rebuilt Post 1963 engines are supplied in 1,911cc form with High Compression Pistons as standard.
The pre 1963 1,911cc engines are supplied as standard with low compression pistons.
While Engine tuning on both engines can go further with a bigger carburettor, camshaft profiling, cylinder head machining, etc the fuel consumption will suffer. It is also unlikely that an engine design from the 1930's will stay reliable if the power boosting goes too far.
This site http://hy-sterie.de/pages/
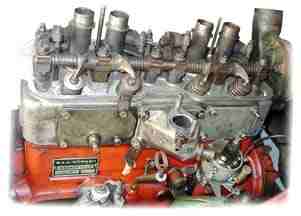 Alloy Head Engine partially dismantled, with the Carburettor removed from the Inlet manifold.
Gearbox
There are, apparently, 6 (maybe more?) different gearboxes. All of the Gearboxes have 3 Gears with synchromesh only on 2nd and 3rd. 1st gear should only be selected with the van stationery (unless you 'Double de-Clutch'), like the reverse Gear on a modern car.
Selecting 1st while the van is moving will result in a 'Graunching' noise and damage to the Gears.
The 2 Indenor Diesels share the same gearbox with a casing that is unique at the bell housing end, with the Perkins Diesel using an Adapter?.
There are then 3 variations for the Petrol engines with the Gearbox being completely redesigned around 1967. The first Gearbox, up to about 1967 has no Syncromesh on first gear. Syncro on 2nd and 3rd is quite crude with a Syncro ring that is engineered into the syncro sliding sleeve. The post 1967 box was completely redesigned with few components interchangeable with the first box. It has a more conventional replaceable Syncro ring and although it looks similar the post 1967 box has a different casing. We can obtain all the Gearbox Bearings on both early and late Gearboxes, having had a limited batch made of the rarer items.
Although the casing is the same on the later petrol engined boxes, both the late and early boxes can have different ratios. The transfer gears can be different giving different ratios and top speed when used on different vans. The lowest ratio Gearboxes are the earlier H vans up to around 1956 and the Diesel vans. The HY 72 sometimes had the intermediate ratio box along with the HY78. The HZ series 2 from 1962 seems to have one of the higher gear ratios with the highest top speed, only the special Ambulance versions were faster.
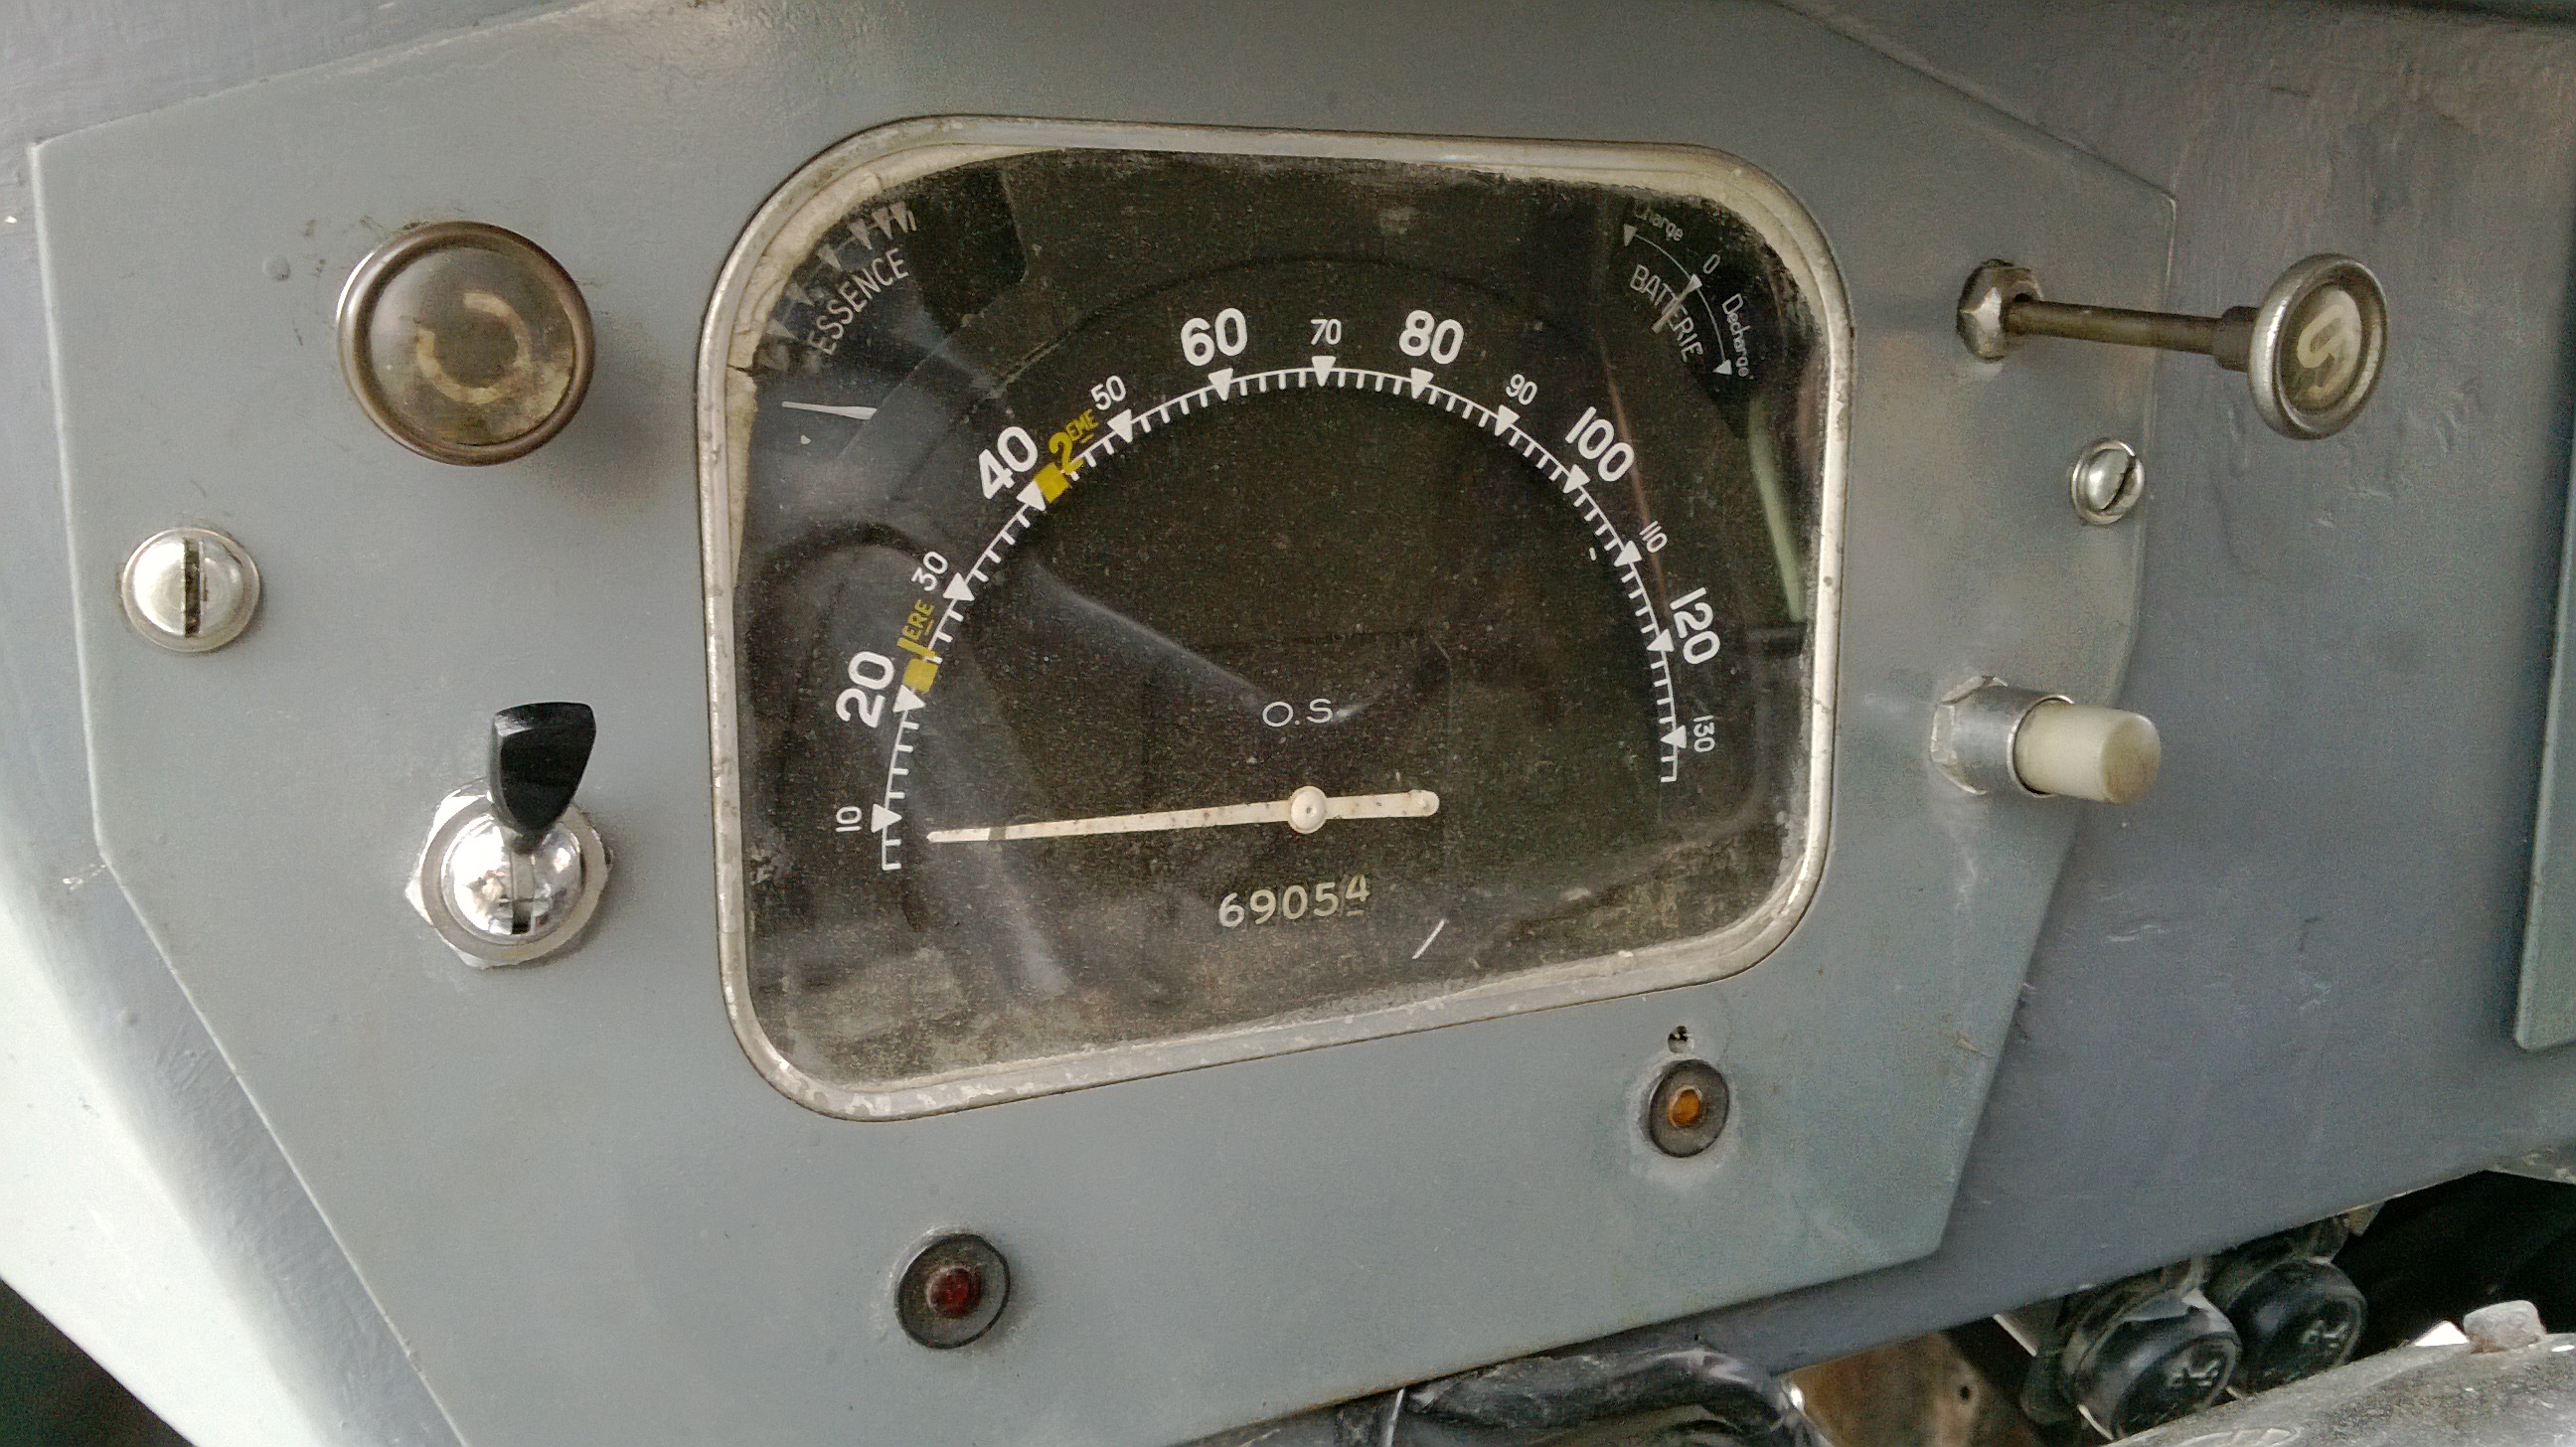
This photo below is of an early Cast Iron Head H78, note the faded red markers showing maximum speed in 1st as 21KPH (13MPH) and 2nd at 41KPH (25MPH).
While the Speedo goes up to a rather optismistic130KPH the actual top speed will be about 69KPH (45MPH). These speeds and Gearing are typical of the very low 'Alpine' box. Some of the lower revving Diesels struggle to even reach 40mph with these low ratio boxes.
This photo below is of the speedo from a early 1960's H 1,911cc, 'medium' ratio gearbox, van shows the 'Red marker' maximum speeds for each Gear :
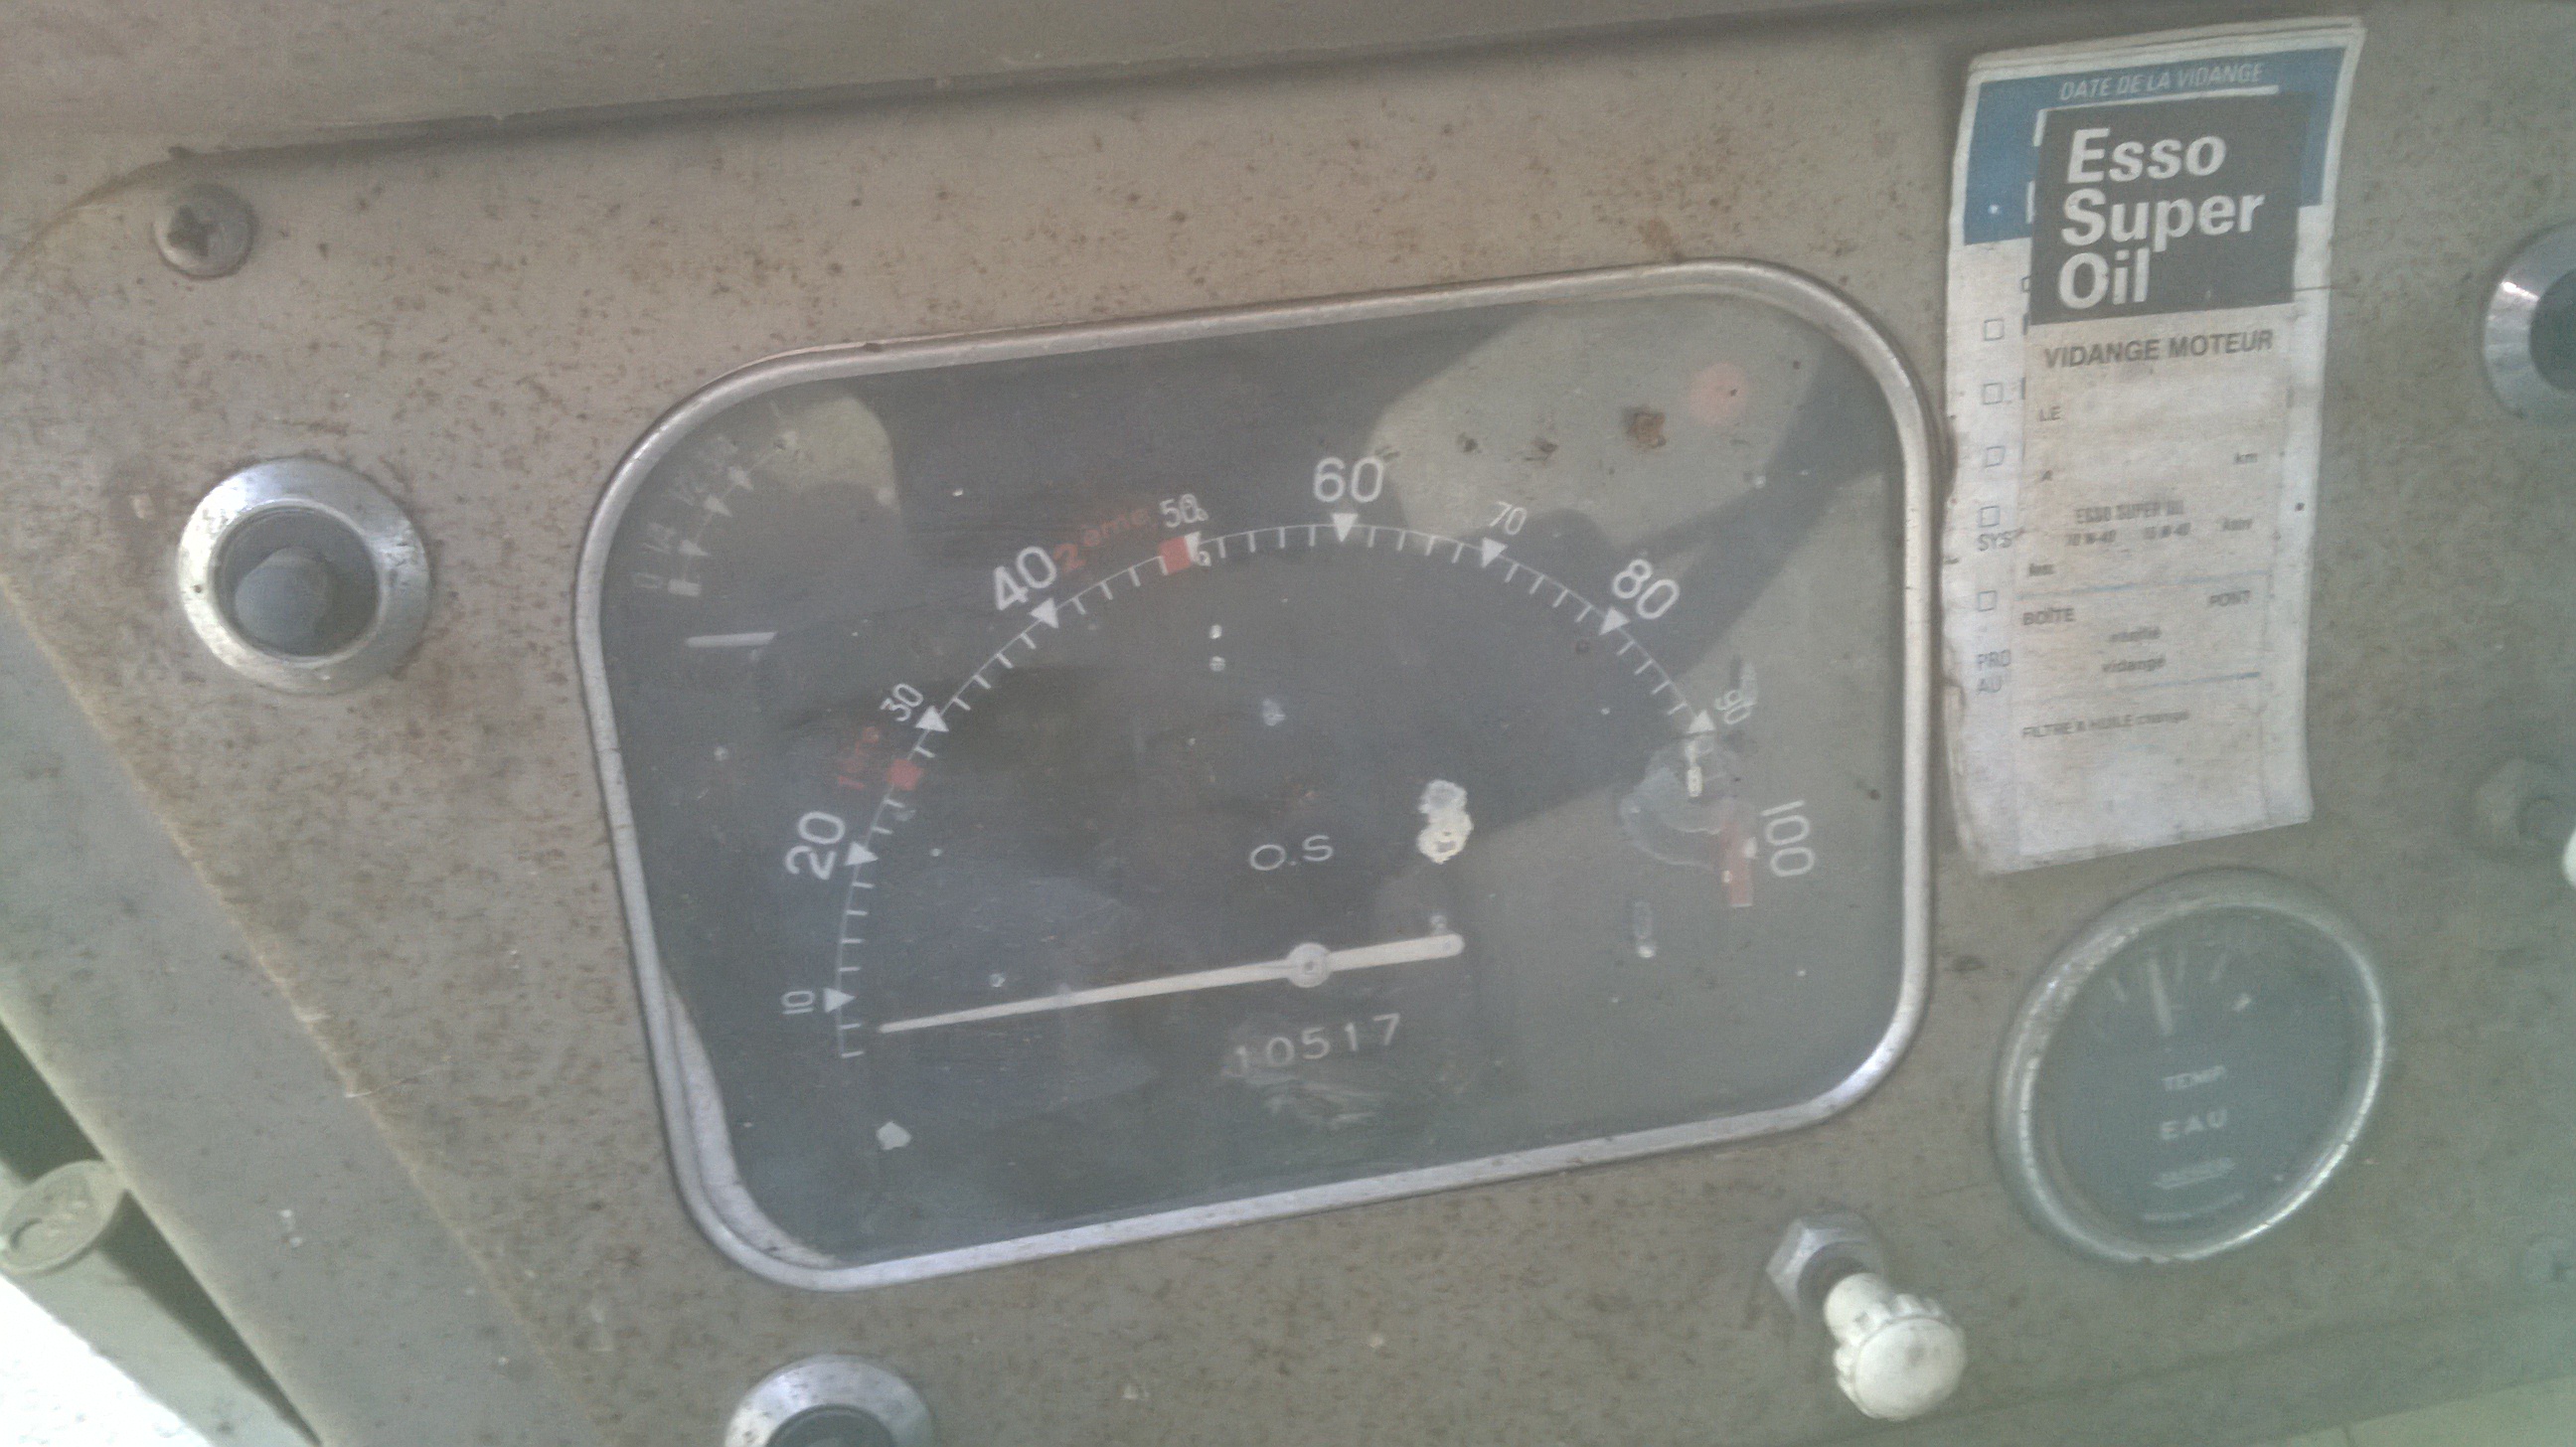
1st maximum Gear speed is 26kph (15mph), 2nd Gear 49kph (31mph) and 3rd is about 82kph (51mph). These speeds are typical of a intermediate box. Note that although the gearing is higher, the overly optimistic max speed has reduced from 135kph to 105kph.
The diesel casings are different to the Petrol and the final drive ratio transfer gears also vary.
There are gearbox upgrades available that reduce the engine revs to make cruising more relaxed, quieter and improve fuel economy. This site http://hy-sterie.de/pages/bakery/getriebezahnraeder-y6-6.php sells 3 gear sets, Y6, Y7 and Y8.
We had heard a rumour that the gearing can be raised by swapping 2 transfer gears in the final drive of the gearbox, but this is incorrect as the gears are physically different. The Driver Gear has a deep recess in one side to hold two retaining clips, the Driven Gear is plain on both sides so they cant be exchanged.
The cheapest way of raising the gearing is by careful selection of Tyre sizes, see our TYRES page for more details.
BRAKES.
There is a lot of rubbish talked about H van Brakes, which were very advanced for their day. Around 1962 larger Front Drums were fitted for more stopping power and larger, more powerful, Slave Cylinders fitted to the Rear drums and these vans are actually quite good if maintained and setup correctly.
Unfortunately they are very complex and time consuming to set up properly, as a result they rarely are. Additionally Brake parts are very expensive, £390 for a set of 4 Front Slave Cylinders is typical, so they are left to slowly deteriorate.
If the van you know has poor Brakes, it is not a feature but a maintenance issue.
Please remember that DOT4 (none Silicone which is DOT5) absorbs water. It is water in the Brake Slave Cylinders that causes the corrosion that makes them stick. It is for this reason that you must never reuse Brake Fluid, plus change it every 3 years max.
Silicone Brake fluid (DOT 5) does not absorb moisture, has a greater lubricating effect and is worth every extra penny when partnered with a H vans rebuilt brakes as they will then last indefinitely and feel more powerful.
We can overhaul your Brakes with specially modified parts that bring the Standard Brakes up to almost the stopping power of a modern vehicle.
H van Brake Shoes take a few miles to bed in after which they need to be readjusted to get the best out of them
The below is an excellent article by Joe Dobson on rebuilding the brakes on a H van :

|
Citroen H Type van Refurbishing the front brakes.pdf Size : 1720.805 Kb Type : pdf |
Power Steering
We have designed and built in House our own Power Steering. This is not something we buy in but make ourselves. The photo below shows one of the Steering wheel options.
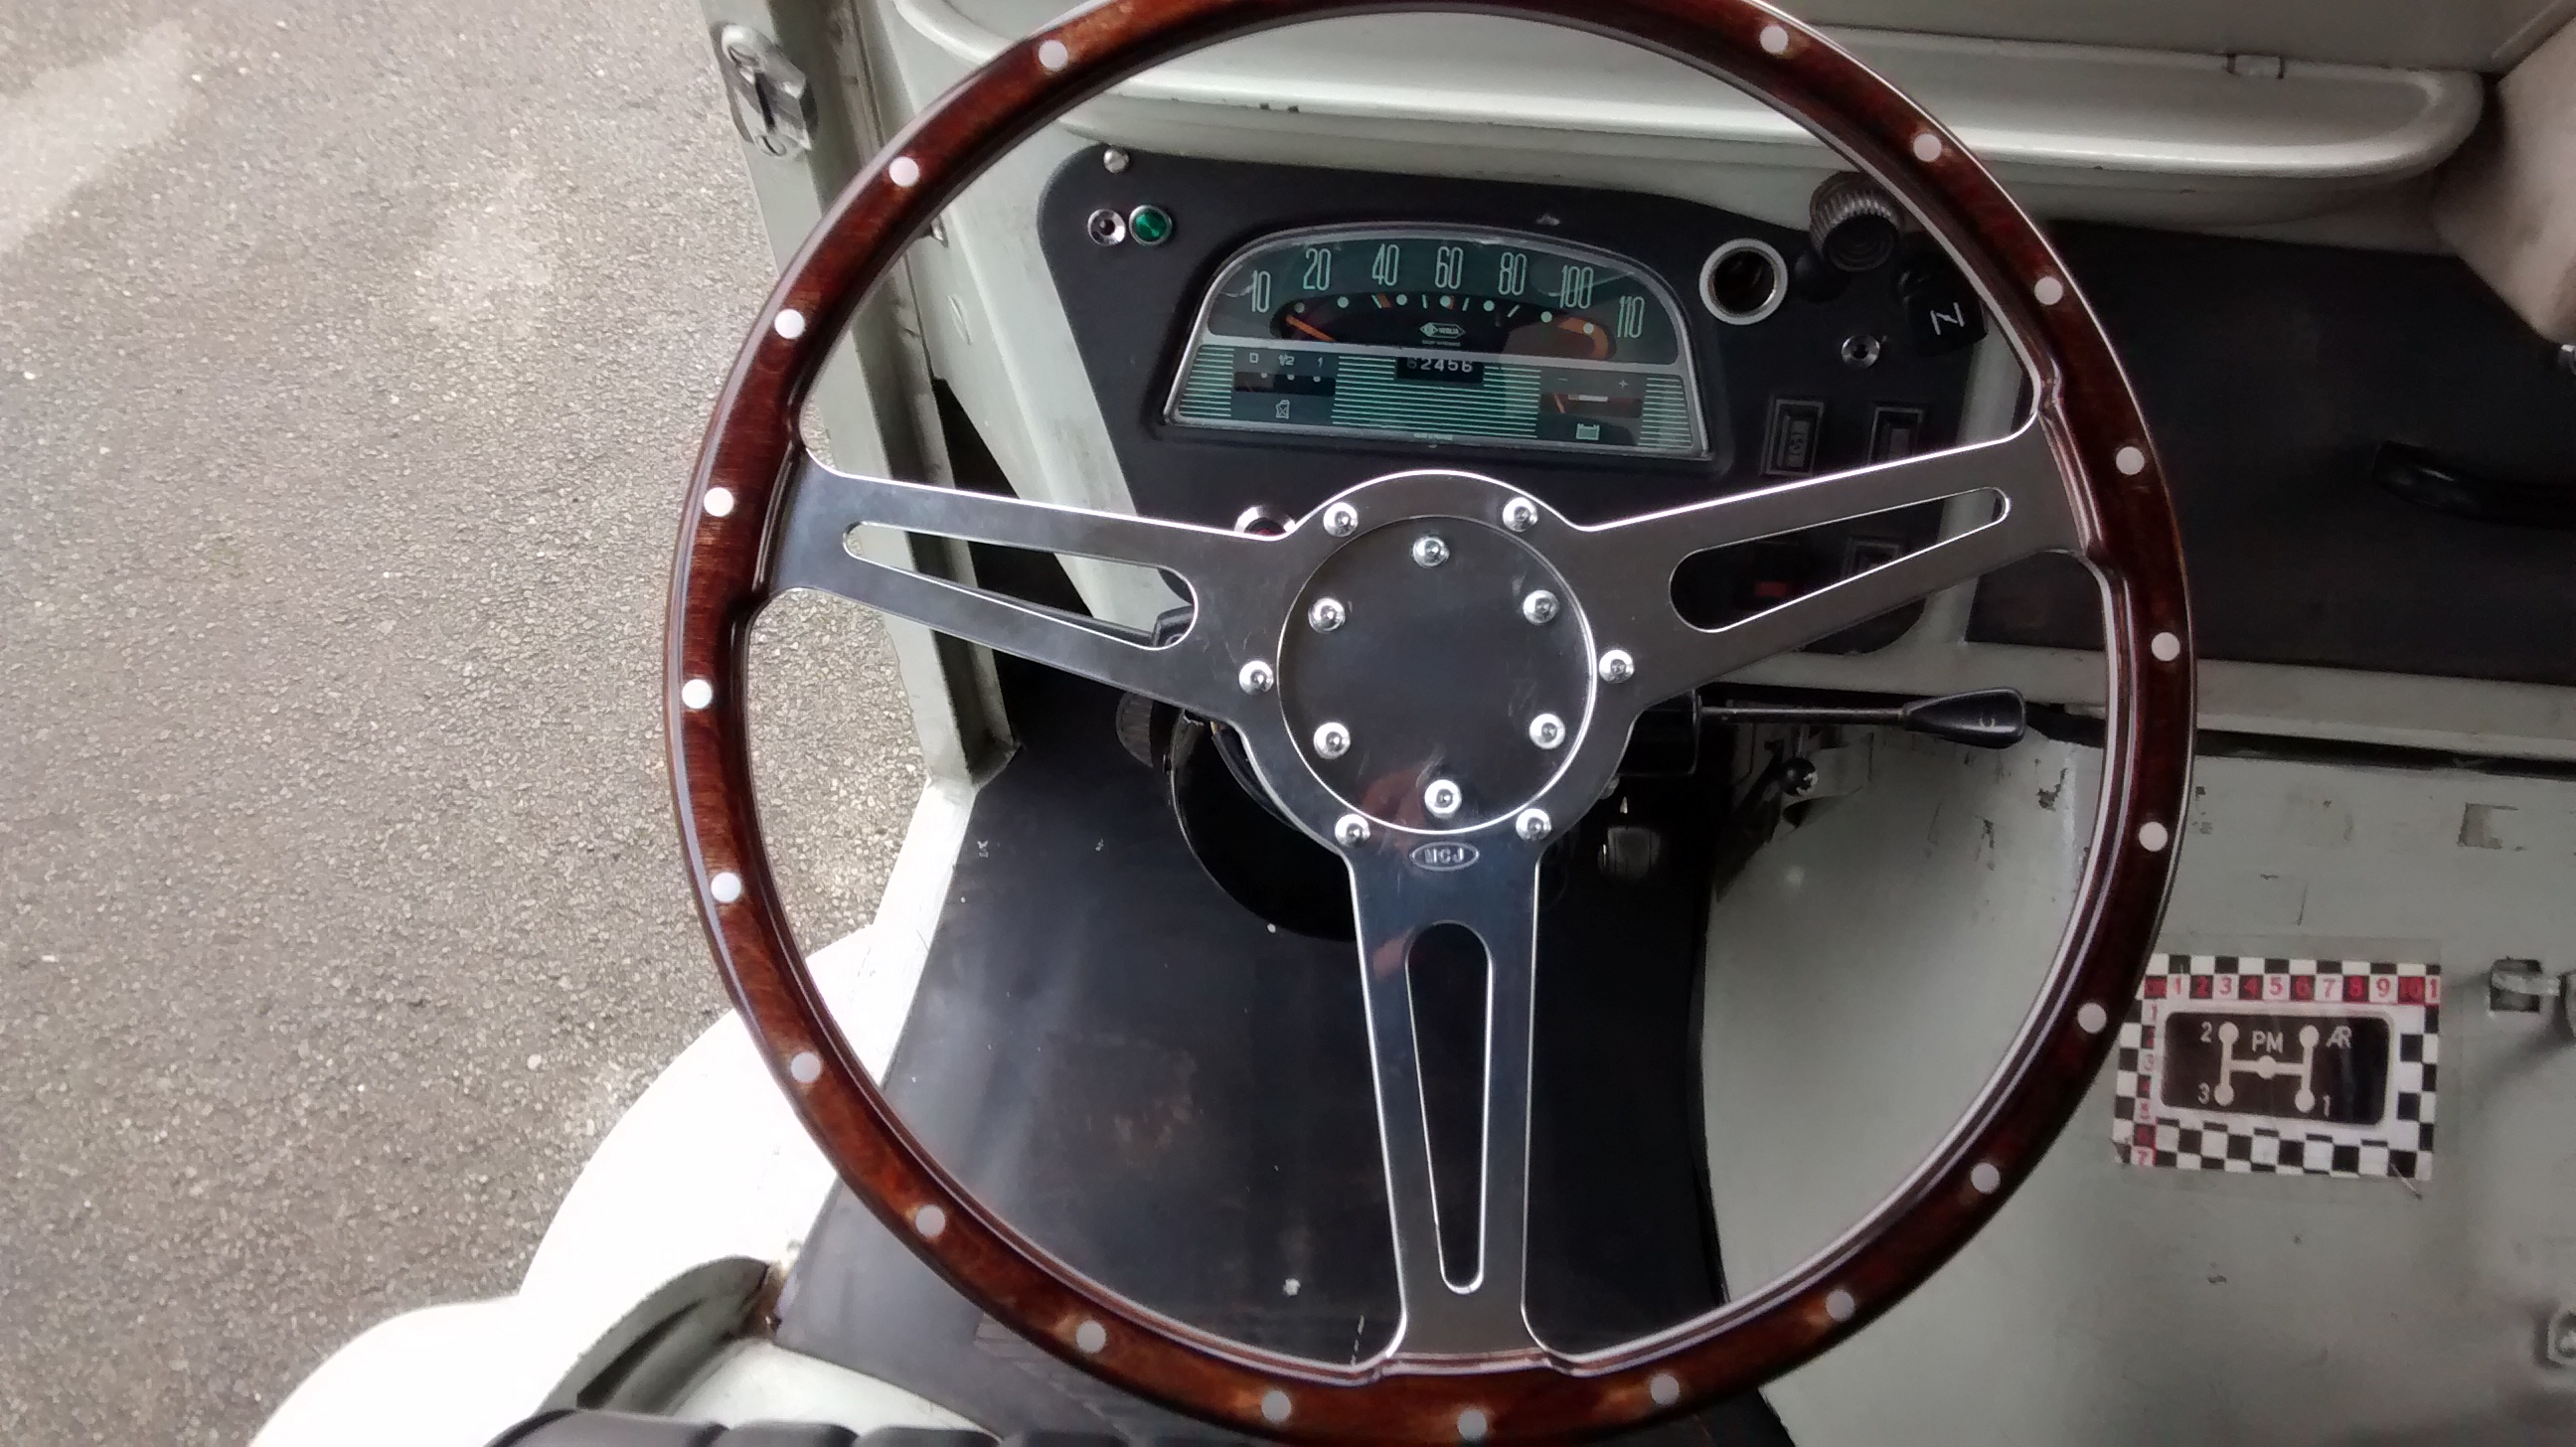
Our Power Steering for the H van requires the old steering wheel to be replaced for a semi dished version which also happens to be safer. The new Steering Column has a Collapsable section as well as better impact absorbancy, see photo above. Our Power Steering has 5 different levels of assistance, all automatically adjusted to the amount of effort you apply. If you don't turn the wheel there is no assistance at all. If you turn it with all your effort the power assistance will be maximum.
Engine power and top speeds
There is a lot of misinformation about H van Top speeds, purely because there was such a wide variation dependent on Age, Model and engine option. It really does depend on the individual model.
Engine power, Gearing, Tyres and even the engine type meant the H van could have a top speed from as little as 41mph to over 65mph.
When the H van was introduced in 1947 the 11cv, 1,911cc engine, developed just 35 bhp at 3,500 rpm. Top speed was just 75kph/44 mph.
As petrol quality improved, Citroen took advantage by retuning the engines with more advanced Ignition curves and altered Carburettor settings so the power outputs, and Top Speeds, slowly rose through the 1950's
By around 1951 power was up to 37 bhp @ 3,700, Top Speed up to about 49mph.
By the mid 1950's power was around 42 bhp @ 4,000 rpm, Top Speed about 55mph
By the end of the 1950's the engine had been very heavily revised with different Conrods with replaceable shells that allowed it to rev Higher. Power was around 45 bhp @ 4,000 rpm, Top Speed about 58mph for the higher geared, lighter HZ vans. However, a Horse Box from this time might still struggle to better 35mph due to the greater weight, height and wind resistance.
The book 'Les Types H de collection', Patrick Lesueur, writes that by the early 1960's the new 1,911cc Alloy crossflow Head engine was producing 56 bhp @ 4,000rpm, Top Speed about 63mph in an unladen standard van. Even with the new, more powerful engine a Horse box struggled to reach 45mph.
The early Diesel engines low ratio gearboxes were usually paired with small 17r400 tyres to give an even lower ratio and a top speed that struggled to get past 40mph.
See our TYRES page on how tyres affect the gearing and your vans top speed.
To see why the Diesels needed a lower ratio gearbox see the table below which demonstrates just how awful a 1960's diesel is compared to what we expect today.
Compare the power output with the Citroen Petrol. A modern Diesel will out power a similar sized Petrol engine on Horsepower, but especially Torque which is what a van needs most, but this table shows how the reverse was true through the 1960's :
ENGINE TORQUE in ft lbs HORSEPOWER
Perkins 1,621 Diesel 66 42
Indenor 1.9 Diesel 79 @ 2,250 rpm 50
1,628cc Petrol 83 @ 1,500 rpm 45
1,911cc Petrol 102 @ 1,750 rpm 57
Ford Engine conversion by Atlantic 112 @ 2,400 rpm 81
.
As can be seen the Diesel had less torque, developed at higher revs, than the 1.6 petrol!!. This lower torque figure meant that the Diesels had to be worked harder which, along with the lower gearing, revealed only a small difference in the fuel consumption. In real terms today the Diesel will cost about the same to run. The small mpg improvement over the petrol is out weighed by the higher purchase cost at the pump. Add on the lower top speed which can be just 41mph, plus the noise and you have a very undesirably van. Our new modern Ford Zetec engine transplant can now be used to replace the Diesel engines.
If you have a Diesel that isn't going so well, we can supply rebuilt exchange Indenor Diesel engines if required.
DS/ID19
The ID19 made between 1955 - 1965 had a similar engine to the Citroen HY, but in a higher state of tune, so in the absence of Citroen HY tech details some of these might be relevant, like Oil pressure and Contact breaker gap, Plug gap, Tappets, etc. if you raise the tune of a HY engine to that of a ID, the carburetor and jetting info might also be relevant? However, please note that the valve Timing and duration are different, as is the inlet manifold (which is bigger), etc. so if you are thinking of increasing H van engine Horsepower by fitting the ID19 Carb, it is not the success you might expect.
You need to add all the other ID19 'features' like the Cylinder Head, matching camshaft, big manifold, high compression Pistons, etc otherwise the engine will be over fueled.
Engine
Bore & Stroke78mm x 100mm
Displacement 1911cc
Firing order 1,3,4,2
Oil pressure (hot)50 lb./sq. in. at 1000 rpm at 60°C through 2.8mm dia. hole. Remember this is with a thicker SAE 30 oil than is normally available today.
Dual points distributor = 2173 and 2173A 1955 – 1959
Fuel Supply :
Carburetor Weber 24/30 DCLC
Choke 21/46
Main jet 105/145
Idling 270/230
Fuel 45/65
Air 150/150
Valving
Intake tappet clearance 0.008" (cold)
Exhaust tappet clearance 0.008" (cold)
Valve-timing indication Marks on timing wheels
Intake valve opens3° BTDC
Ignition
Breaker gap 0.010" - 0.016"
Plug gap 0.024" - 0.028"
Ignition timing indication Flywheel and bell housing
Ignition timing8° BTDC
Clutch
Clutch type Single Dry plate hydraulically operated
Clutch linings Ferodo M8, F44
Tyres:
The tyres available for the H van were 17r400 and the taller 19r400. The former gave better hill climbing ability and the later gave more relaxed cruising. See our TYRES page on how to save a lot of money and make the van more relaxed to drive