Translate This Page
When the side of a van is cut out to make a Hatch you are affecting the structure of the van, you should put that strength back. Especially so if the van is showing signs of corrosion as it is likley that all the structural steel will have corroded as well. It could be half the thickness (and strength) of when it left the factory. These vans were never designed to carry the massive amount of Catering equipment that gets installed, let alone all that Water, Gas and Stock. Throw in many kilos of Stainless Steel and you have a van that would barely be strong enough without a Hatch, when it was new. One H van owner read our pages and had the Van weighed. they were astonished that it was 2650 kg without Water, Driver, Passenger, Stock, Milk, Gas, etc. They were convinced they had a light weight fitted Interior.
The smaller the opening the greater the vans strength.
This is a suggestion on how it can be done on a standard van, Beast Carriers may be different :
Make a simple oblong frame of 20mm box clad with Zintec steel. It is strong but light. The steel skin must be 'glued to the frame to seal it as well as add strength. Then tack weld the skin on from the inside only.
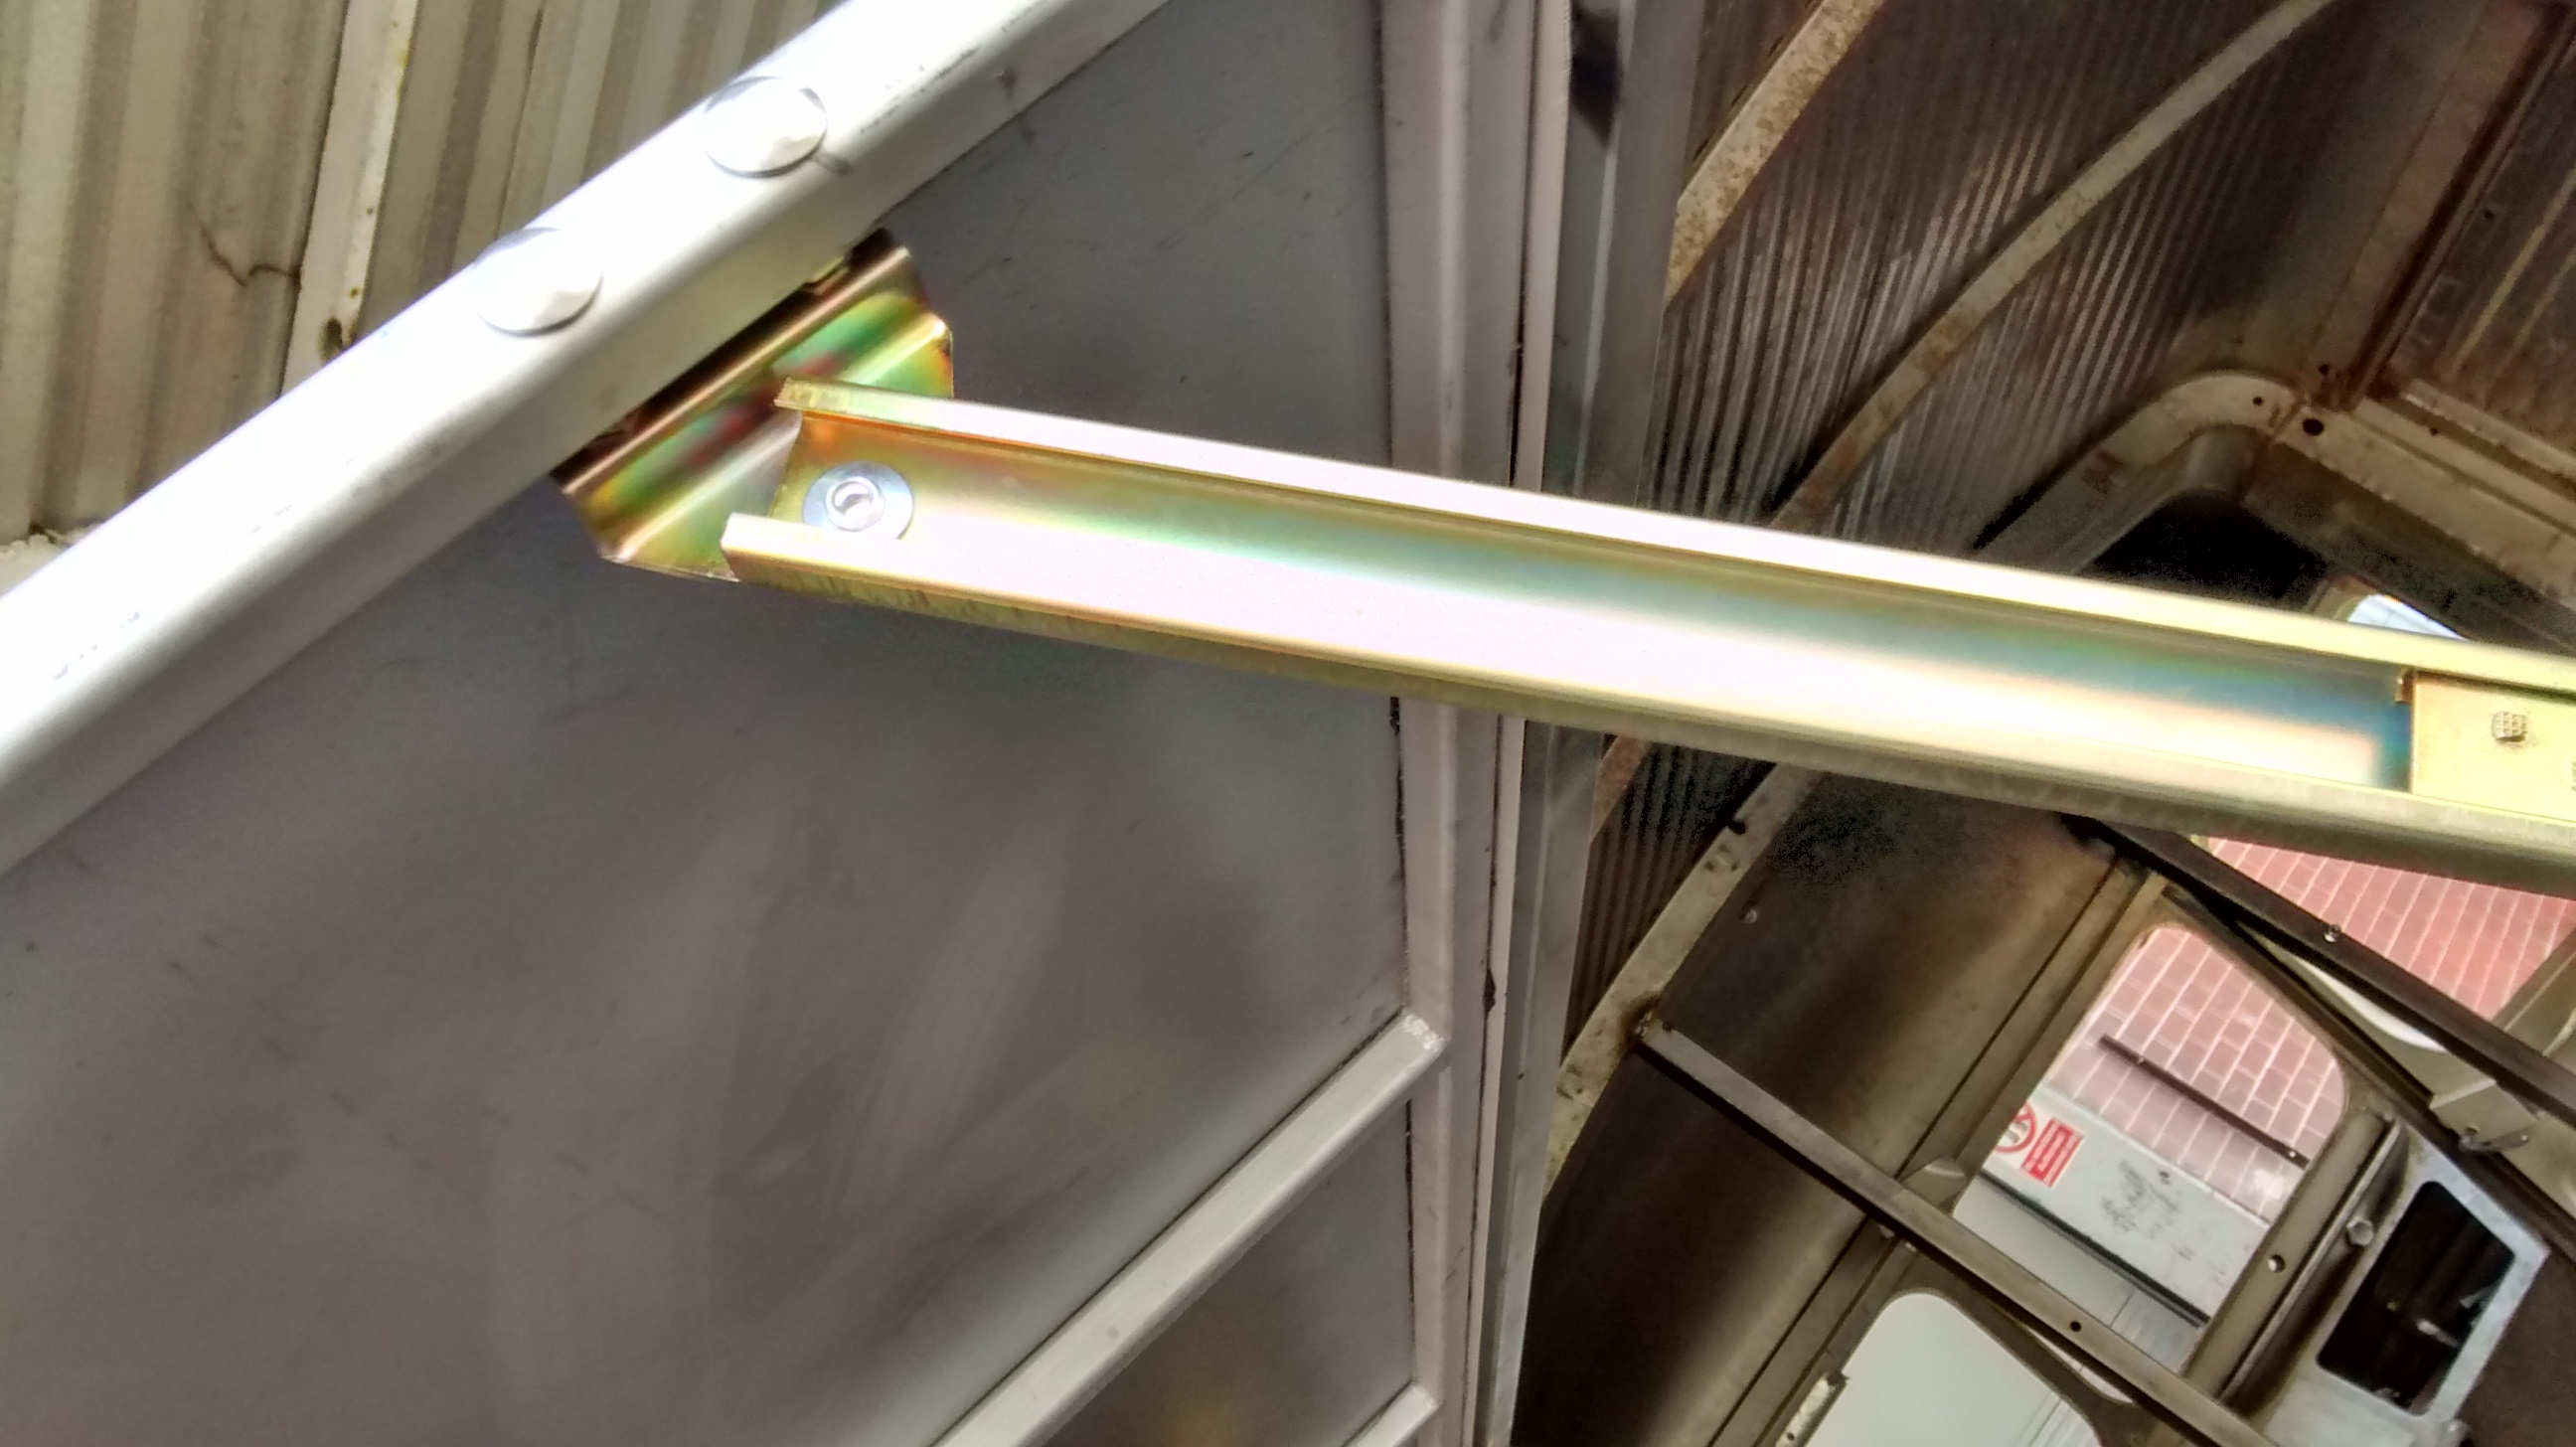
The picture above is the inside of the frame with the steel skin on the outside.
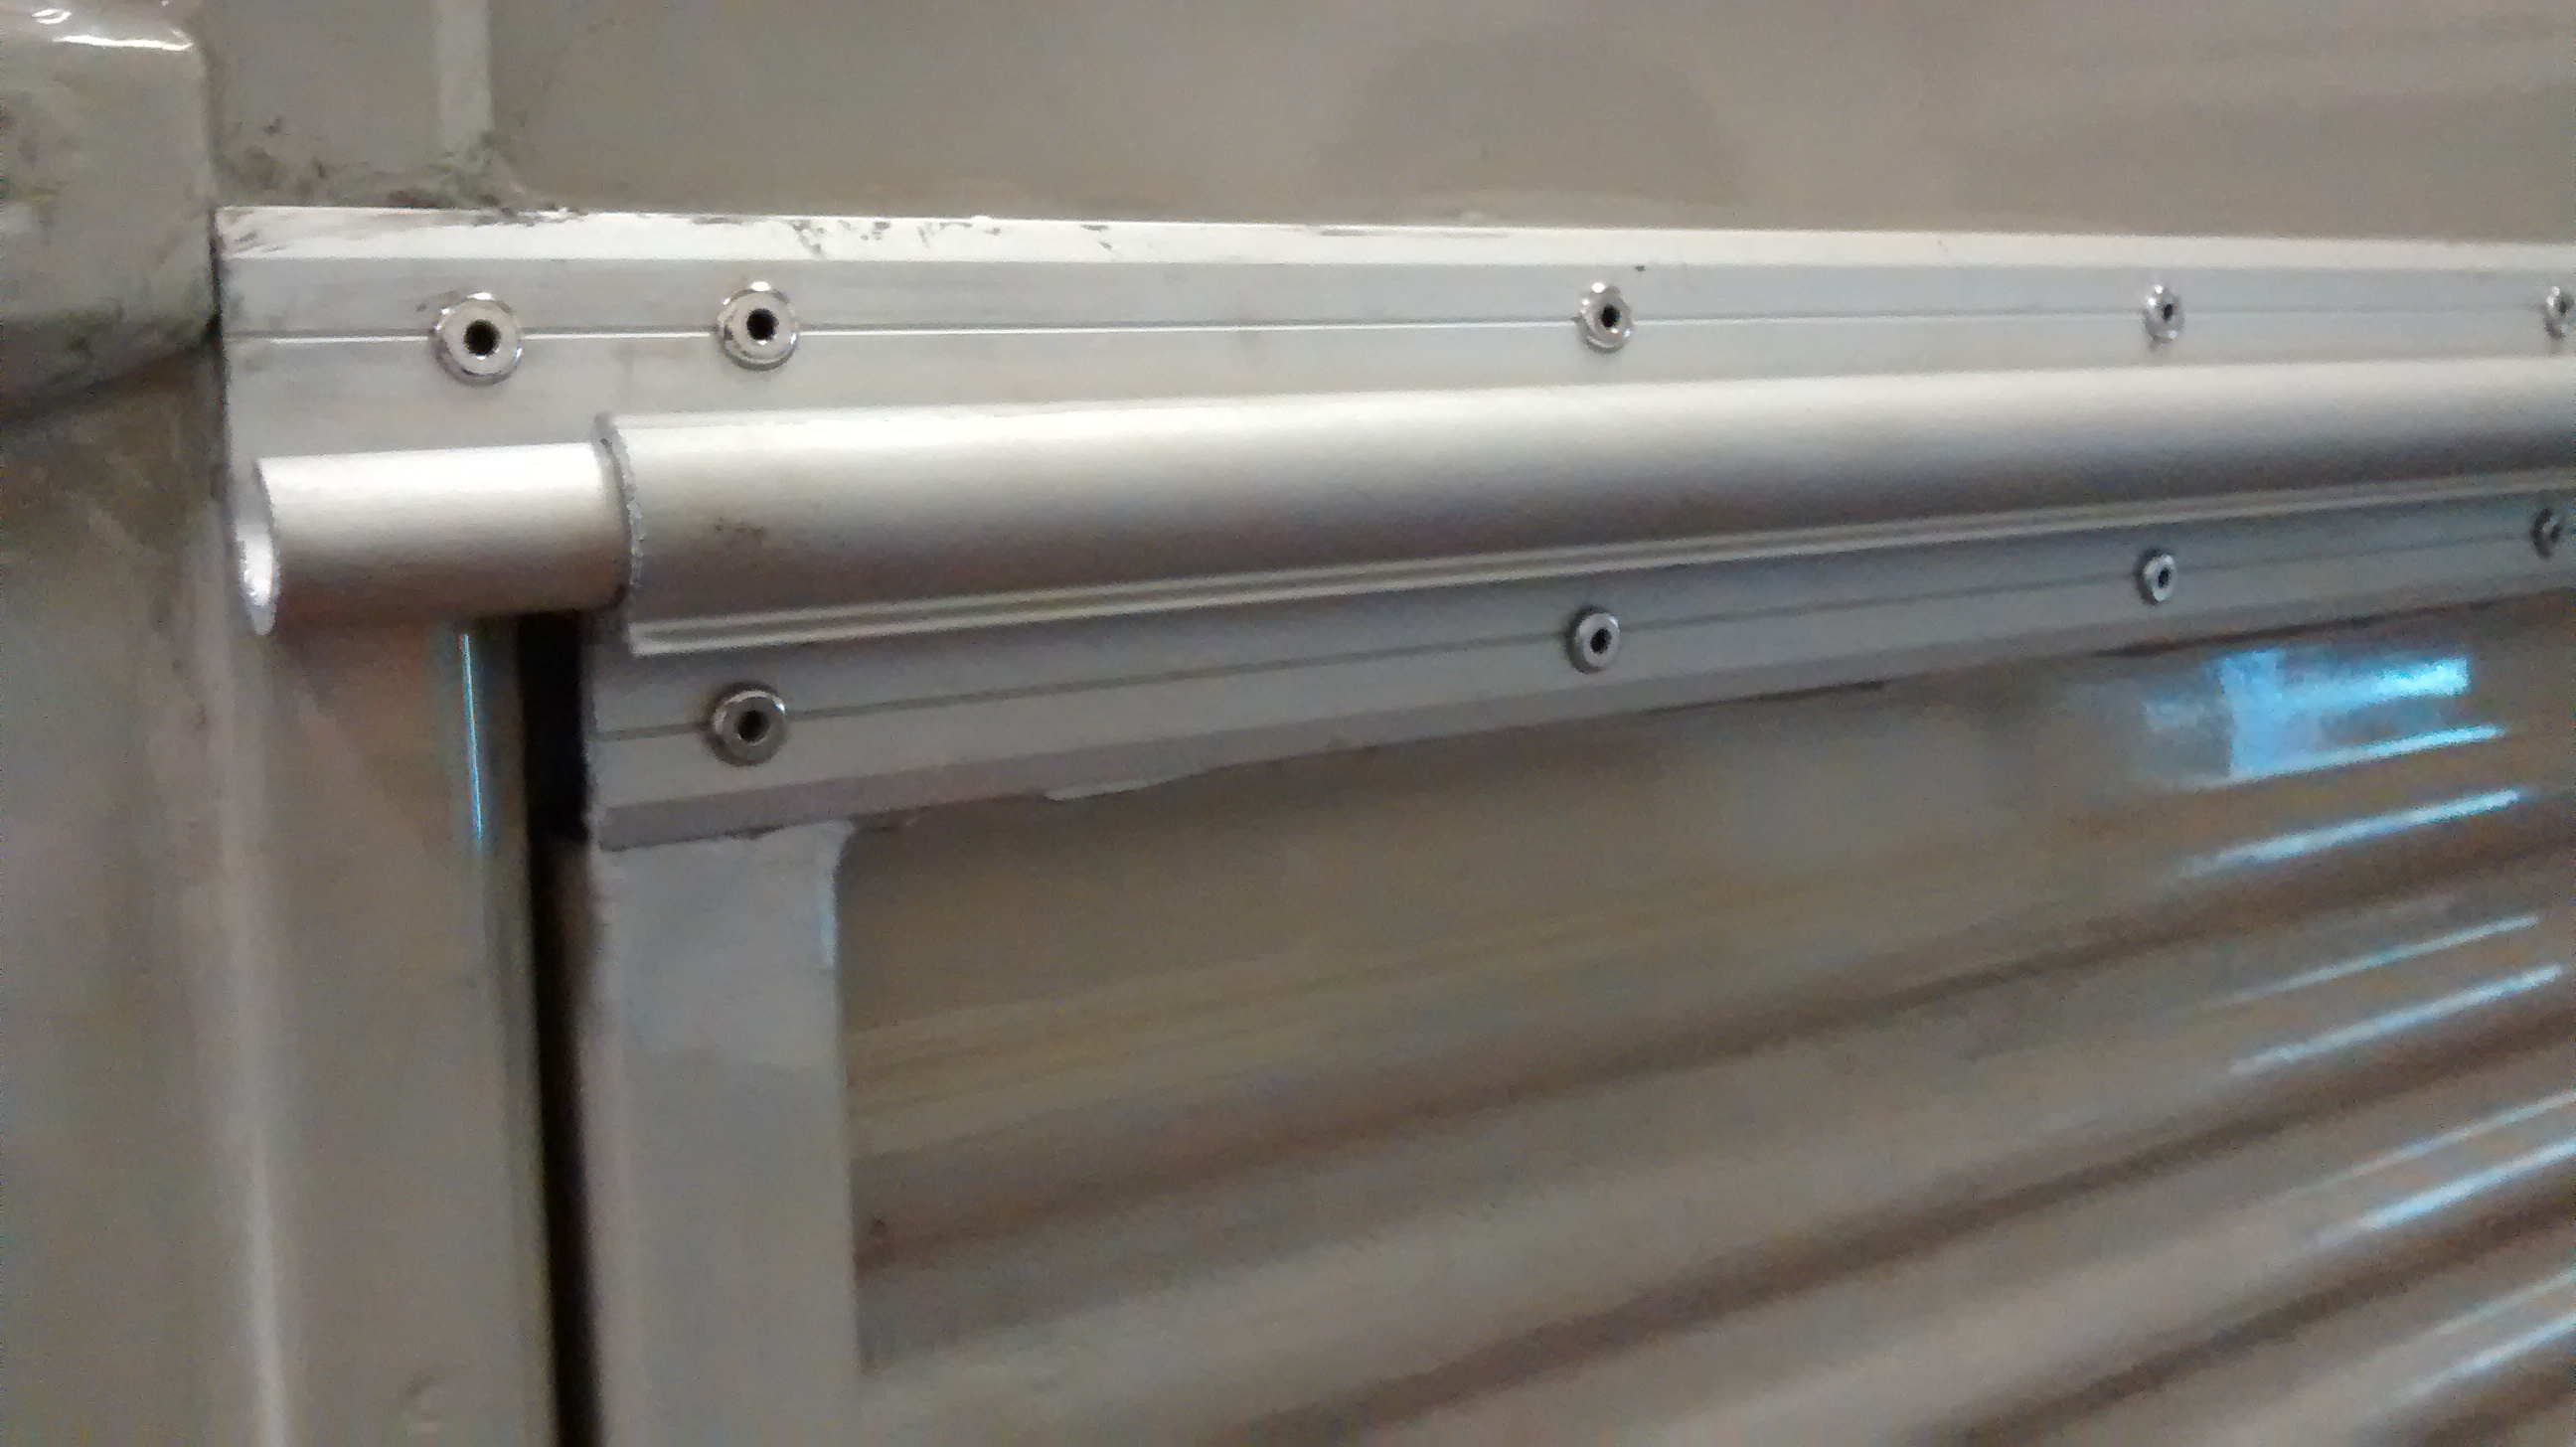
This then hangs off the top rail using Waterproof continuous hinge, like in the photo below.
The van was yet to be media blasted to strip off the old paint which was cracking badly, typical of a Southern France van, so the Hatch was going through a 'pre-fit' prior to it then being removed and stored safe while the paint stripping took place.
It will then be refitted after Painting has taken place. This ensures a good coat of paint is behind the hingean in the drilled holes.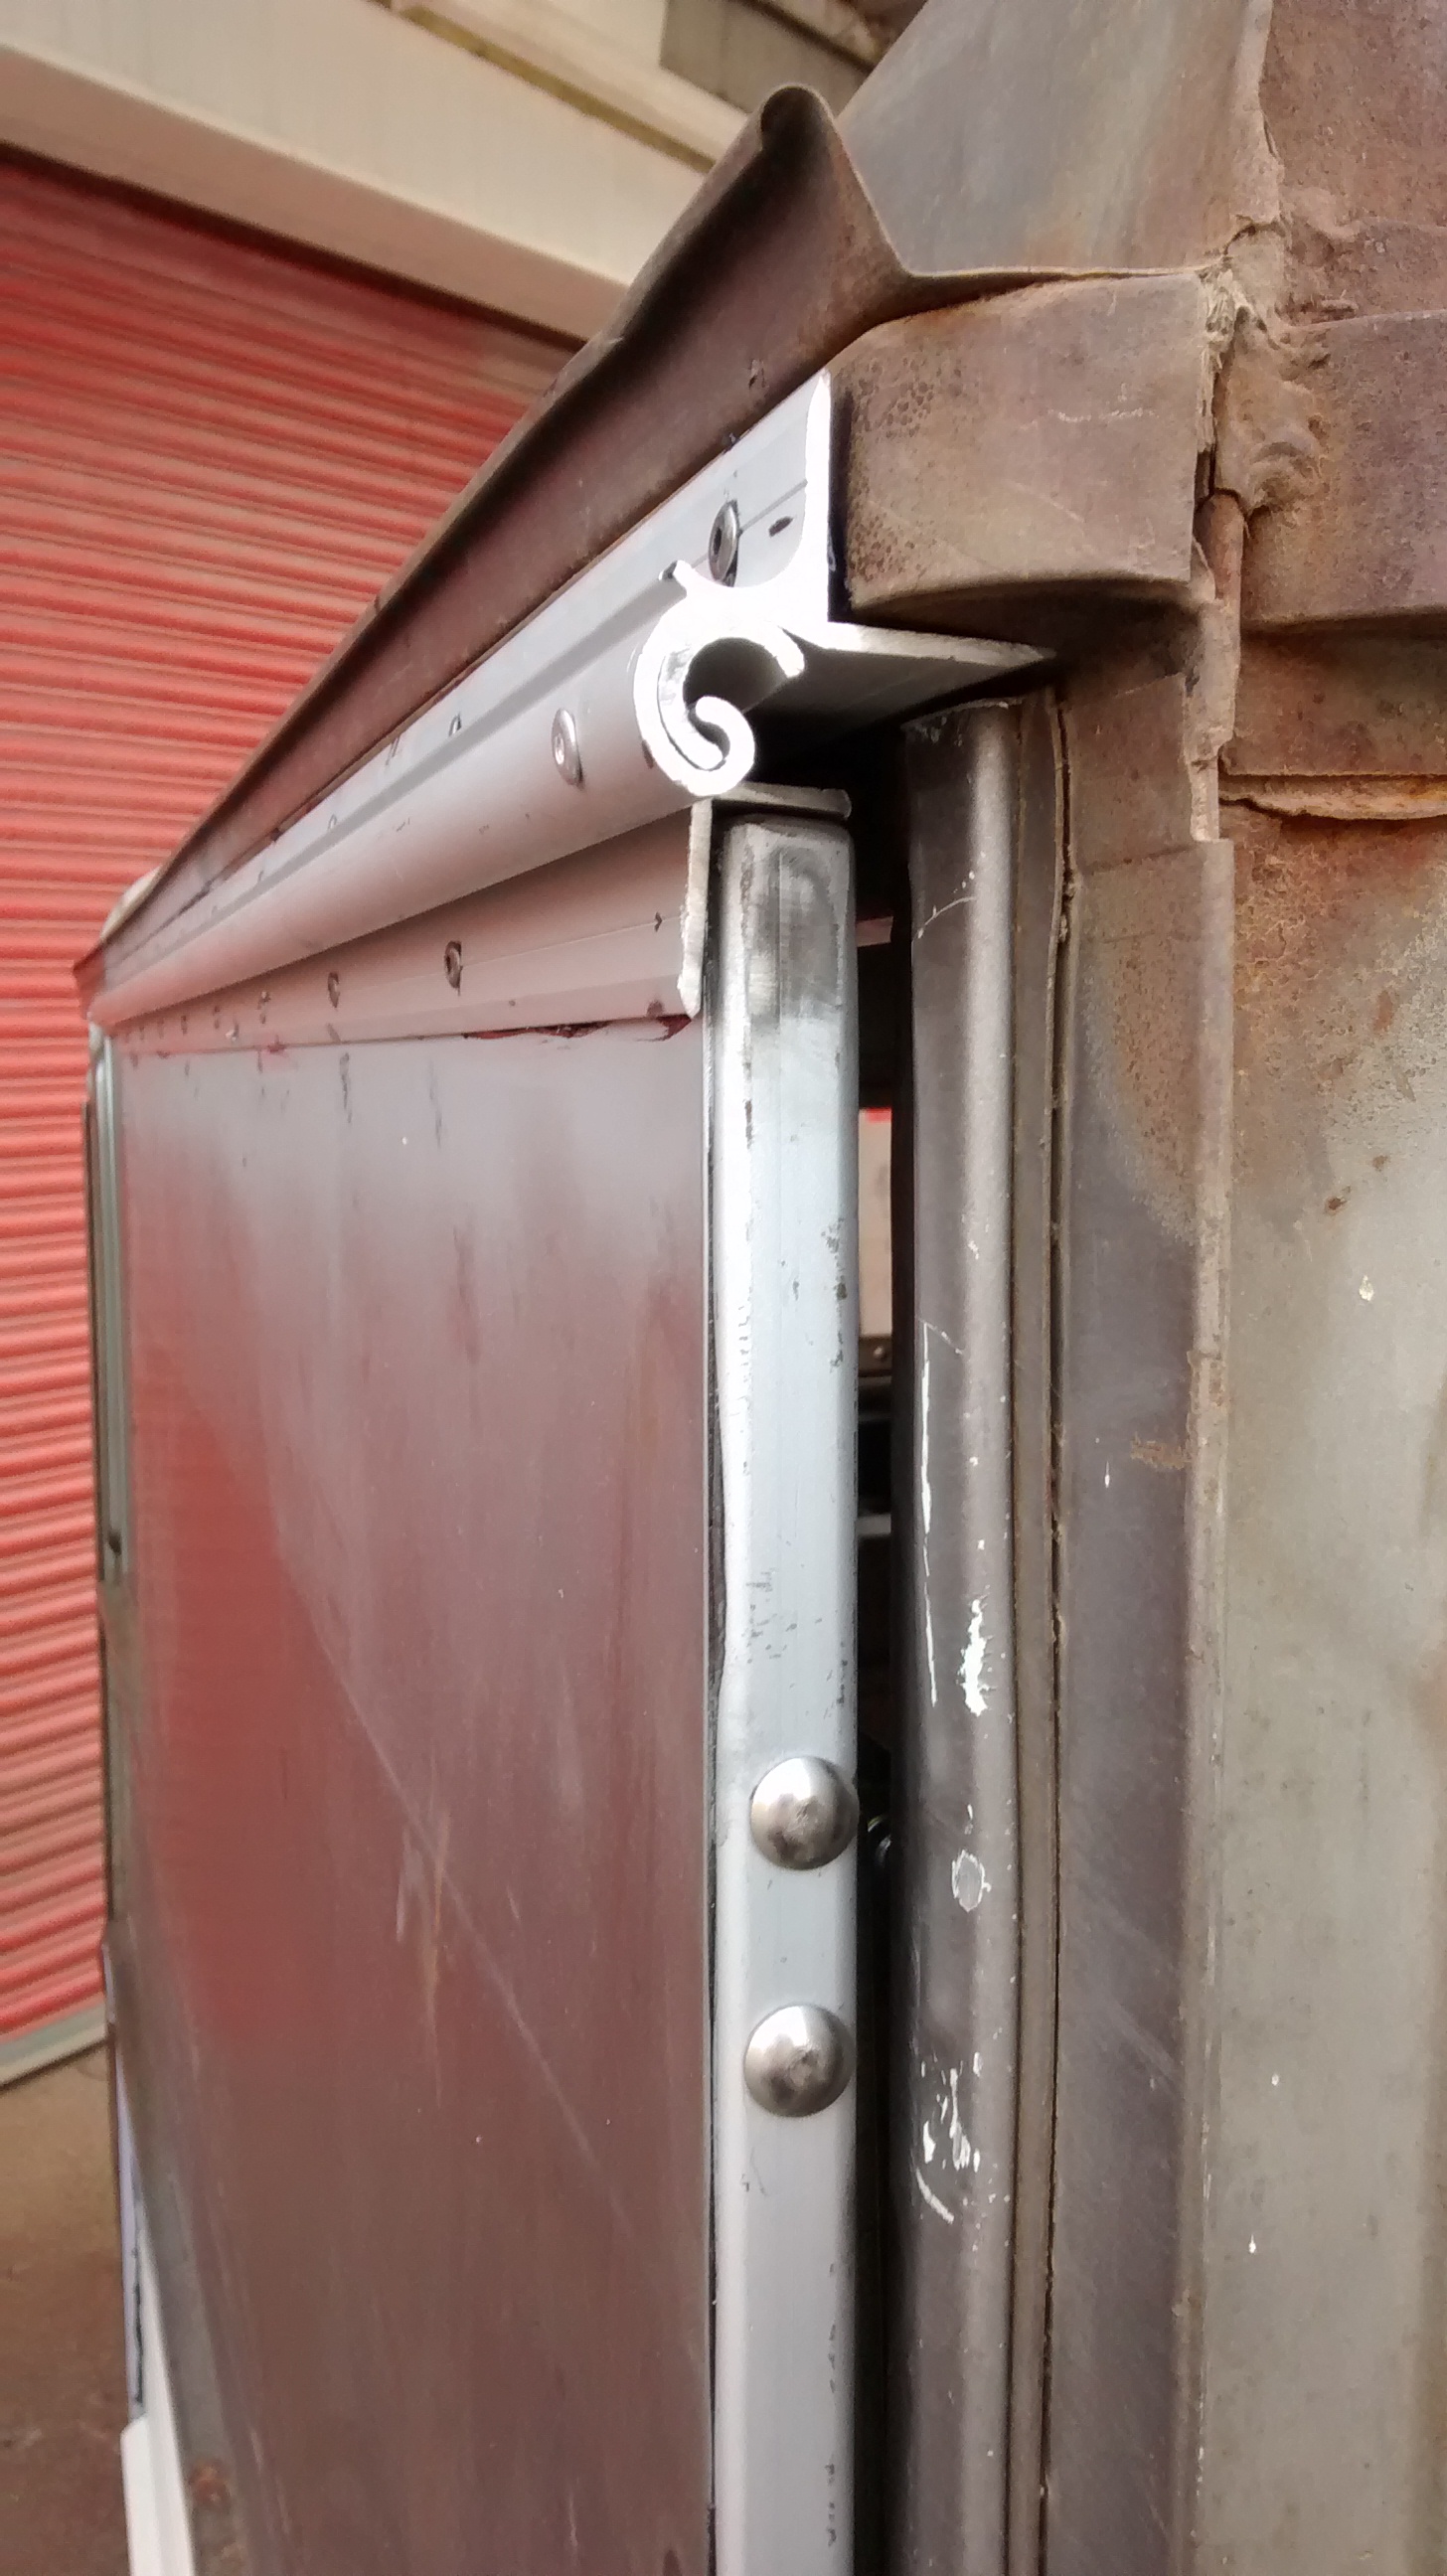
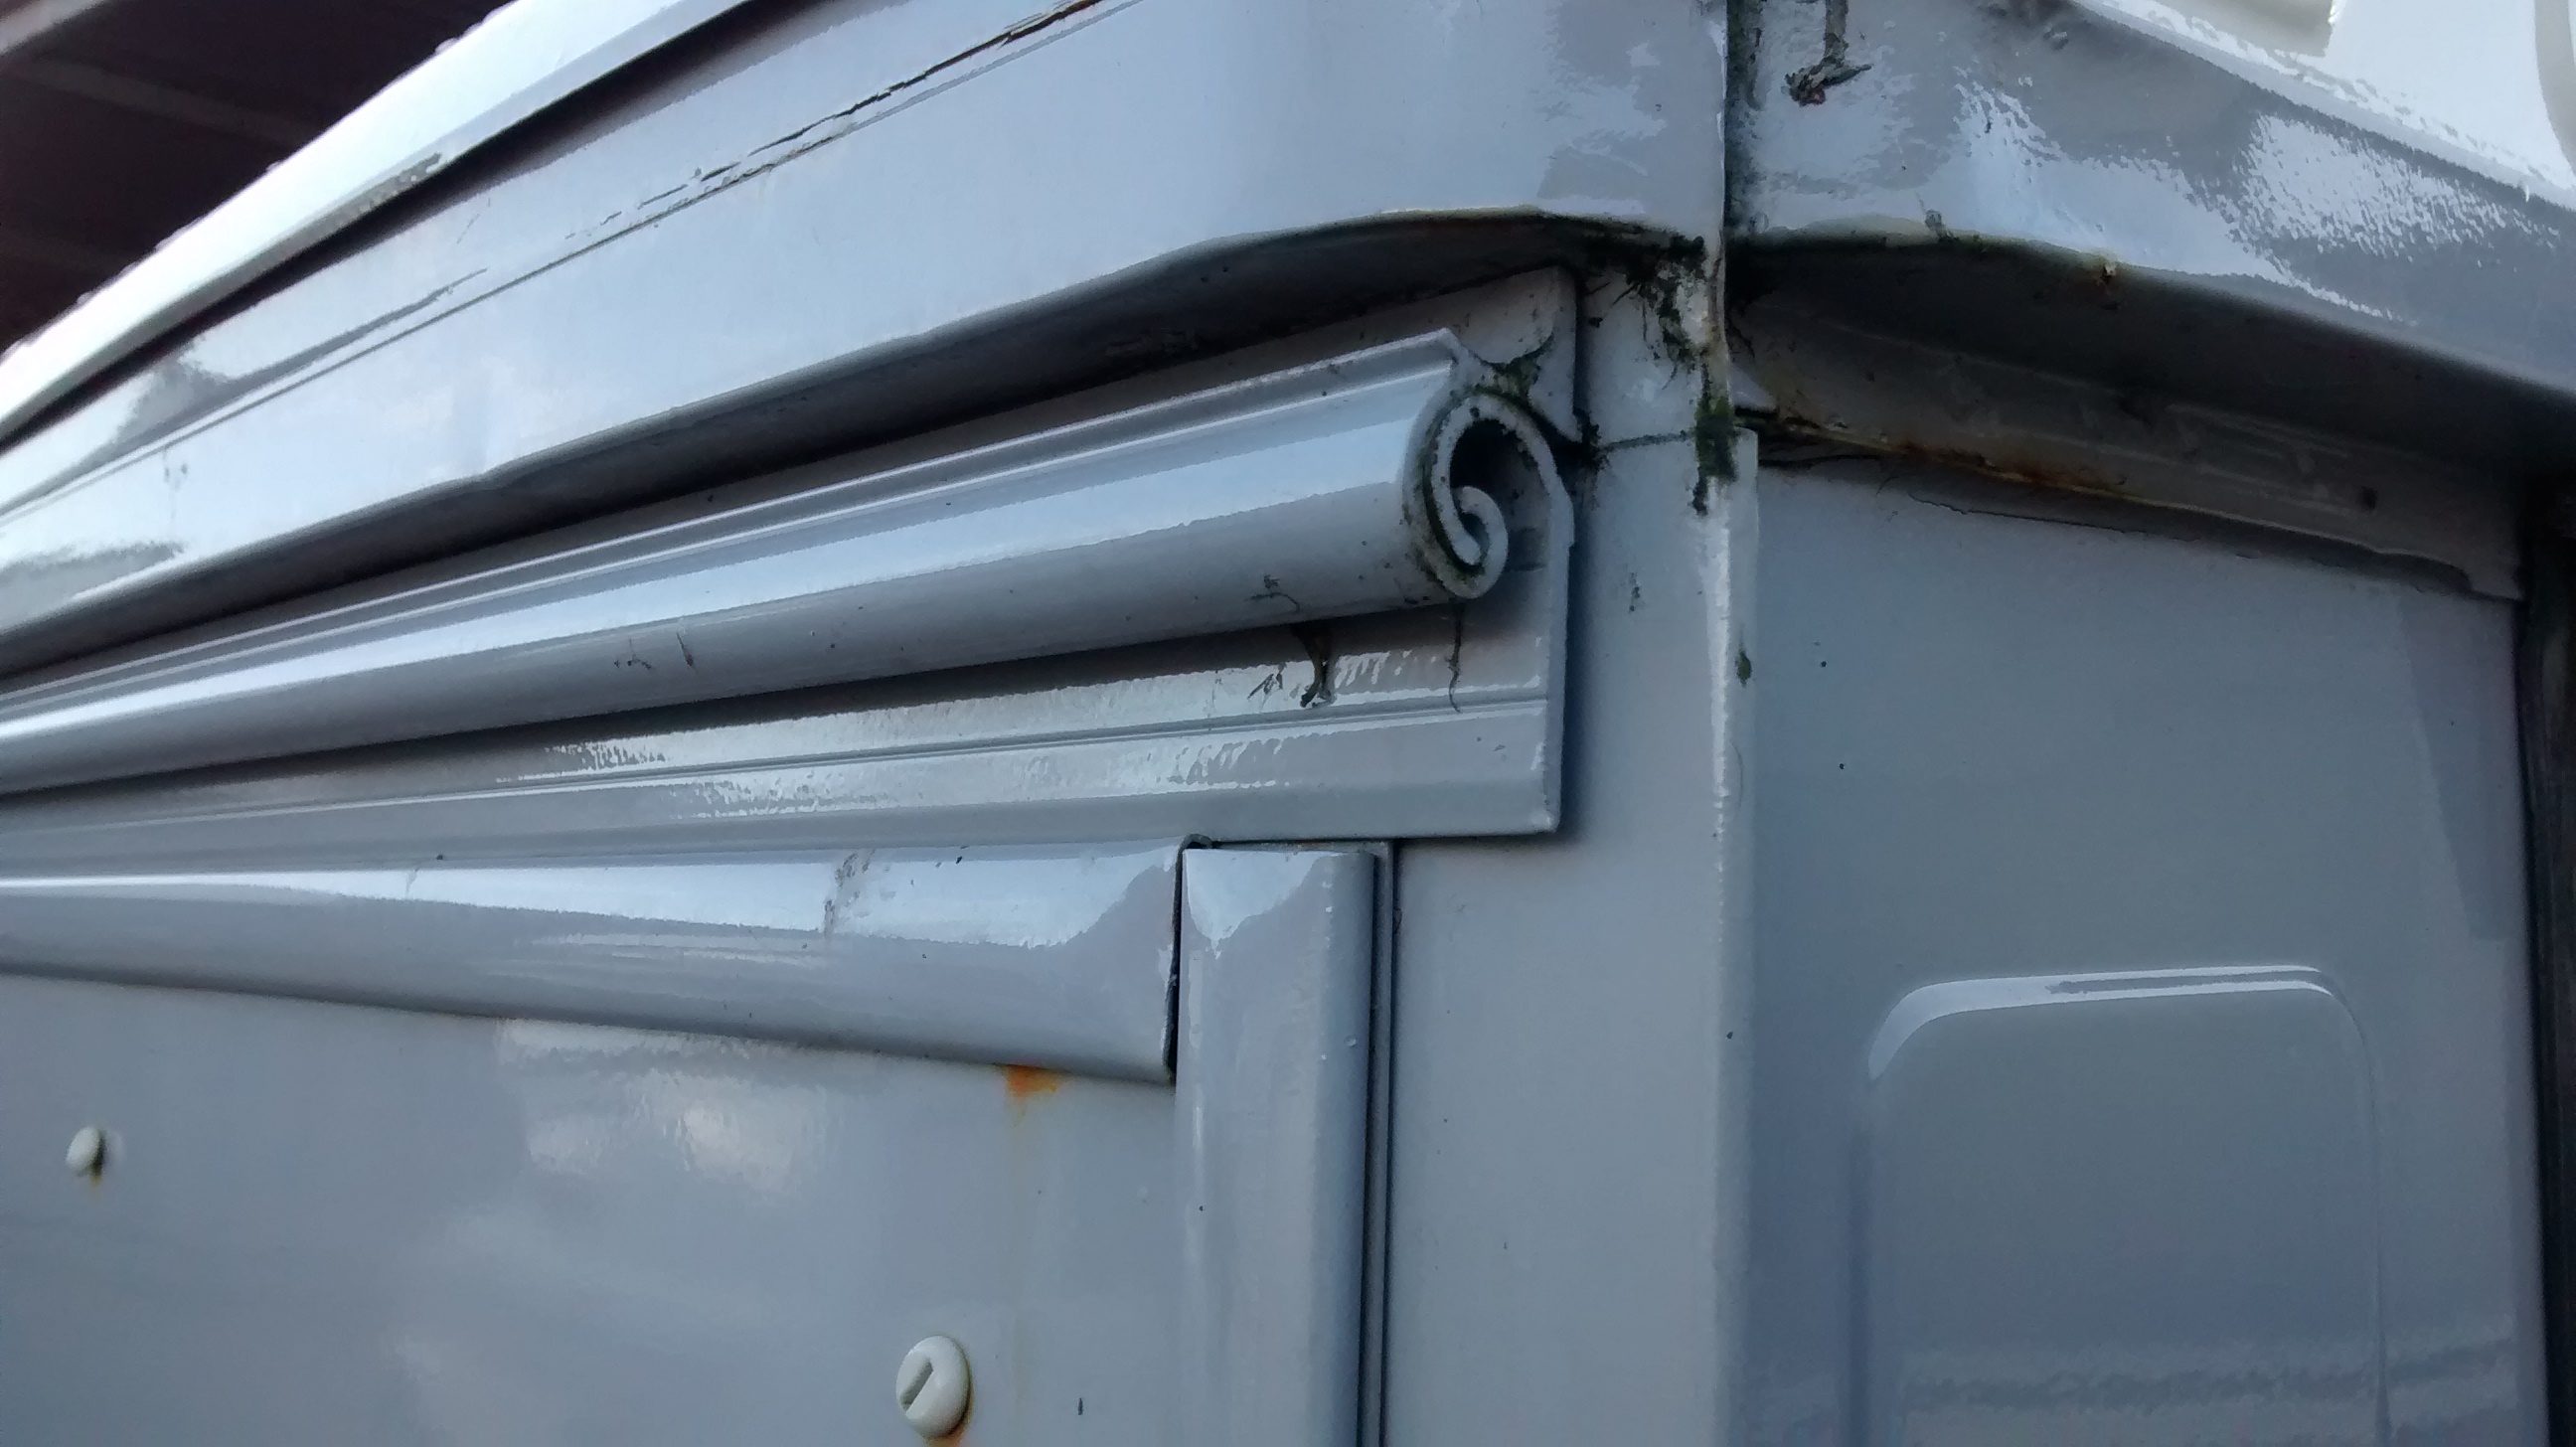
Notice in the photo above how the Hatch 'stands proud' from the van body by about 5mm to allow room for a decent rubber seal?
The hinge 'End Stops' are an offcut of the inner hinge slid into the end and then drilled and rivetted.
You should put fixings into both faces of each Hinge for strength, not just the front face. Don't underestimate the Force of the Wind on a Catering Hatch hinge, we have seen them ripped off. A Catering hatch flying through the air poses a real danger to life and limb.
Remember that under high loads the fixings(such as rivets) will just pull through soft Aluminium, hence the importance of using both edges of the Hinge.
Don't use Aluminium rivits as these are soft and fail very quickly, use Stainless Steel rivets, Coach Bolts or better still both.
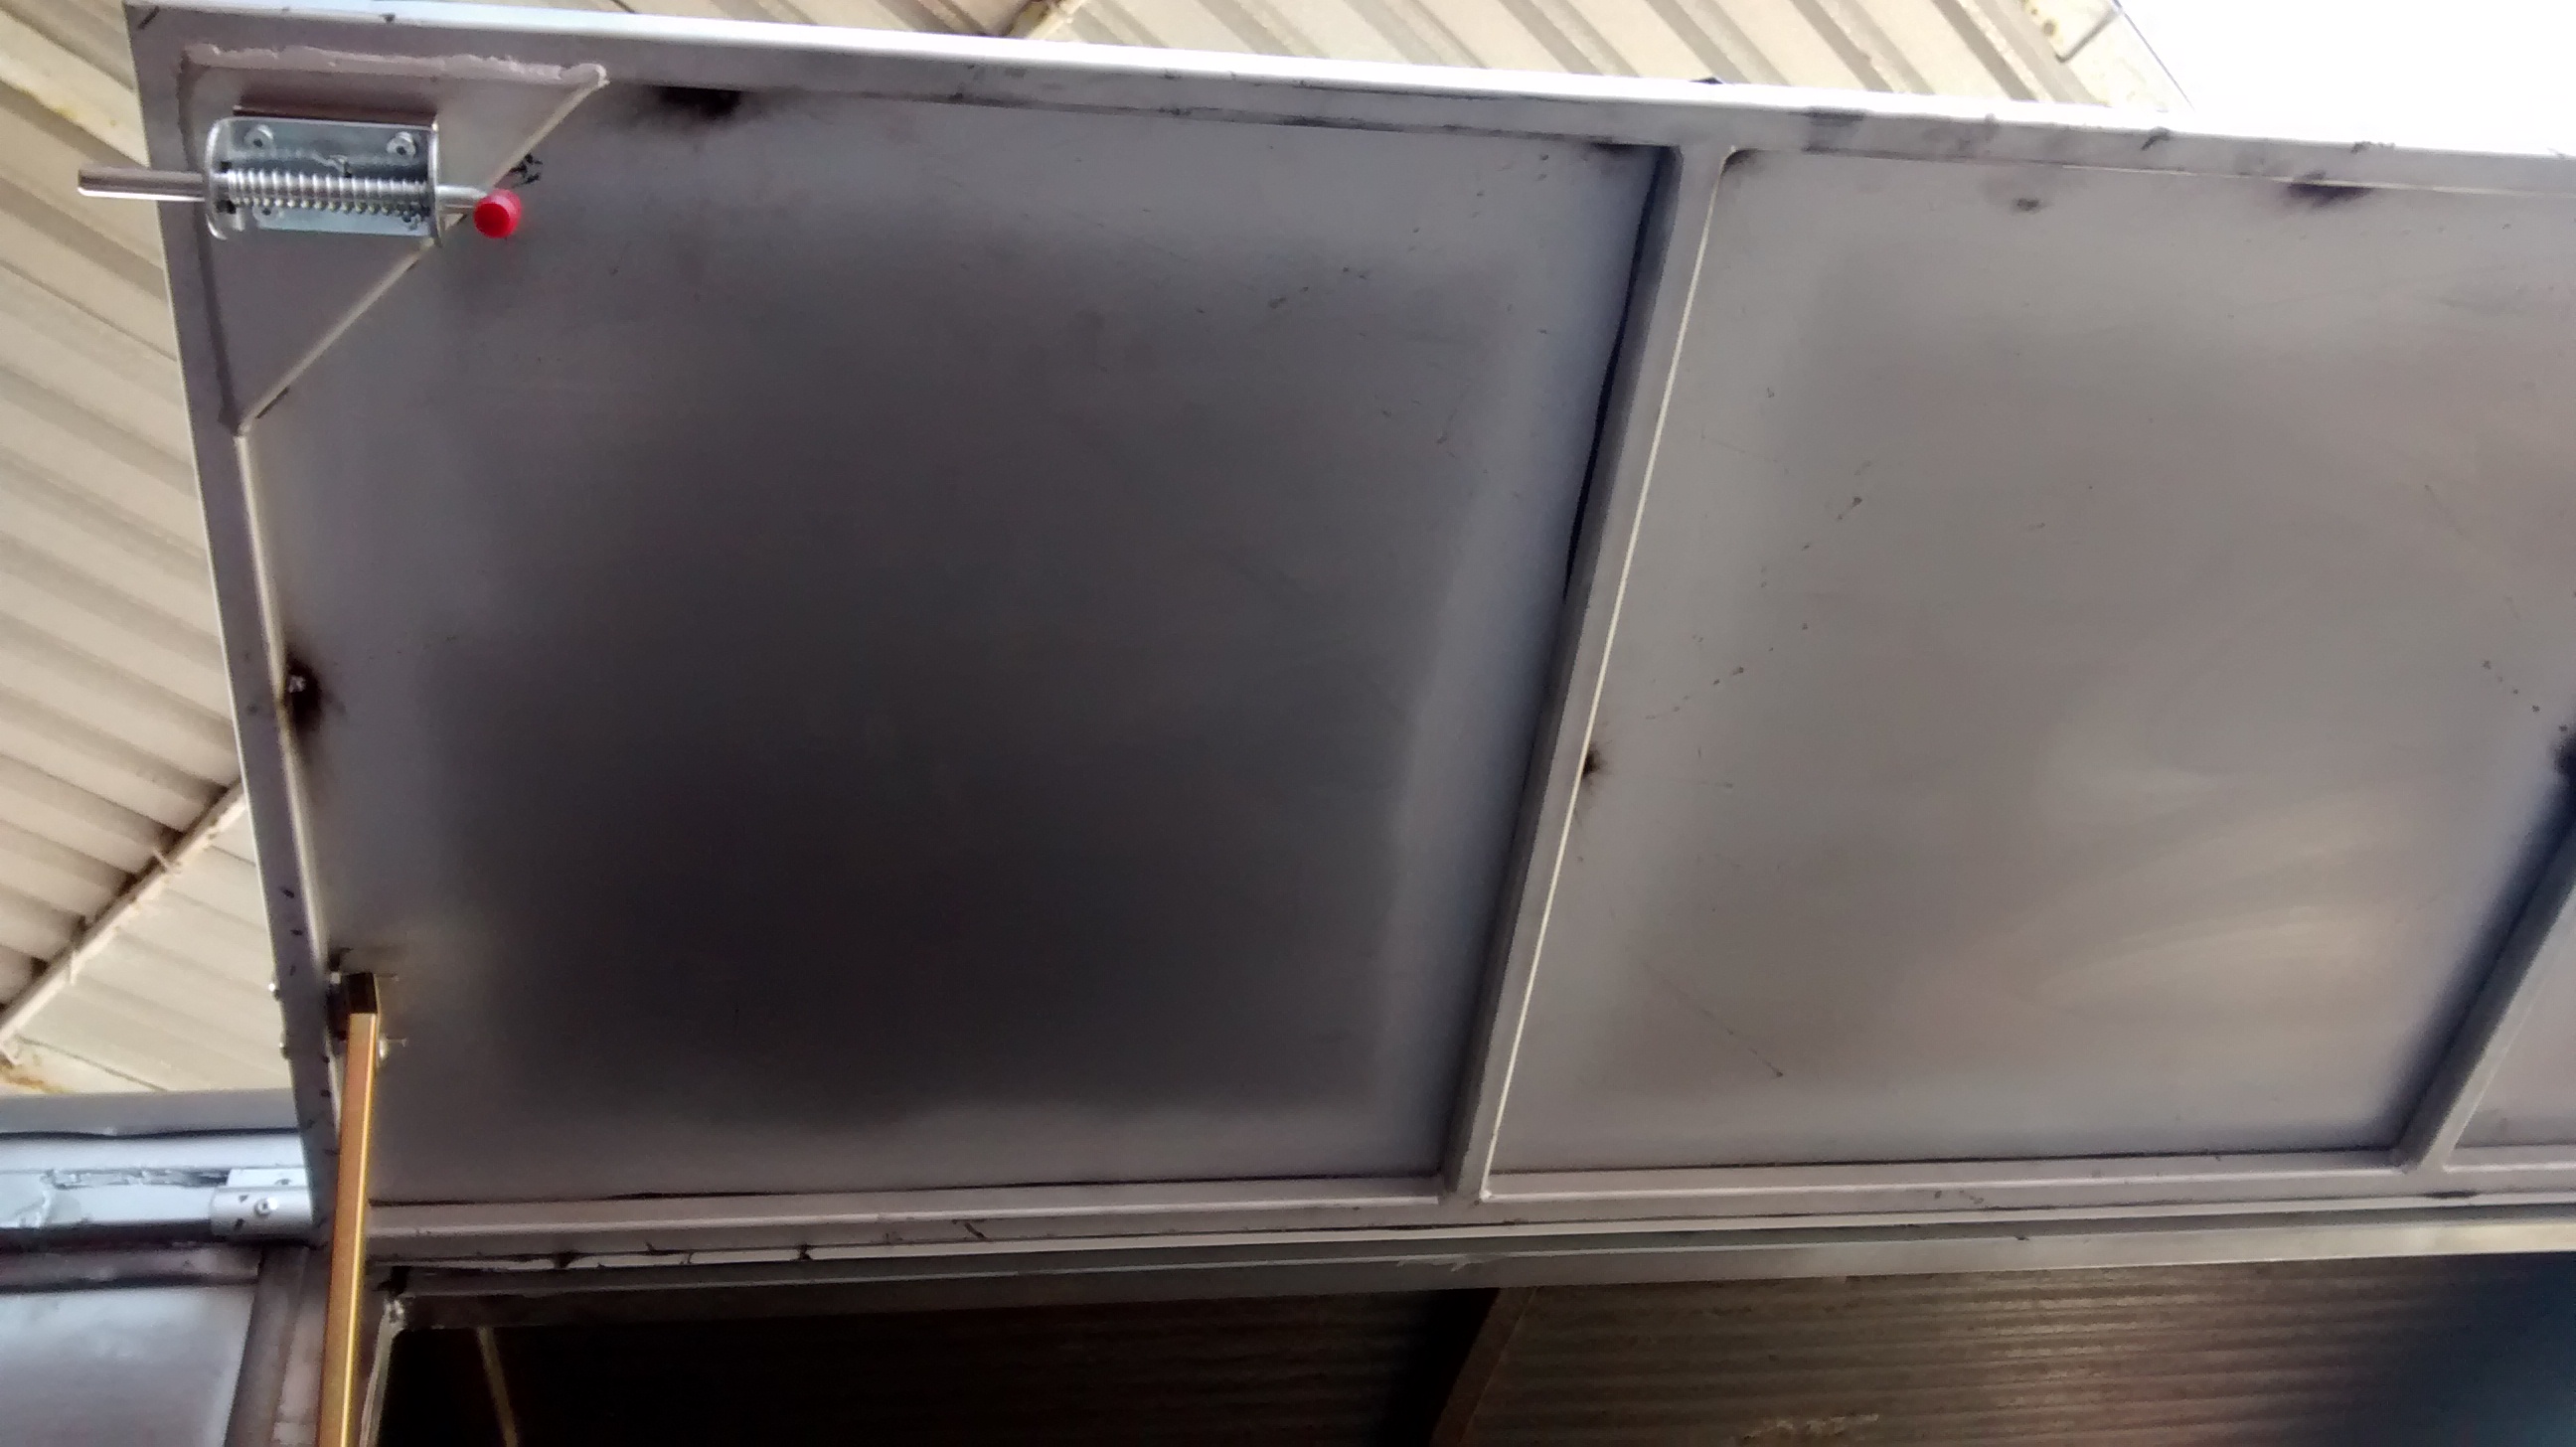
View below of the full hatch in raw unfinshed state prior to Painting. When ready for paint, the Hatch and Hinge will be removed to ensure the paint gets underneath it. After painting the Hinge is reattached to the Hatch and then refixed to the van. Because the holes have already been drilled they are covered in paint to prevent rusting. .
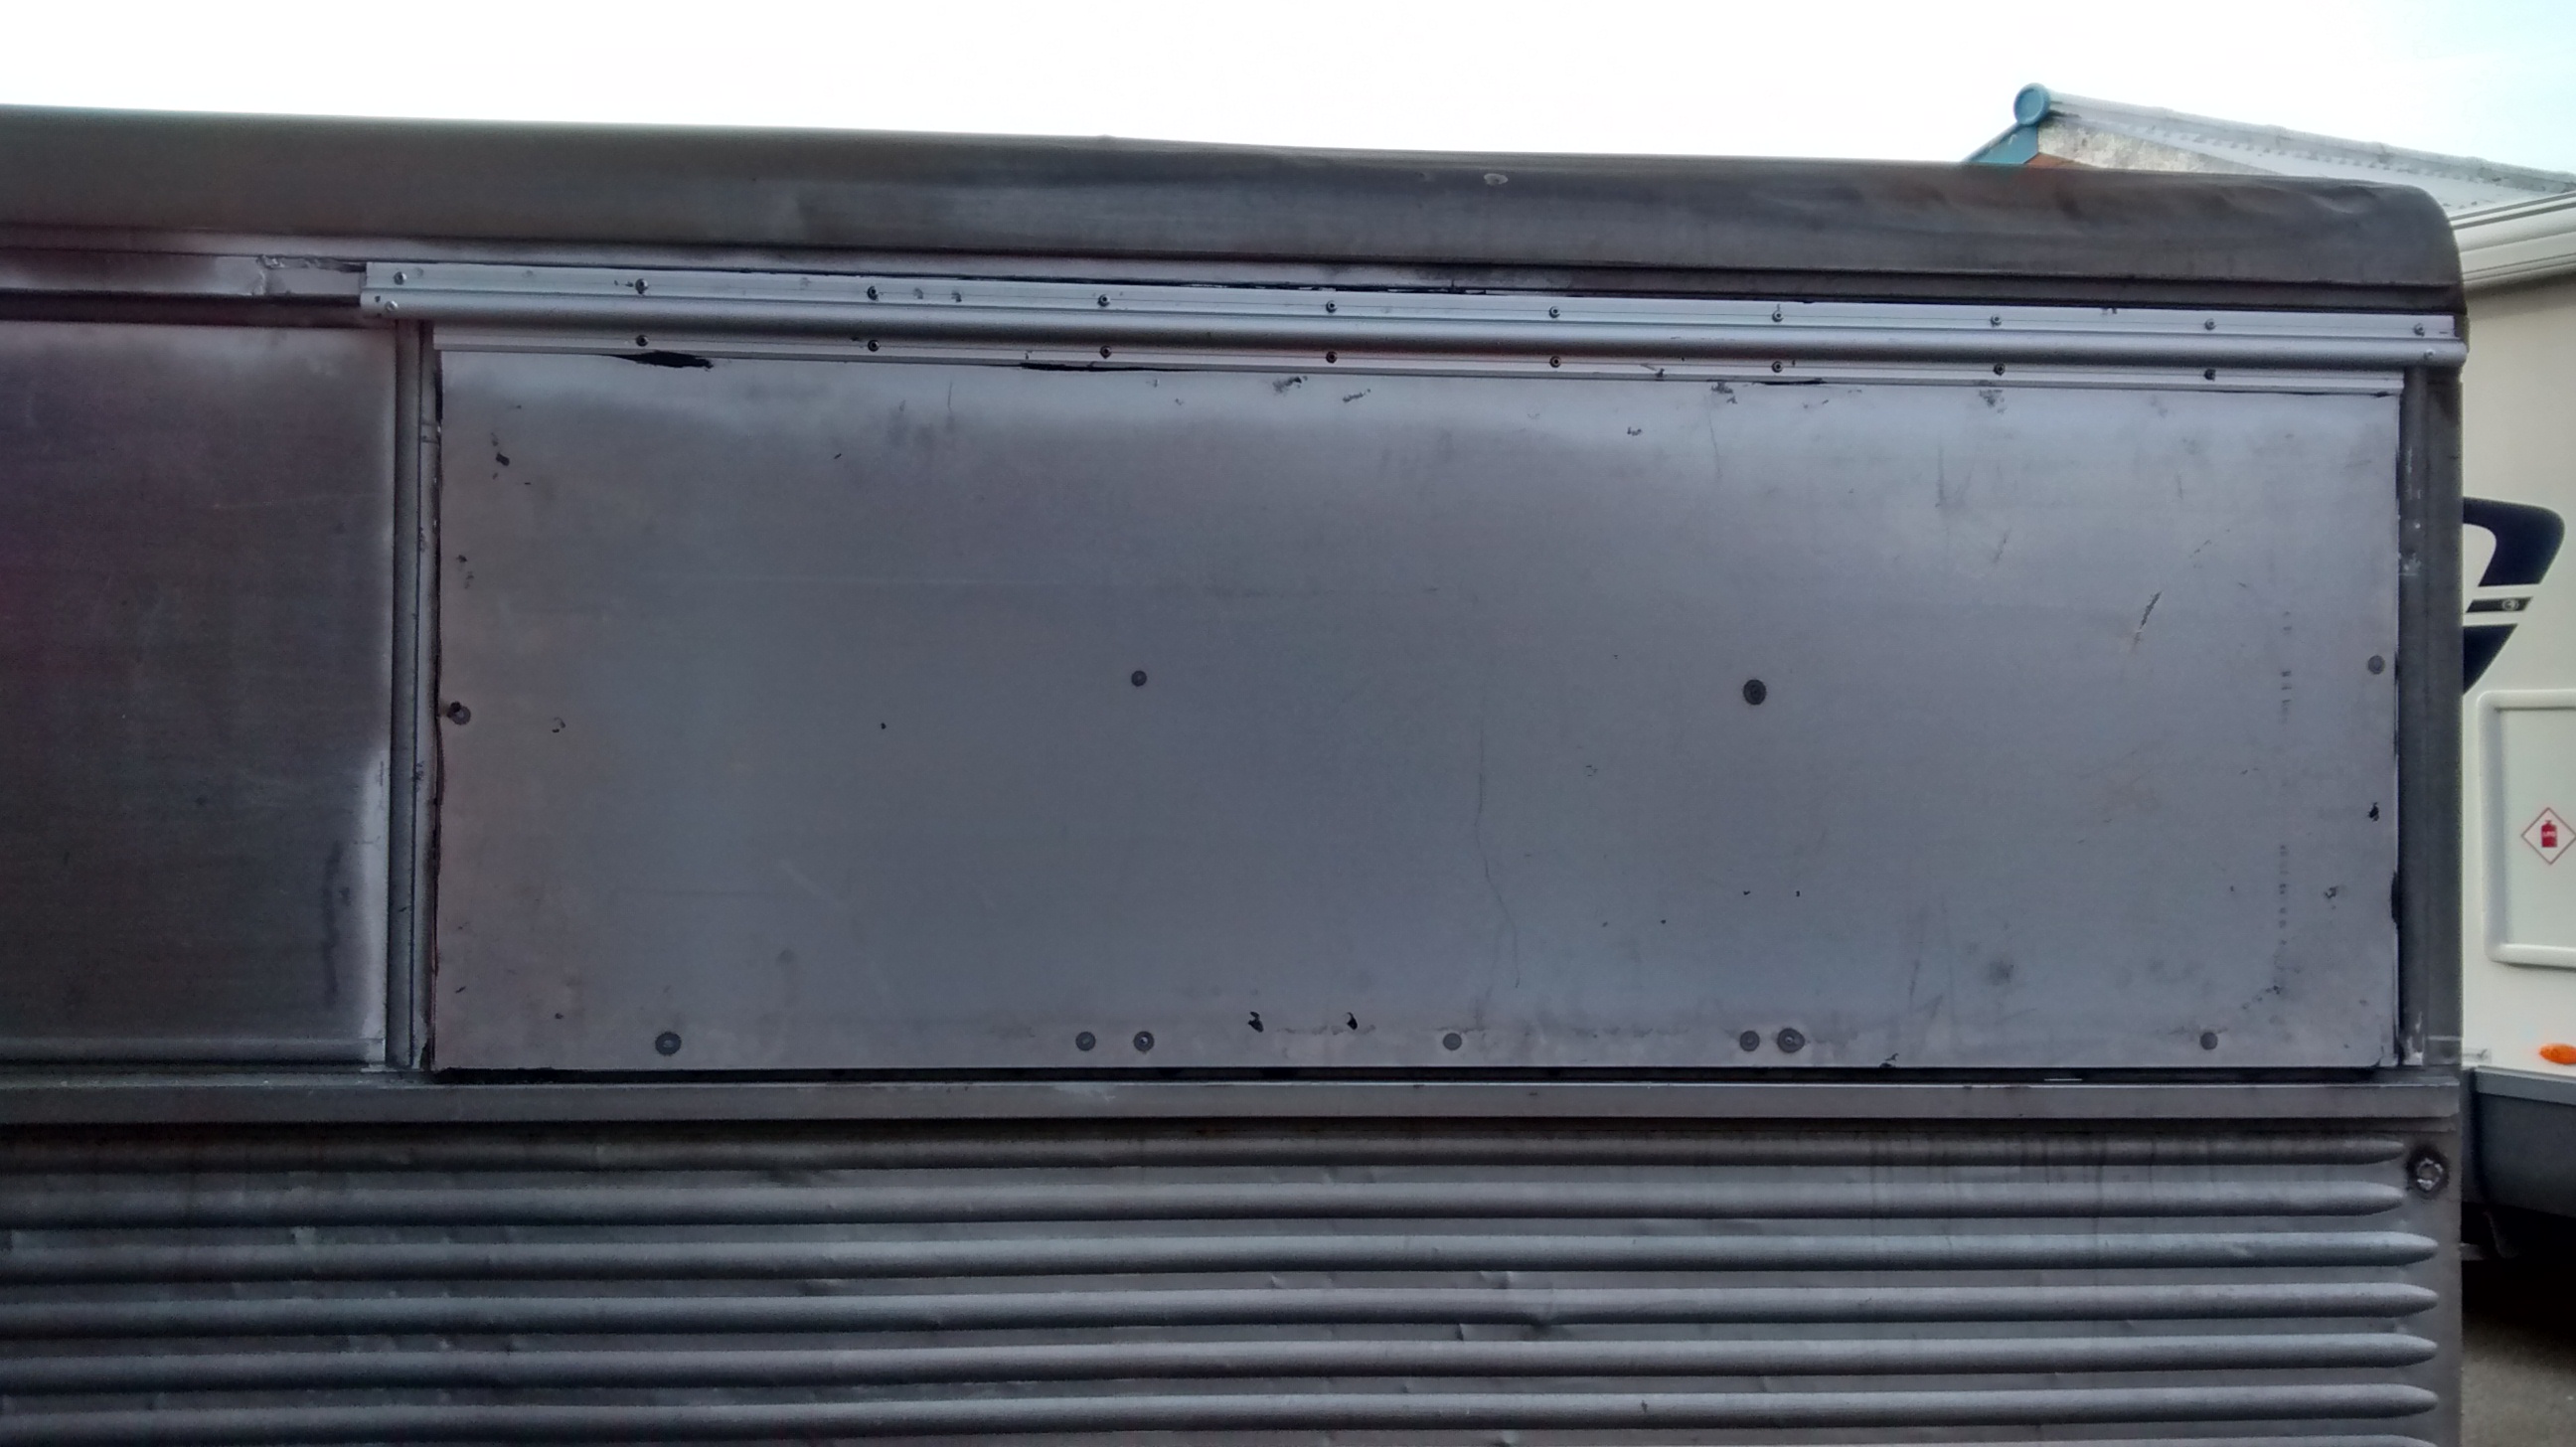
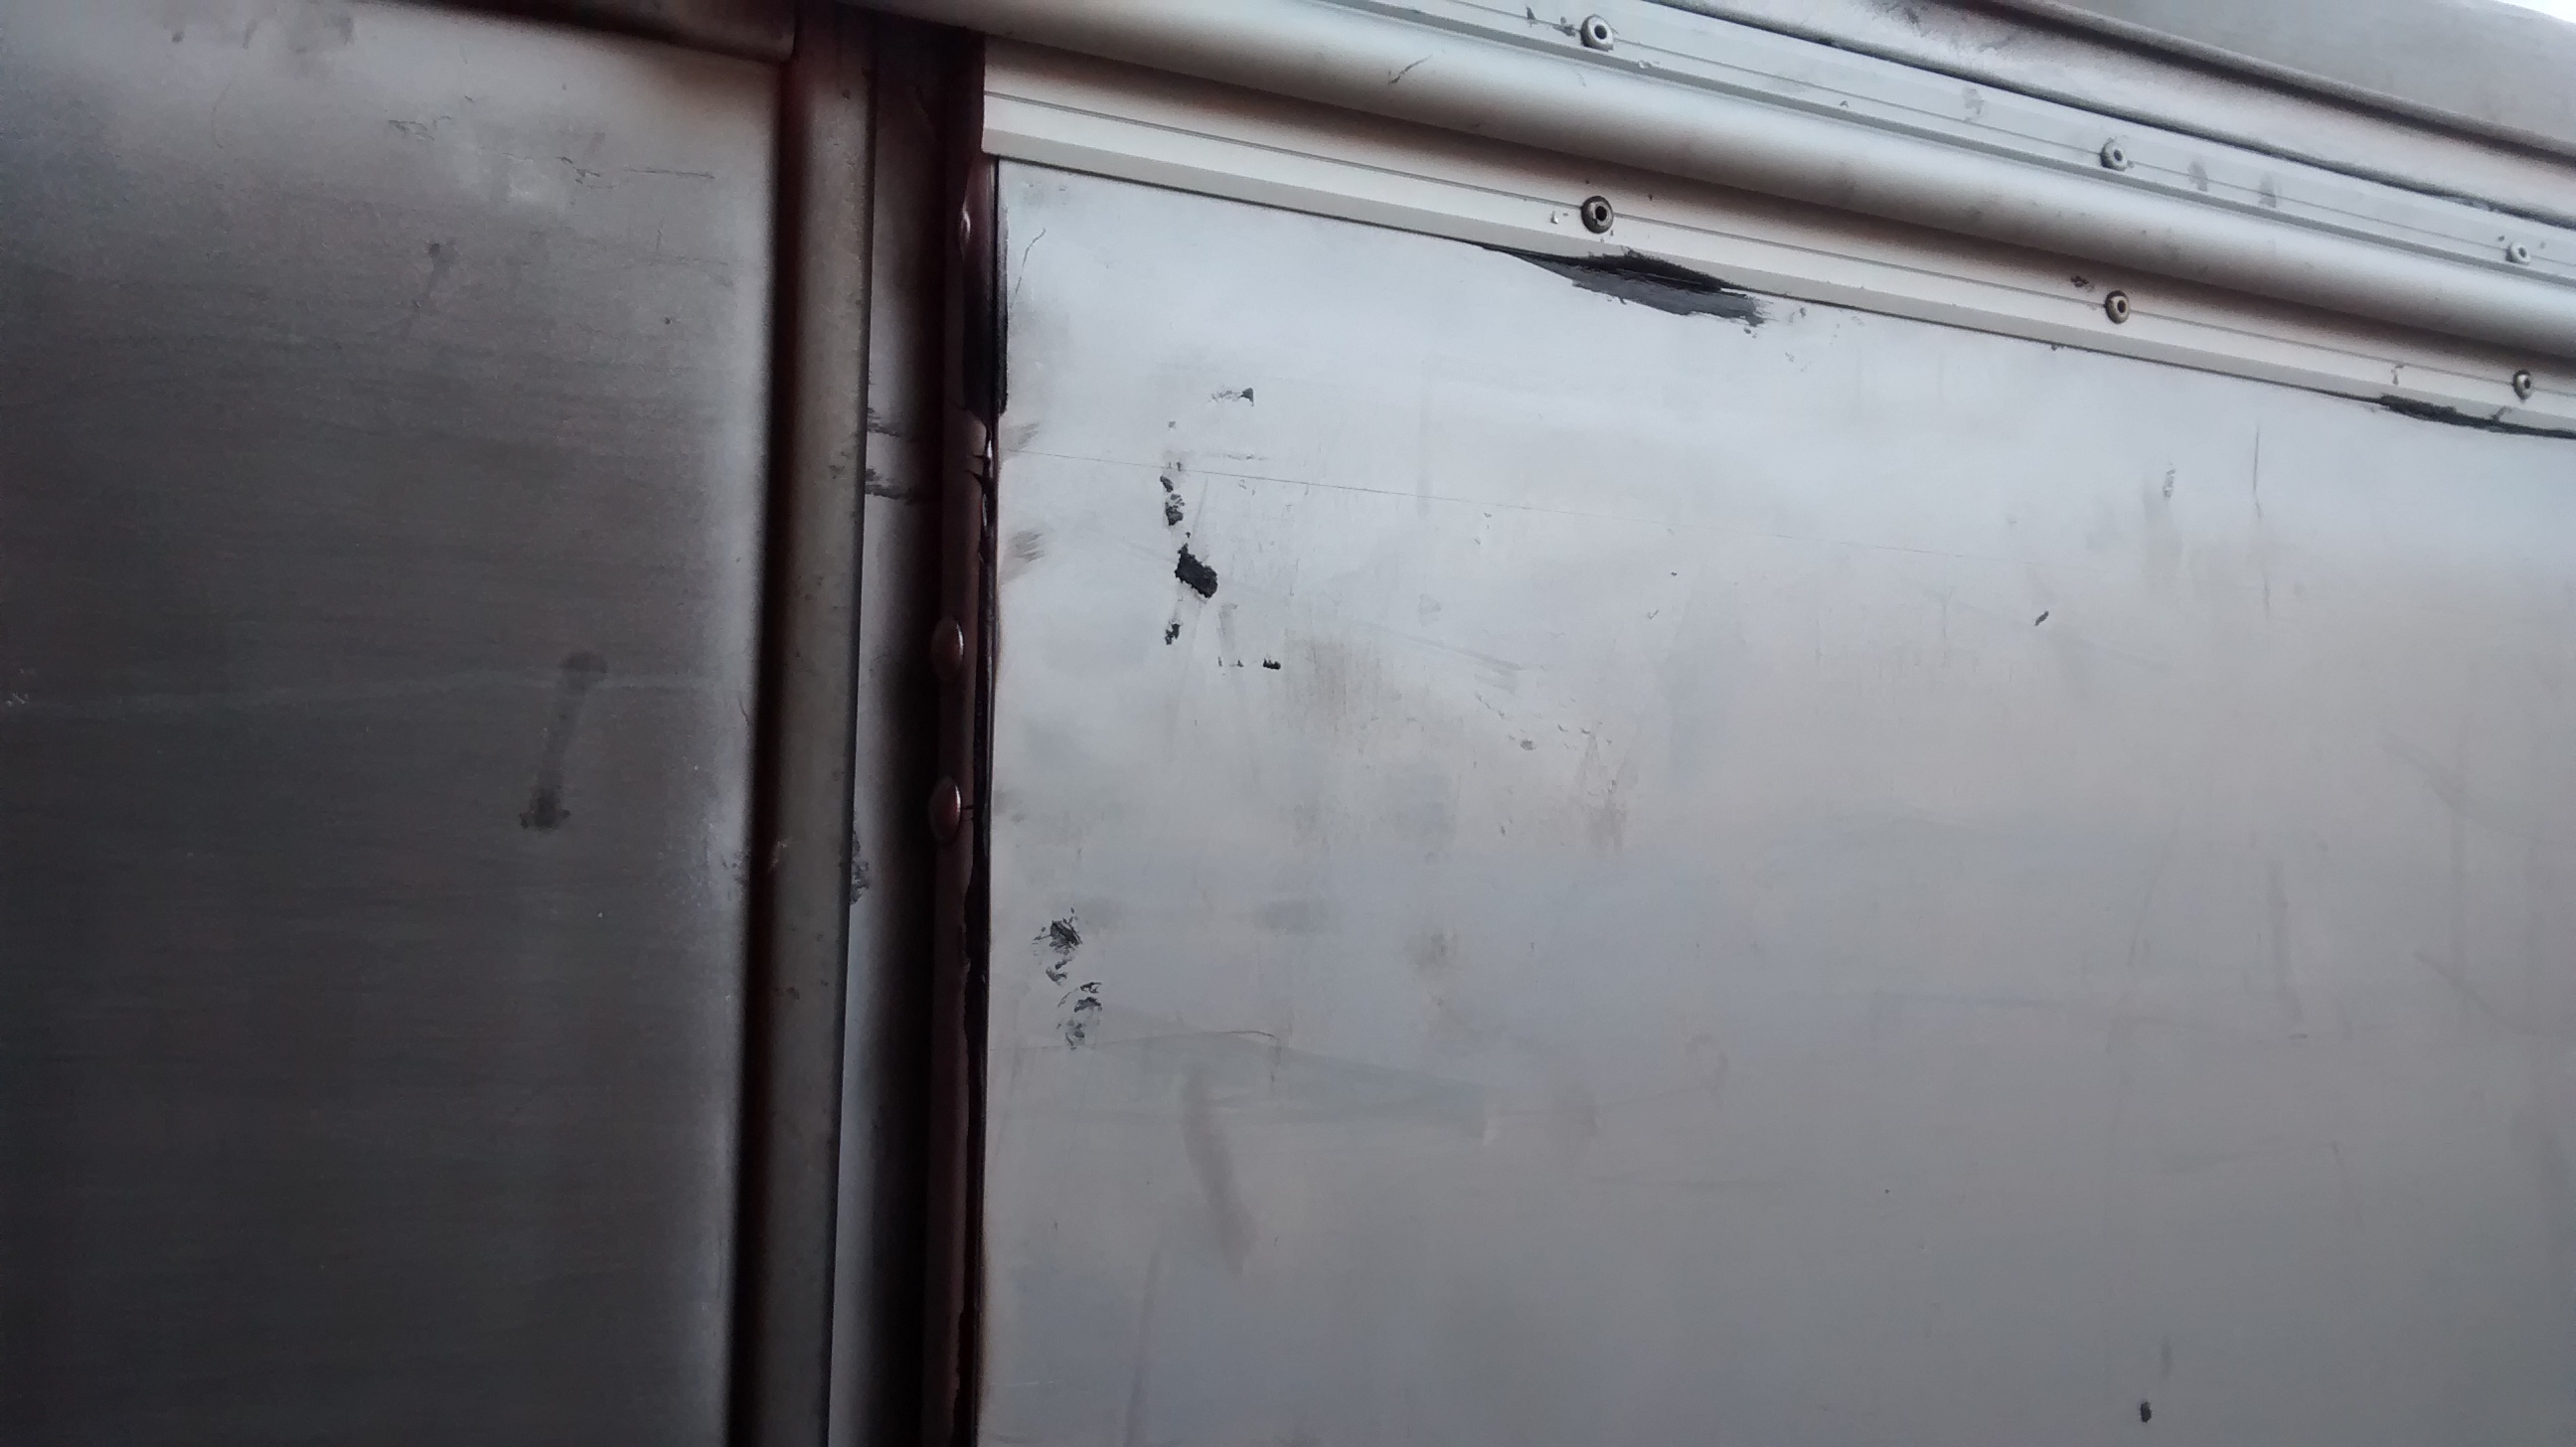
Notice in the photo below a piece of the panel trim (cut out from the top) and fitted just in front of the hatch? This helps finish it but also pulls the panel down onto a supporting square reinforcing tube on the inside making it quieter. It also helps direct water away from the 'Hatch to Side' joint when driving at speed.
Otherwise water gets blown into the gap with such force it is often enough to compress a Rubber Seal allowing water past. This tiny trim acts as a Spoiler deflecting the air reducing the pressure on the seal.
The picture below shows the attachment of our Struts to the Hatch. We think these look much more period than the modern Gas struts. Obviously the holes drilled in the Hatch frame weaken it, but for a normal sized hatch it is perfectly strong. If you increase the size of the Hatch by making it deeper and/or wider you would need to add bracing around the bolts holes. We weld a 130mm length section of 20mm box to the lower part of the frame and drill this, rather than the frame itself. It also gives a little more height to the hatch opening.

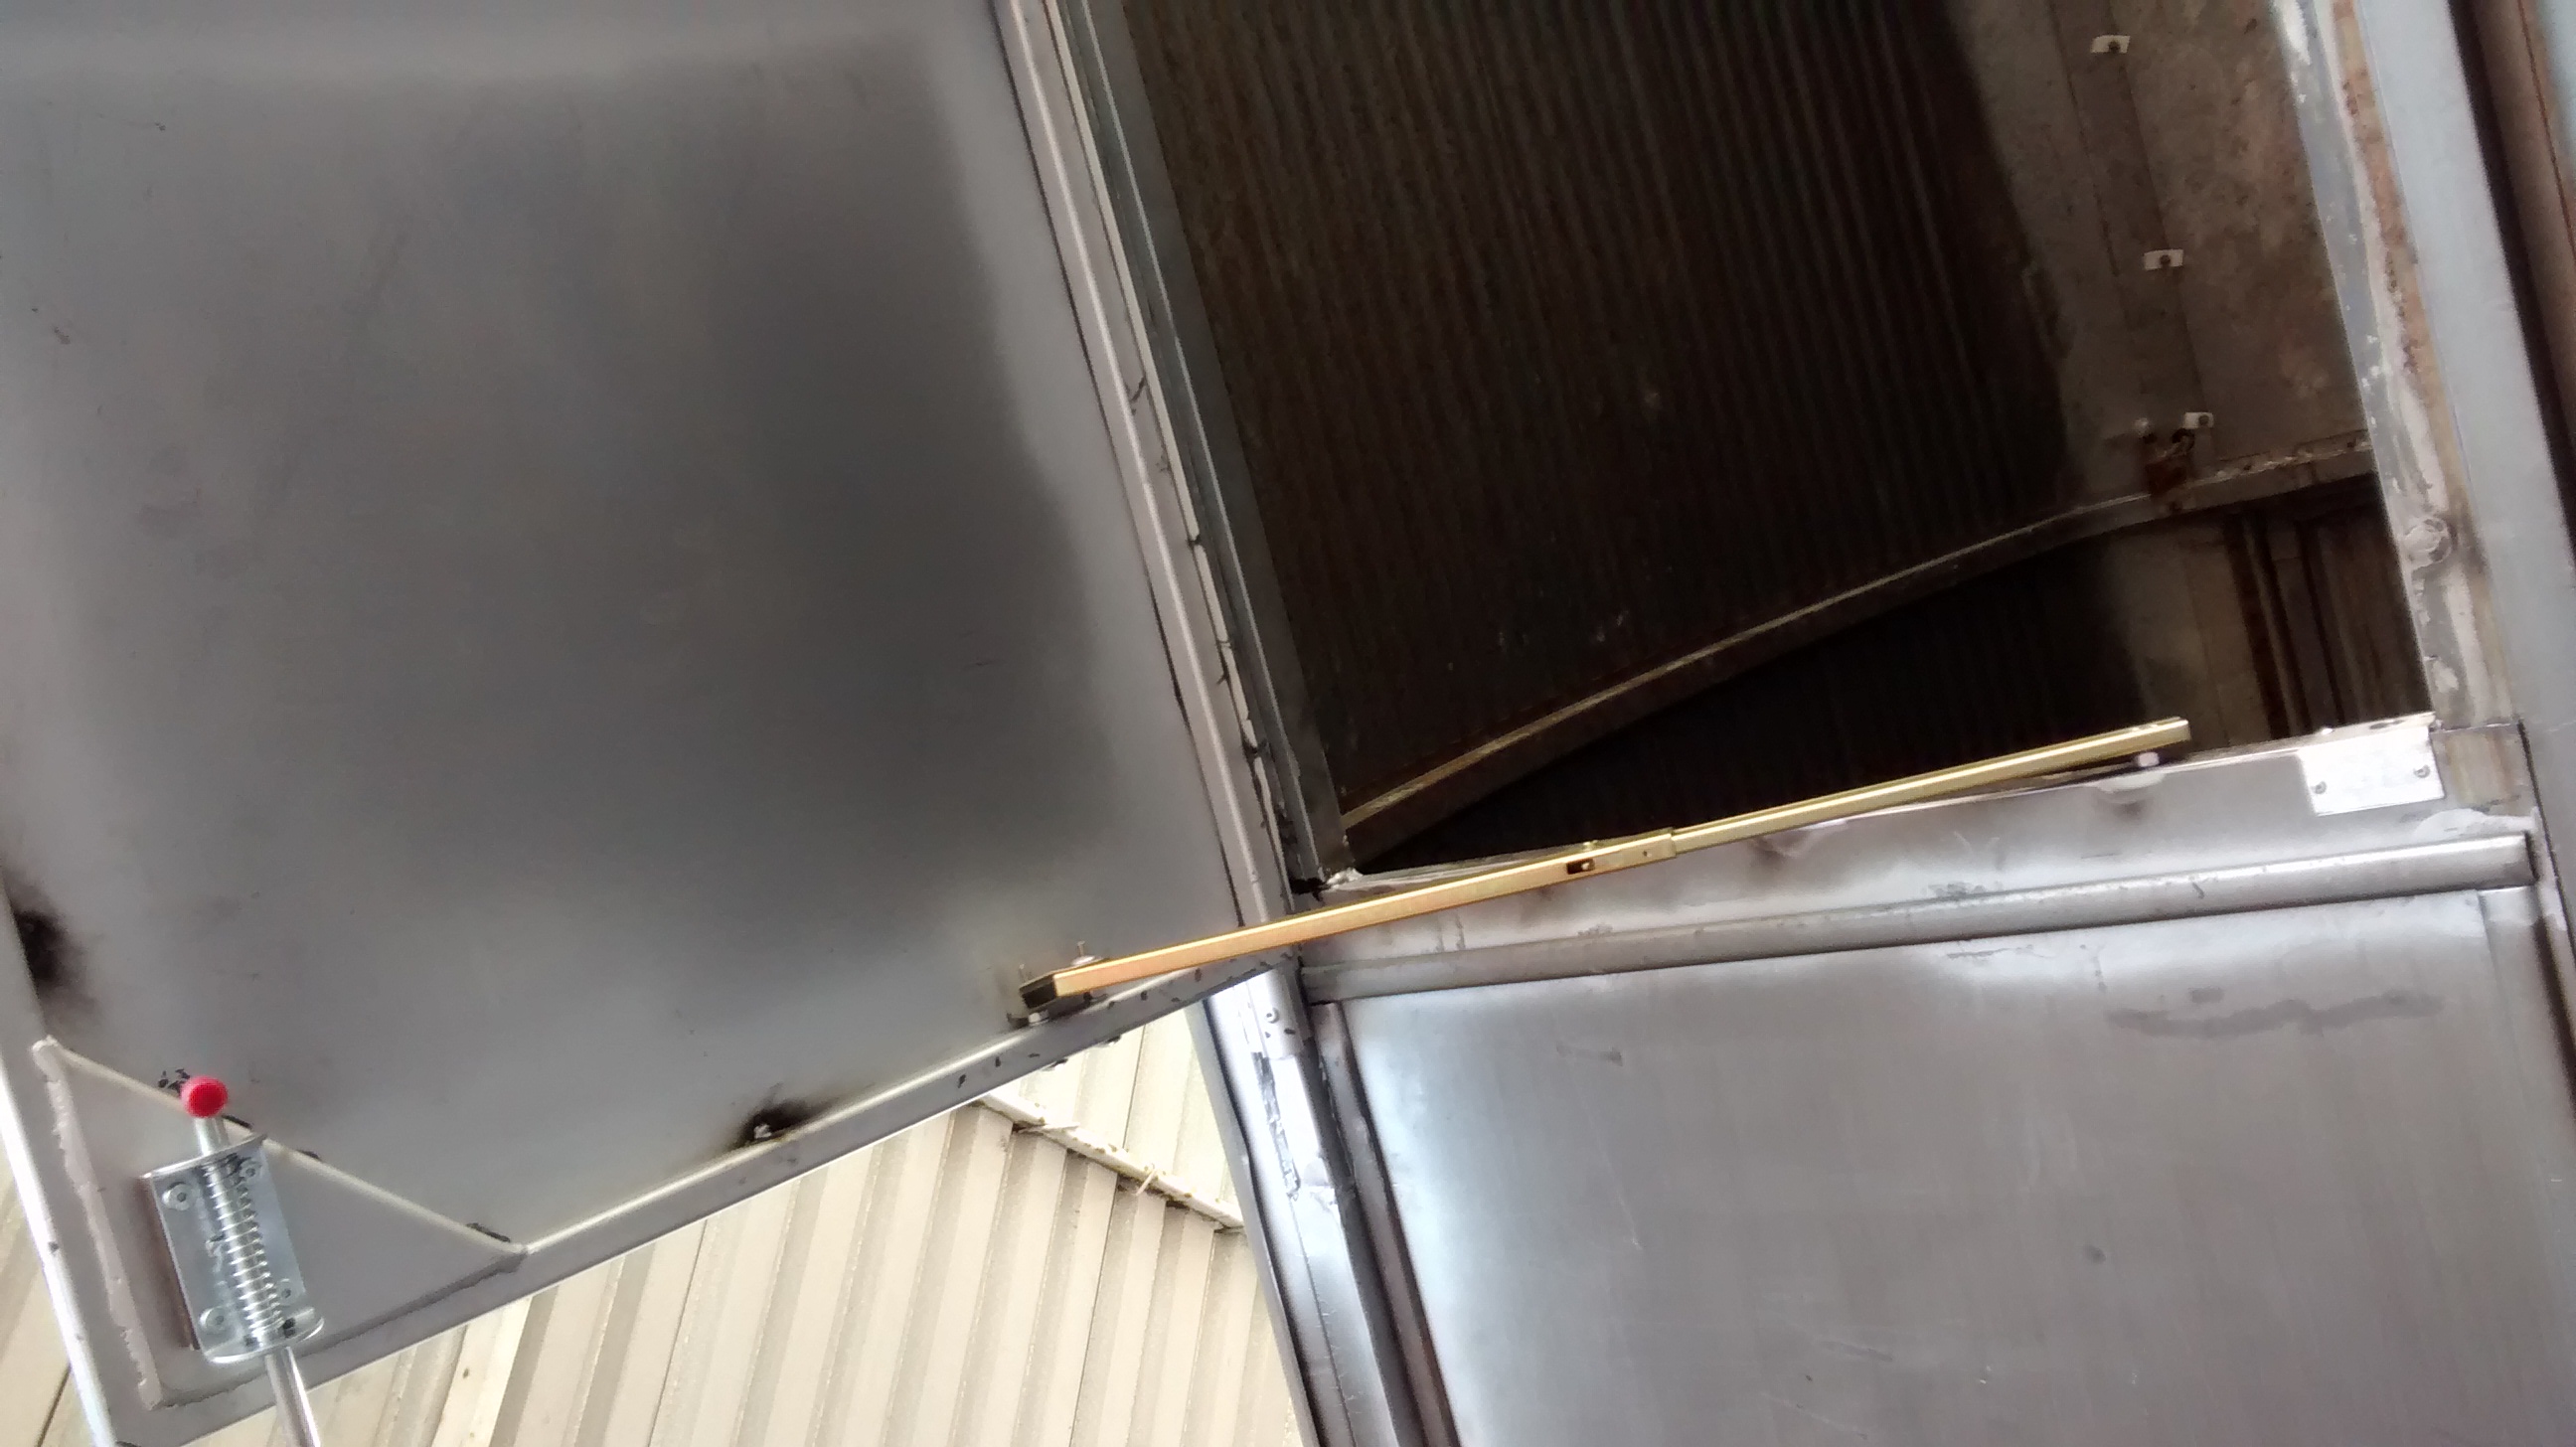
The above picture shows the triangular hatch reinforcement plate that also acts as Sprung Bolt mount. Note how the triangle sits on top of the frame to give clearance to the bolt which has to slide into a recess of the van.
See also the riveted oblong Stainless steel 'striker plate', top right of photo, that protects the paint if the hatch is closed with the Bolt extended. This should be drilled and fitted, then when you are happy with the position removed prior to painting. The picture also shows how the other end of the Strut mounts on the van. You must re-inforce the inside of the van opening with decent size square tube, the strut then mounts on to this.
The burnt areas on the photo below clearly show where the skin is tack welded onto the frame. Don't over do it as distortion can be an issue.
When buying a van don't assume that because it has been done by a big professional restorer it has been done correctly. In January 2015 we took in a van (restored by one of the biggest UK companies just 6 months previously) to fit one of our rebuilt engines. The hatch was a massisve 2.9m x 1m, really big and heavy. Despite the Hatch size it was attached by just 3 House Style hinges. The owner asked us to replace the hinges with a continuous Waterproof one as water continually ran on to the Counter. Amazingly each of the 3 hinges was attached to the van by a SINGLE 10mm BOLT.
.
It doesn't follow that just because you have seen standard vans with a big hatch that they are not suffering structural issues. We have driven vans where the strength has been compromised and they twist, shake and rattle so badly when driven that they are far from pleasant.
Cracks in the body are becoming more common.
See below for alternative ways of creating a Hatch, with our comments on Good/Bad points.
This Picture below is of the Waterproof hinge installed where both surfaces are level (please note that none of these pictures below are of vans we have done, they are from Vans were we have done Engine work, not Bodywork).
On the van below the Van side upper Hinge has been cut down to about half it's front mounting surface and bonded on below the 'Top Hat'. The 90 degree lower surface does protrude into the van and is secured underneath a 25mm square reinforcing tube that has been added. The rivets go up into the lower part of the Hinge and through into the 25mm reinforcing tube. While this is quite neat, with half it's mounting surface area gone, it won't be strong.
The hinge face mounted on the Hatch only has a front surface, the second 90 degree edge being cut off. It is also just bonded on.
Again a lot of strength has been lost and this may break off within a short space of time. The designer has considered only the weight of the Hatch, and attached his hinge accordingly, not the loading of the wind when open which can be 6 times the hatch weight.
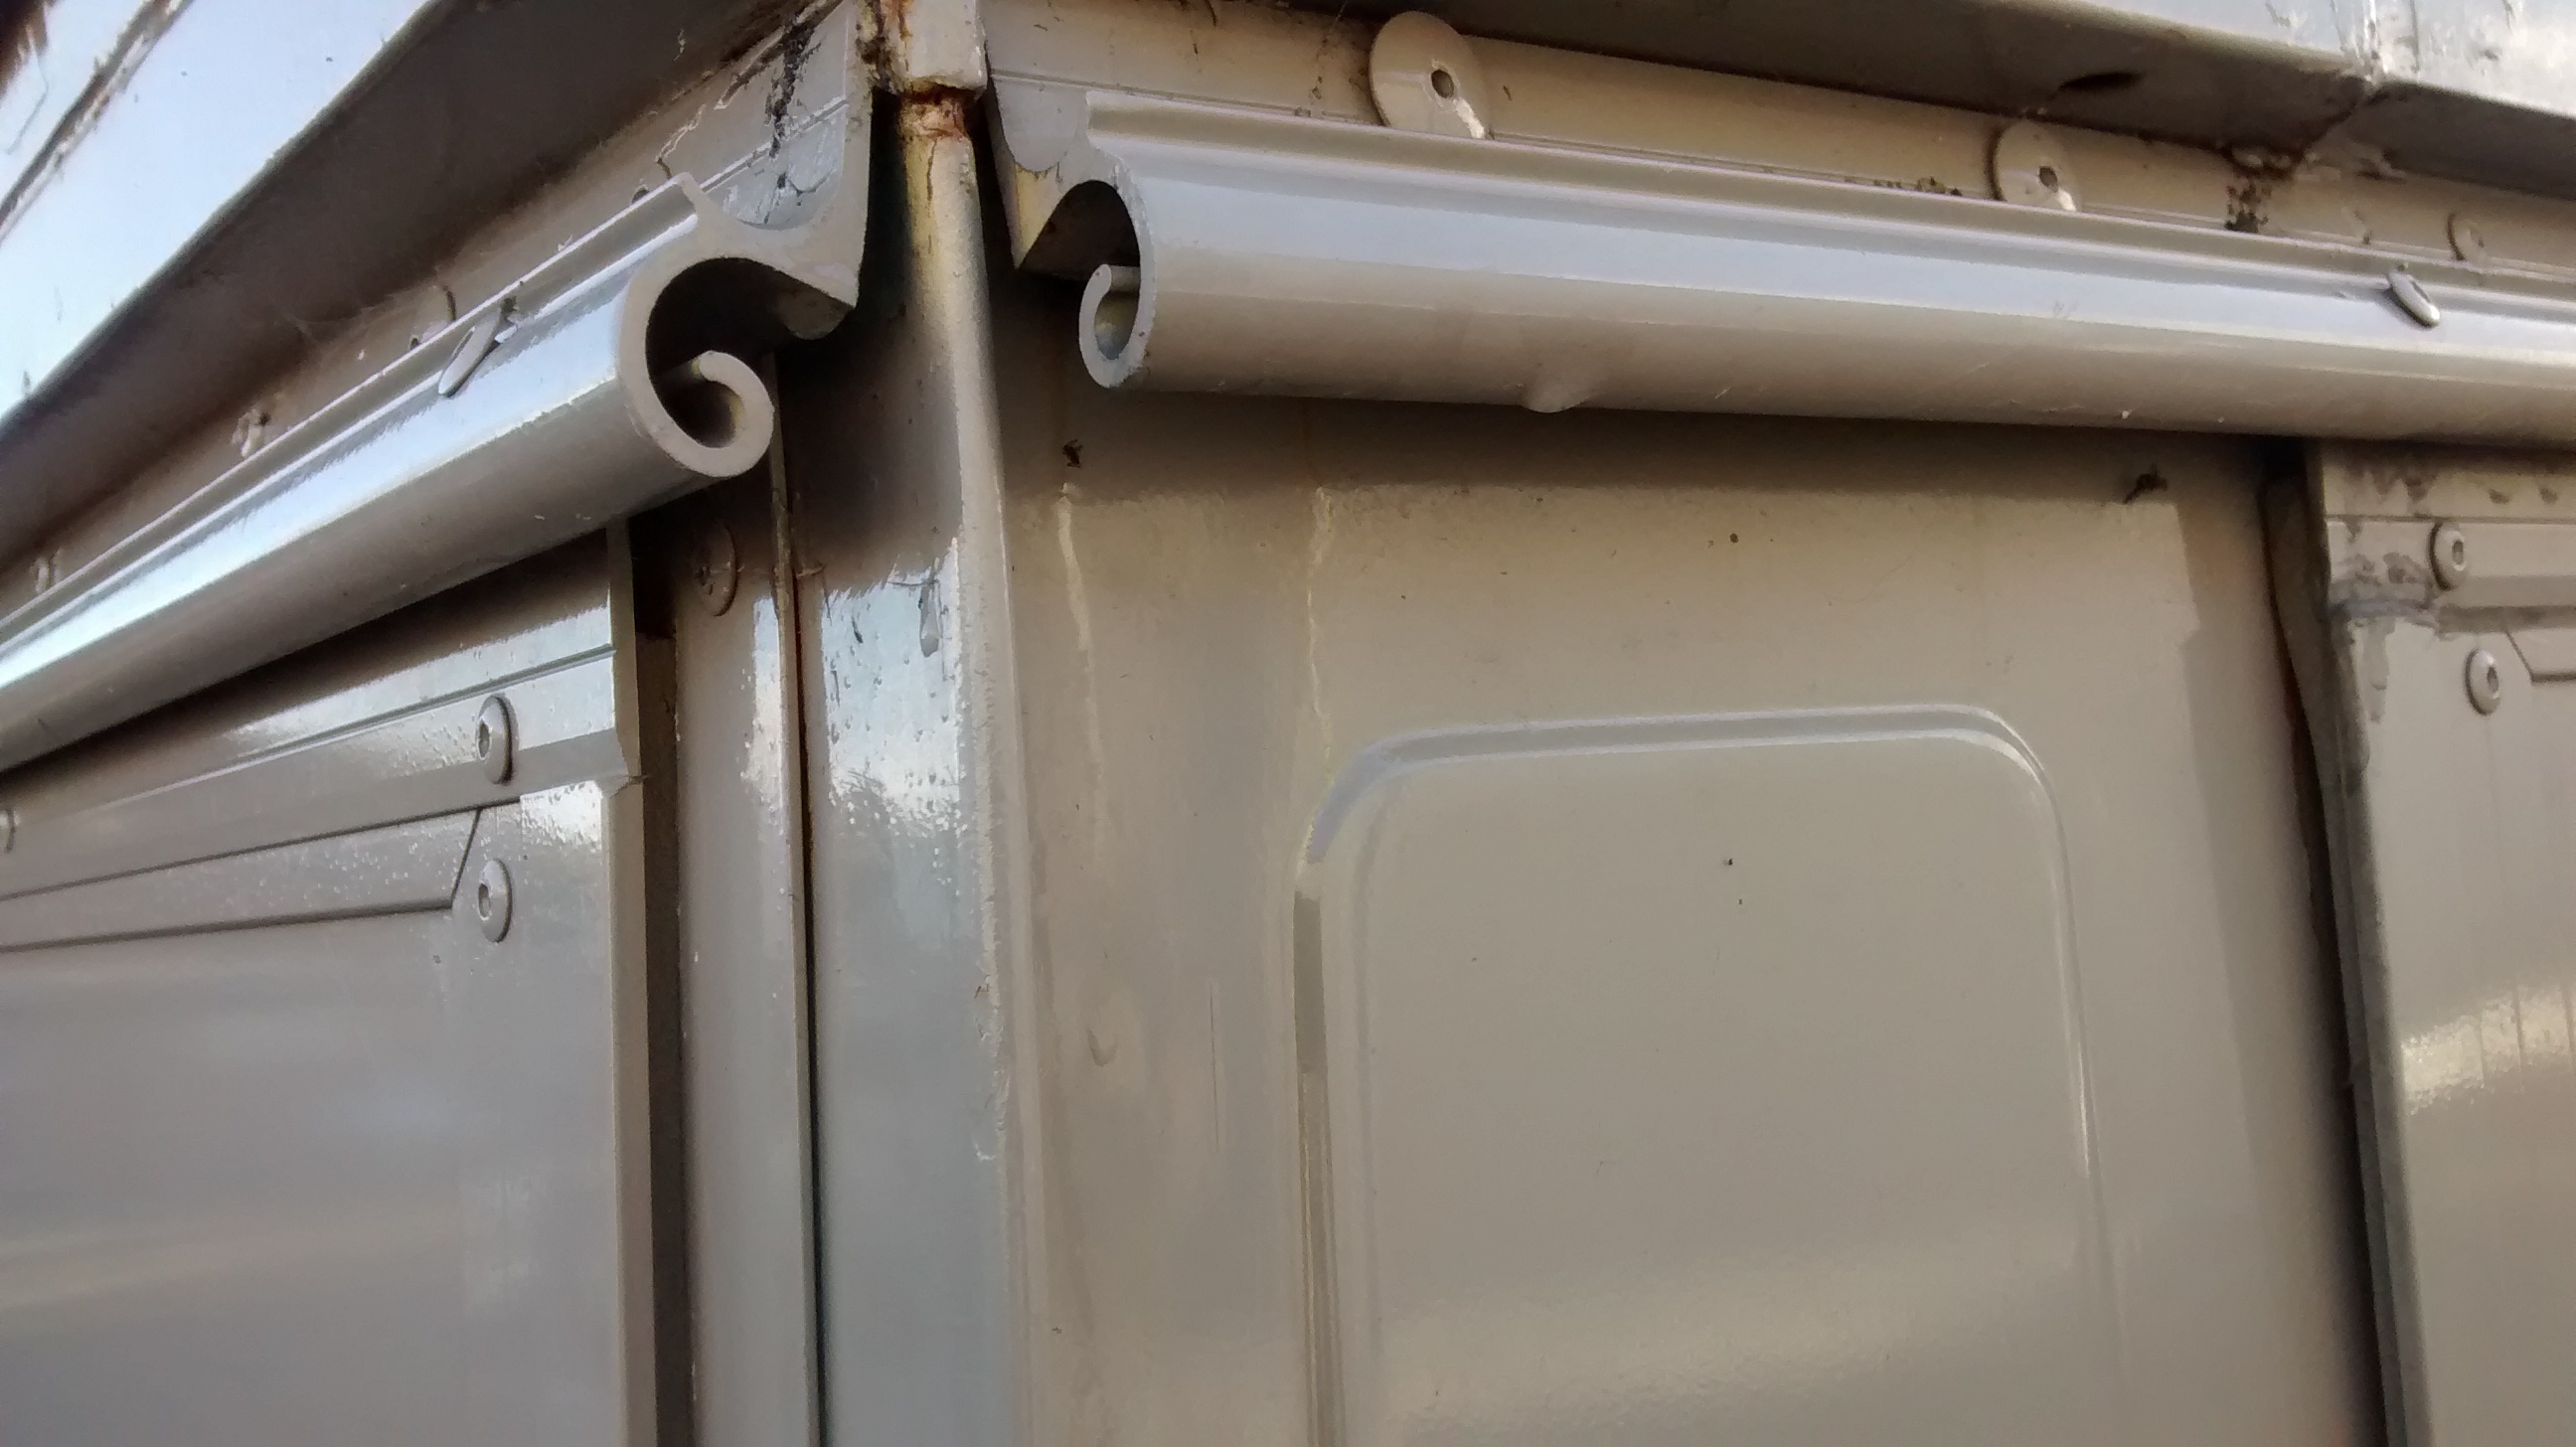
On the Hatch below, the Van side Hinge is mounted on the 'Top Hat' just below the roof gutter and a similar sized square tube welded to the top of catering Hatch which has a square tube added to the outside. Both surfaces of the Hinge are the same height. Note the Stainless Steel rivets, not Aluminium. Additional reinforcing square tube is welded inside the van to strengthen the Top Hat, which remember is only 0.7mm thick bent sheet.
A second steel square tube is also welded on the inner edge of the Hatch.
This is very strong and a good way of mounting the hinge on a Beast Carrier
See how the Van mounted hinge goes beyond that of the Hatch hinge to act as a secondary gutter reducing rain run off into the van? ideally they should go beyond the hatch side by about 100mm.
If you look closely you will see the Hinge 'gutter' is upside down. The hinge has a top side with small gutter and a lower side which attaches to the Hatch. The Hinge would normally be mounted so that the gutter handles any rain running off the van roof. However, Some vans have their Hatch with a very high opening, up high (over 45 degress) so any rain falling on the hatch gets channelled back towards the hinge. In these situations mounting the hinge upside down helps divert the water to the sides, but it does require careful design.
The picture below shows a good long overlap beyond the Rear Door to the right and a short overlap on the Hatch on the left.
However note that the Hinge has not been mounted on the 'Top hat square Tube' but on the Flat panel just below the Top hat. There is no strength in the Van side at this point. Note also the large fixings on the Van but only soft Aluminium rivets on the Hatch/Door.
They could have welded a 25mm reinforcing square tube on the inner side of both the Hatch and the Van which would have made a big difference.
When the side of a van is cut out to make a Hatch you are affecting the structure of the van, you should put that strength back. Especially so if the van is showing signs of corrosion as it is likley that all the structural steel will have corroded as well. It could be half the thickness (and strength) of when it left the factory. These vans were never designed to carry the massive amount of Catering equipment that gets installed, let alone all that Water, Gas and Stock. Throw in many kilos of Stainless Steel and you have a van that would barely be strong enough without a Hatch, when it was new. One H van owner read our pages and had the Van weighed. they were astonished that it was 2650 kg without Water, Driver, Passenger, Stock, Milk, Gas, etc. They were convinced they had a light weight fitted Interior.
The smaller the opening the greater the vans strength.
Notice in the photo above how it stands out from the van body by about 6mm to allow room for a decent rubber seal?
The van above was yet to be media blasted to strip off the old paint which was cracking badly, typical of a Southern France van, so the Hatch was going through a test fit prior to being removed and stored safe while the paint stripping took place.
It will then be fitted just before the re-Paint, with Coach bolts added for greater strength as well as the Stainless Rivets.
The hinge 'End Stops' are an offcut of the inner hinge slid into the end and then drilled and rivetted.
Notice in the photo below how a piece of the panel trim (cut out from the top) and fitted it just in front of the hatch. This helps finish it but also pulls the panel down onto a supporting square reinforcing tube on the inside making it quieter. It also helps direct water away from the 'Hatch to Side' joint when driving at speed. Otherwise water gets blown with some force into the gap, even when a rubber seal is fitted. This tiny trim acts as a Spoiler deflecting the air reducing the pressure on the seal.
