Citroen HY Progress

                                                                             This page documents the progress of a Citroen HY van


 15th June 2014 - Waiting for me to find time to update. 

 5th March 2014 - The van is now in the Paint shop to be painted Red and Cream.


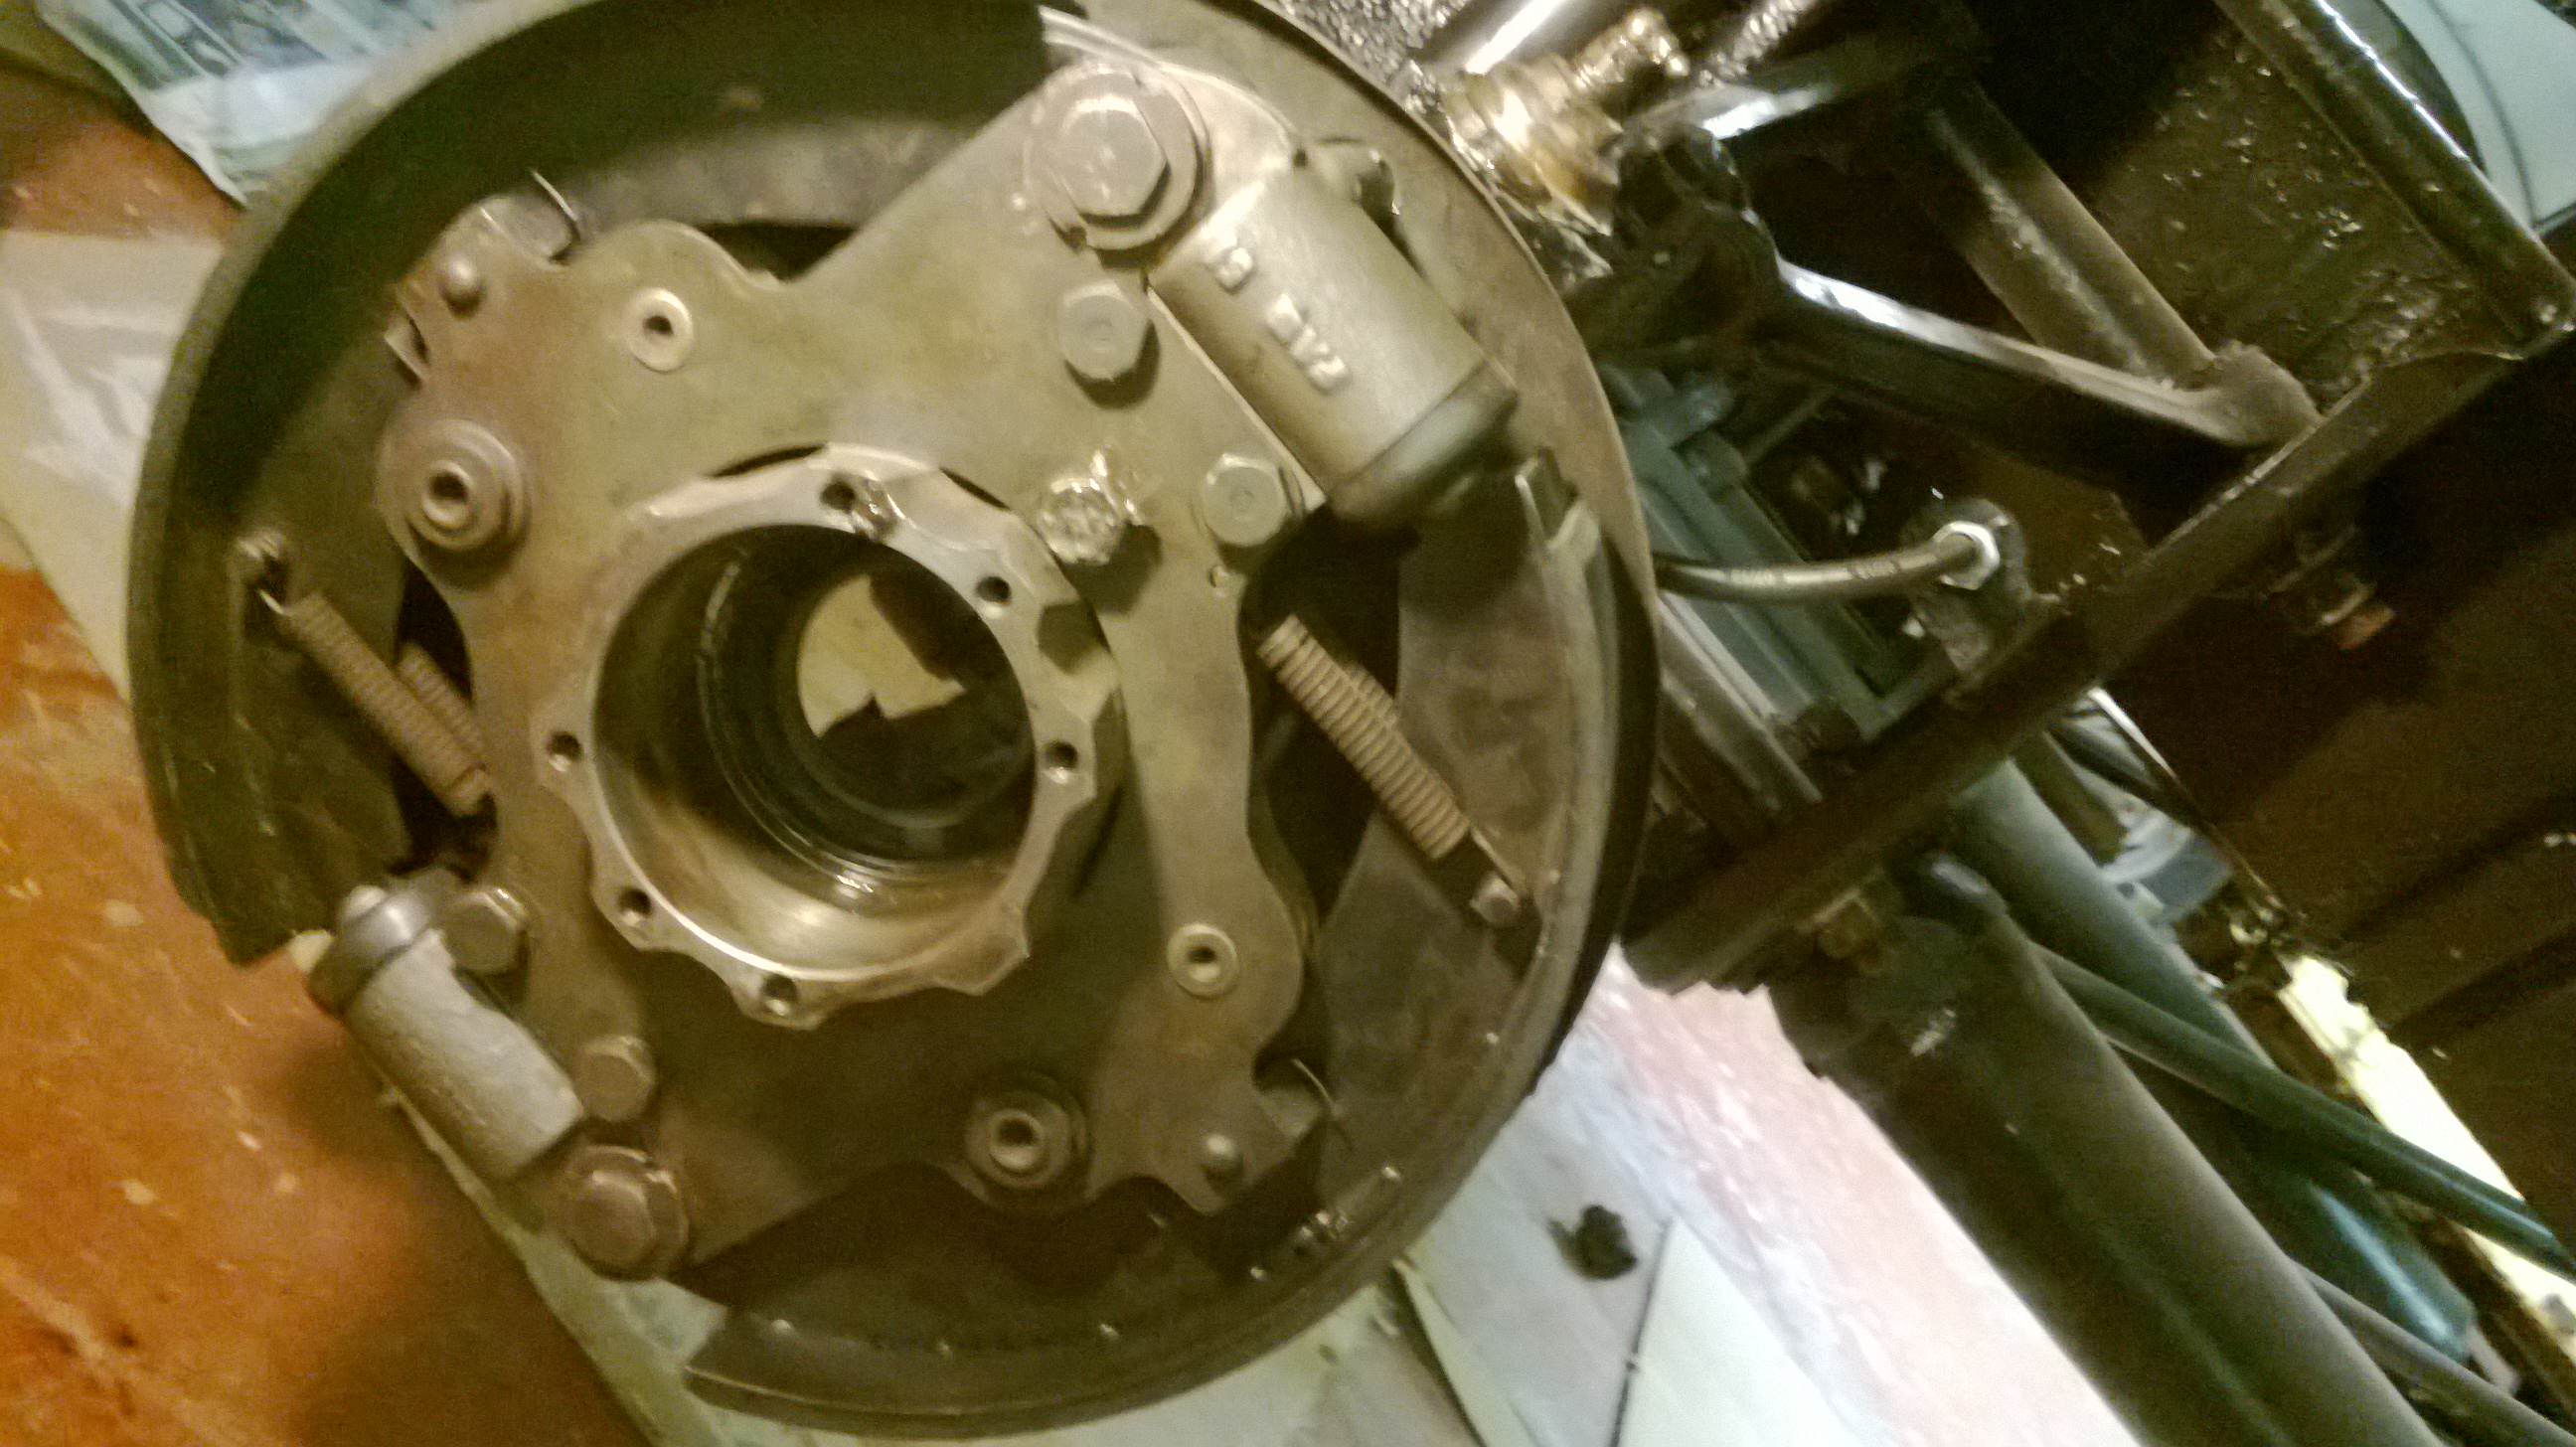
 15th January 2014 - The Rear Brakes are now done with new Brake Flexi hoses fitted to new Copper Brake Pipes. 

The Urban Myth that H van Brakes have to be poor just isn't true, with our modified parts they can be really good.

We are fitting new Copper Brake pipes throughout and a new master Cylinder to match the rebuilt Slave Cylinders. We can supply a full set of Copper brake pipes and Flexi hoses. If you are not sure what you want just email us the length and size plus age of van and we will source it for you. High quality Flexi Hoses for the front at £25 each.

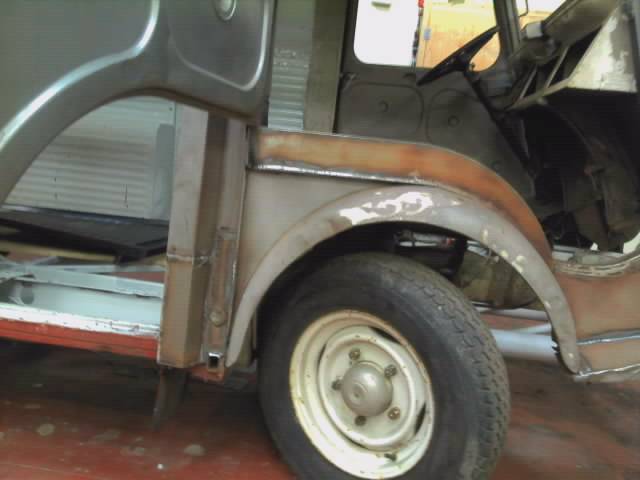
Note restored and painted Inner rear wheel Arch.


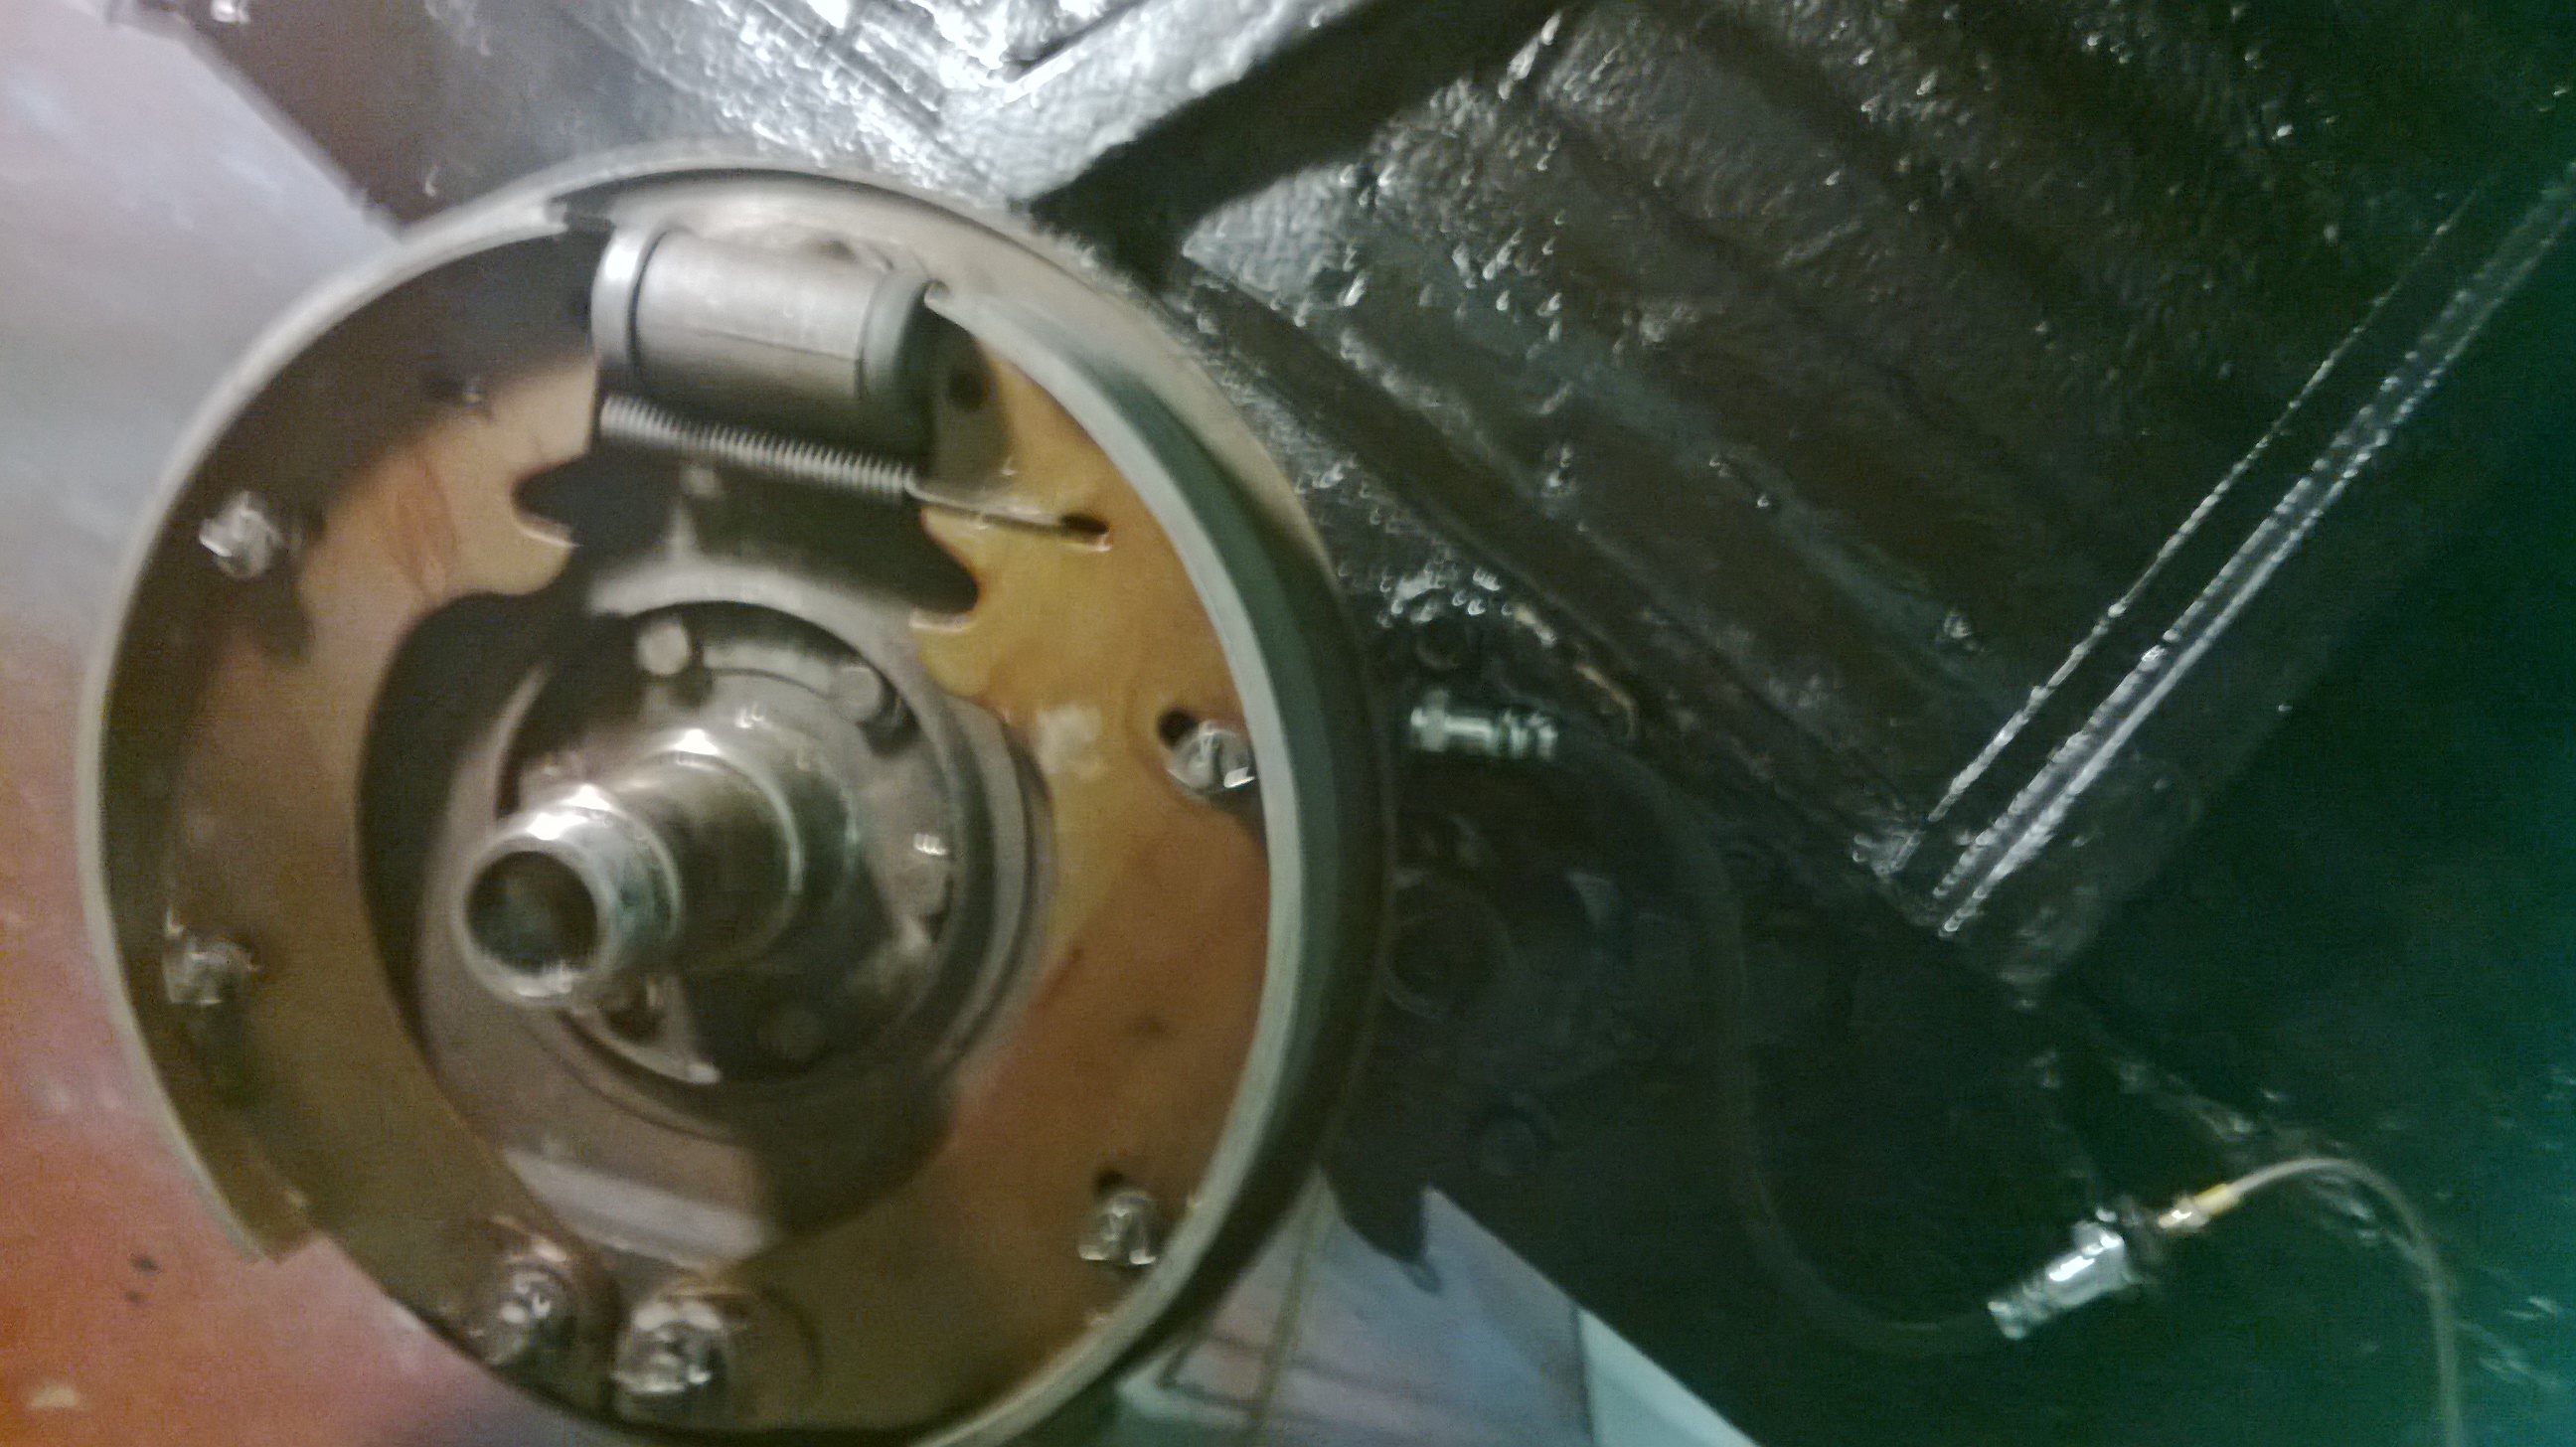
 8th January 2014 - The Front Brakes have been assembled using the relined Brake Shoes which have been fitted along with the l rebuilt Slave Cylinders and the new Flexi brake hoses, see photo : 

Read our Brakes article on the Technical page to see how to do it yourself and save a day and a half labour on each brake.   


 2nd January 2014 - Happy New Year!!.

We now have a modern 'bolt on' 70amp Alternator kit that has a built in regulator that removes the need for the unreliable Black Box Regulator. This Alternator kit will be fitted to this van as it will require a powerful Alternator for charging both the Starter Battery and the Catering Battery used for the Interior spot lights, etc. The H van Standard Alternator just isn't upto powering a H van headlights let alone a Catering Conversion.


The special production run of Titanium Socket head bolts that tie the Gearbox and Engine together has arrived. These bolts replace the strange and awkward Citroen items that rust easily and cost almost £3 each. .


Our modern Ford engine conversion is also ready!! Our mission is to make the H van a reliable, practical, everyday working Camper and Catering Van.


 22nd December 2013 - When working on a H van the chances are it will have Asbestos Brake Linings, please take all the necessary precations when working on these vans.

These brakes are very time consuming to set up, if it is done properly, to ensure the linings contact the drum at every point. 

We are hopeful that when the brakes are rebuilt and set up correctly that they will have braking effort more fitting for todays roads. 

The Driveshafts and Steering column have been rebuilt and the Engine/Transmission subframe re-installed. 


12th December 2013 - We have been so busy that finding time to update this has been hard but the front subframe is out.

You can see it has been stripped down, painted and is now partially reassembled. 


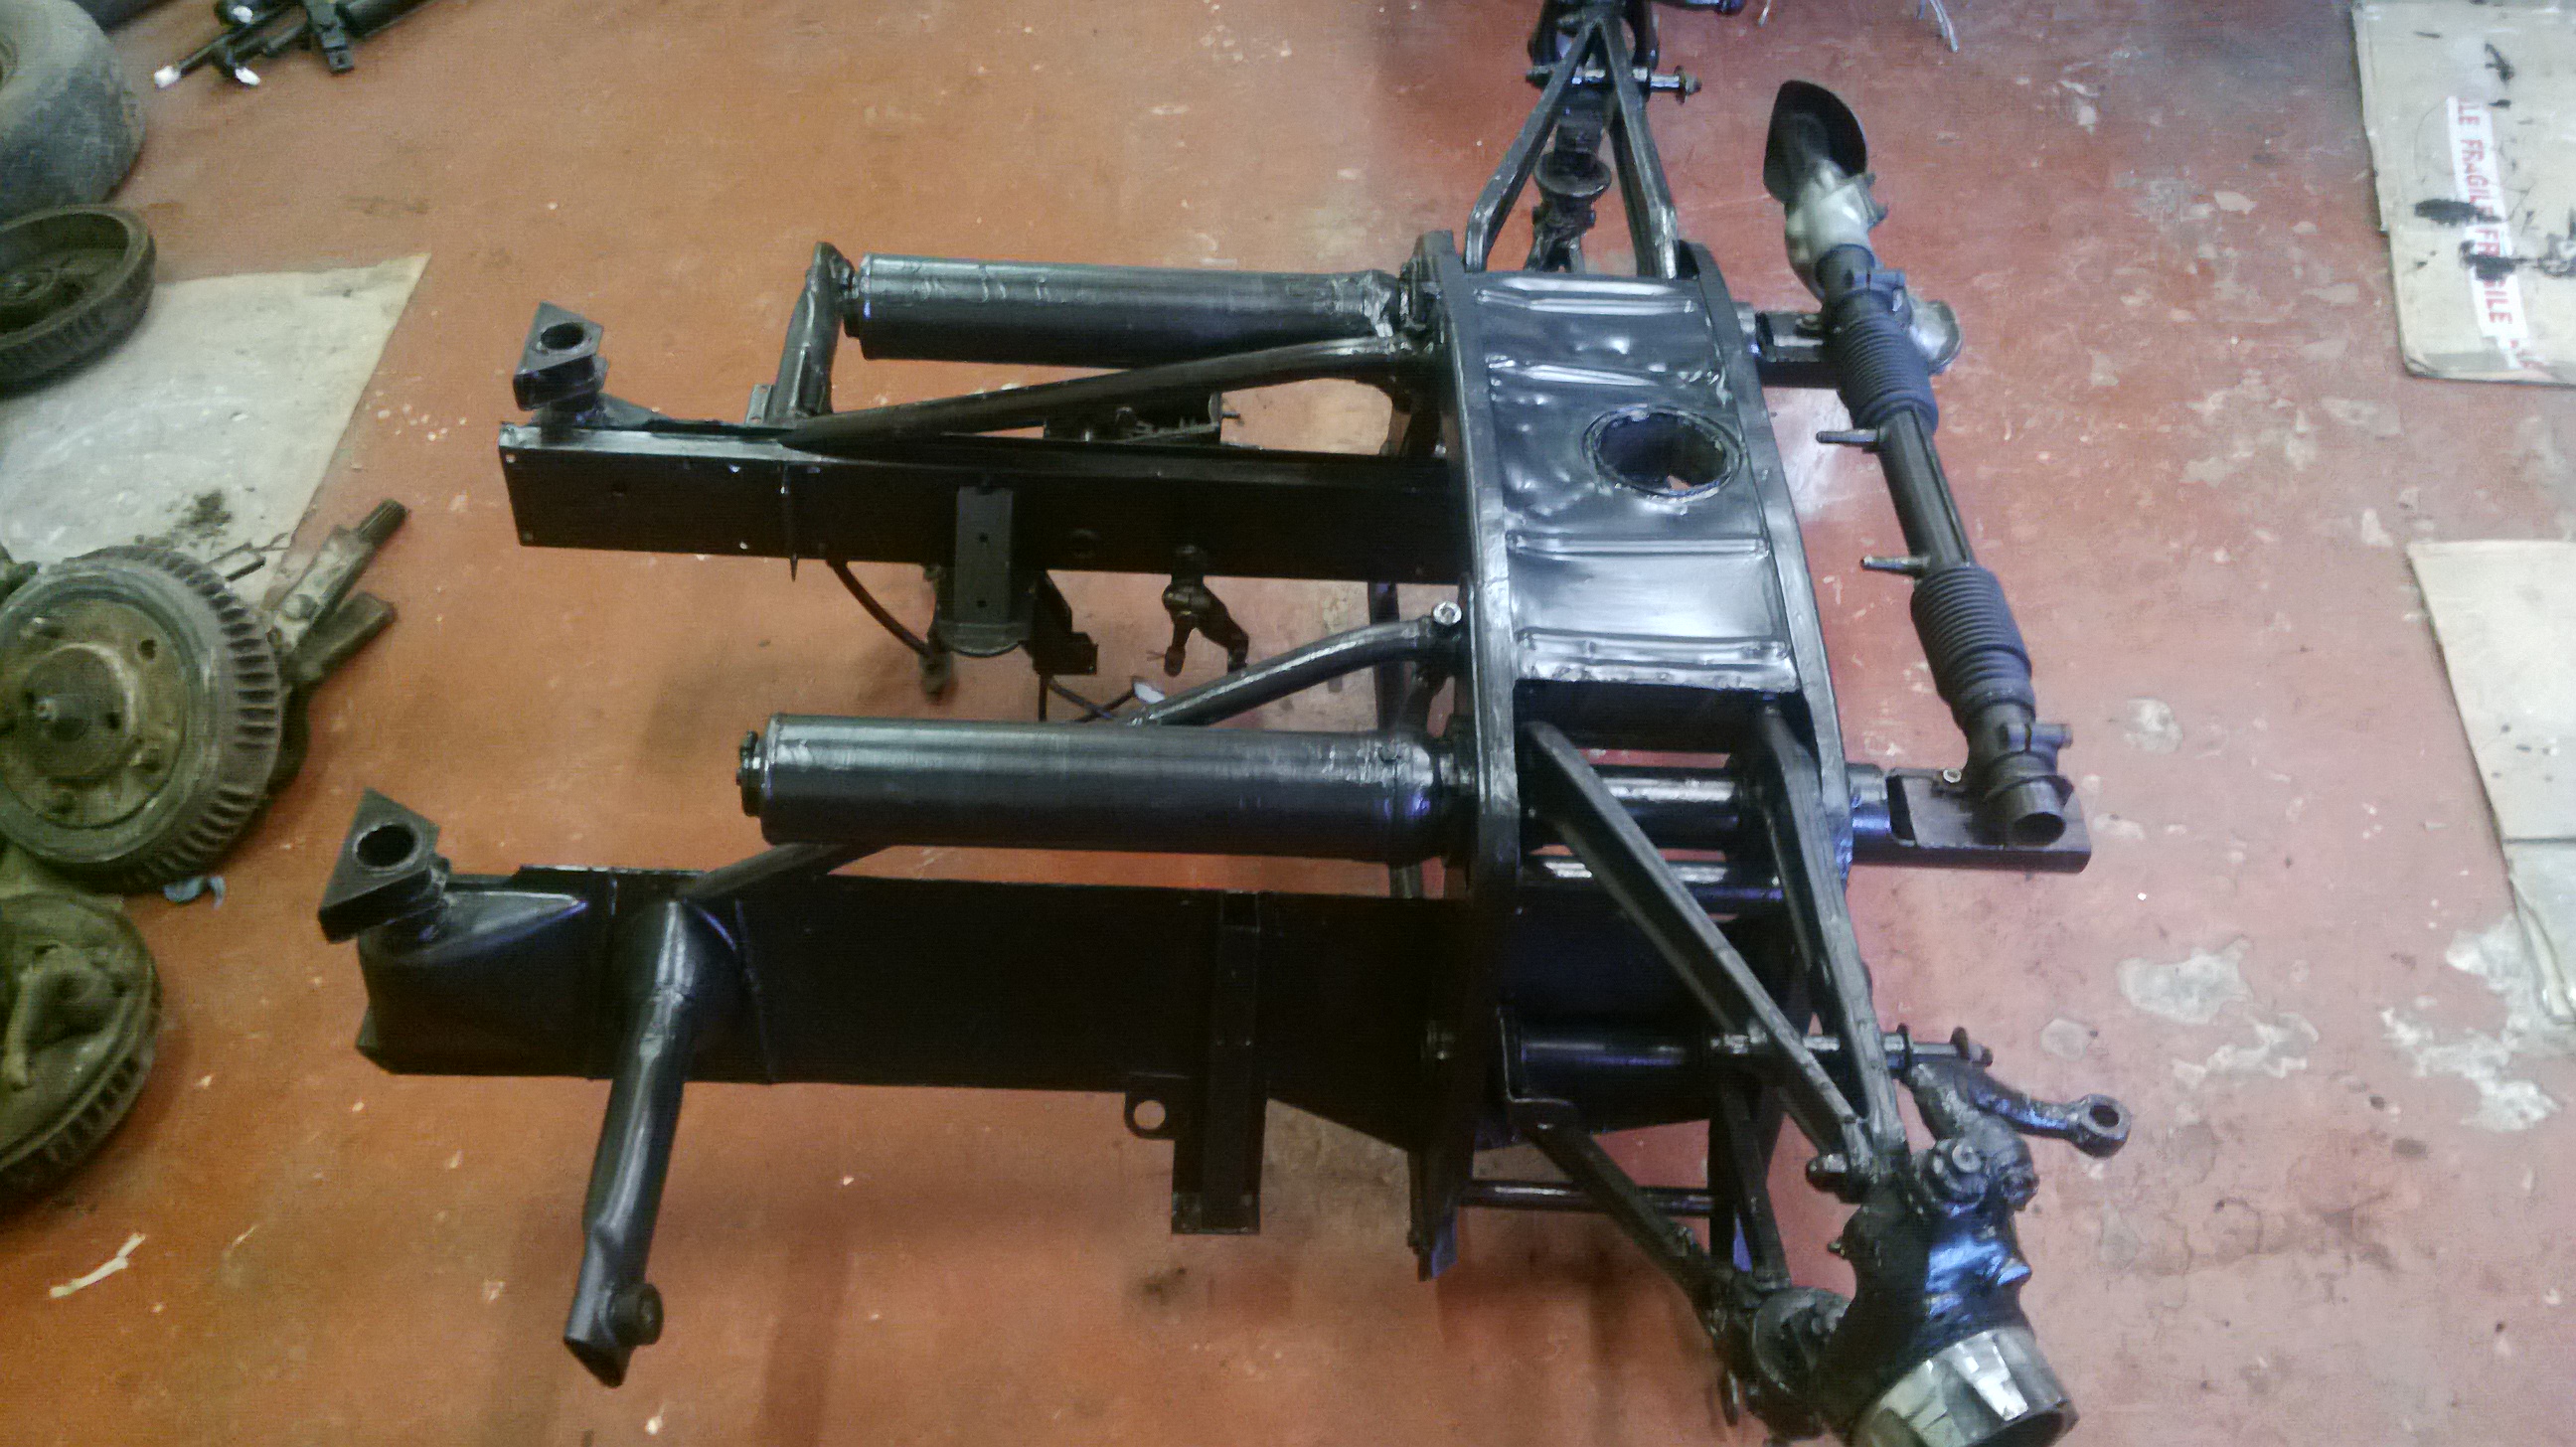
The Steering rack has been rebuilt using new rubber gaiters (not the Leather ones that you 'sew' together that are prone to letting out Grease and letting  in dust). The drive shafts have also been rebuilt with new rubber gaiters. New wheel Bearings have been acquired and they will go in with rebuilt brakes. 

We offer a Steering Rack rebuild service we have stocks of rebuilt Racks, Driveshafts, etc or we can rebuild your own. 

The Brake Shoes are being reworked.

The Brakes on a H van do tend to seize through corrosion caused when the brake Fluid absorbs moisture, so if you don't want another big Brake bill in a couple of years time, to replace the brake fluid in an H van every 2 years. 

Brake fluid is hygroscopic – that is it readily absorbs moisture from the atmosphere, increasing the risk that the water in brake fluid will boil creating a vapour and resultant brake failure. The brakes on a Catering H van will get very, very hot with a risk of very high temperatures inside the brake drums and boiling of the fluid. If you have a big H van changing brake fluid at least every 2 years is a must.


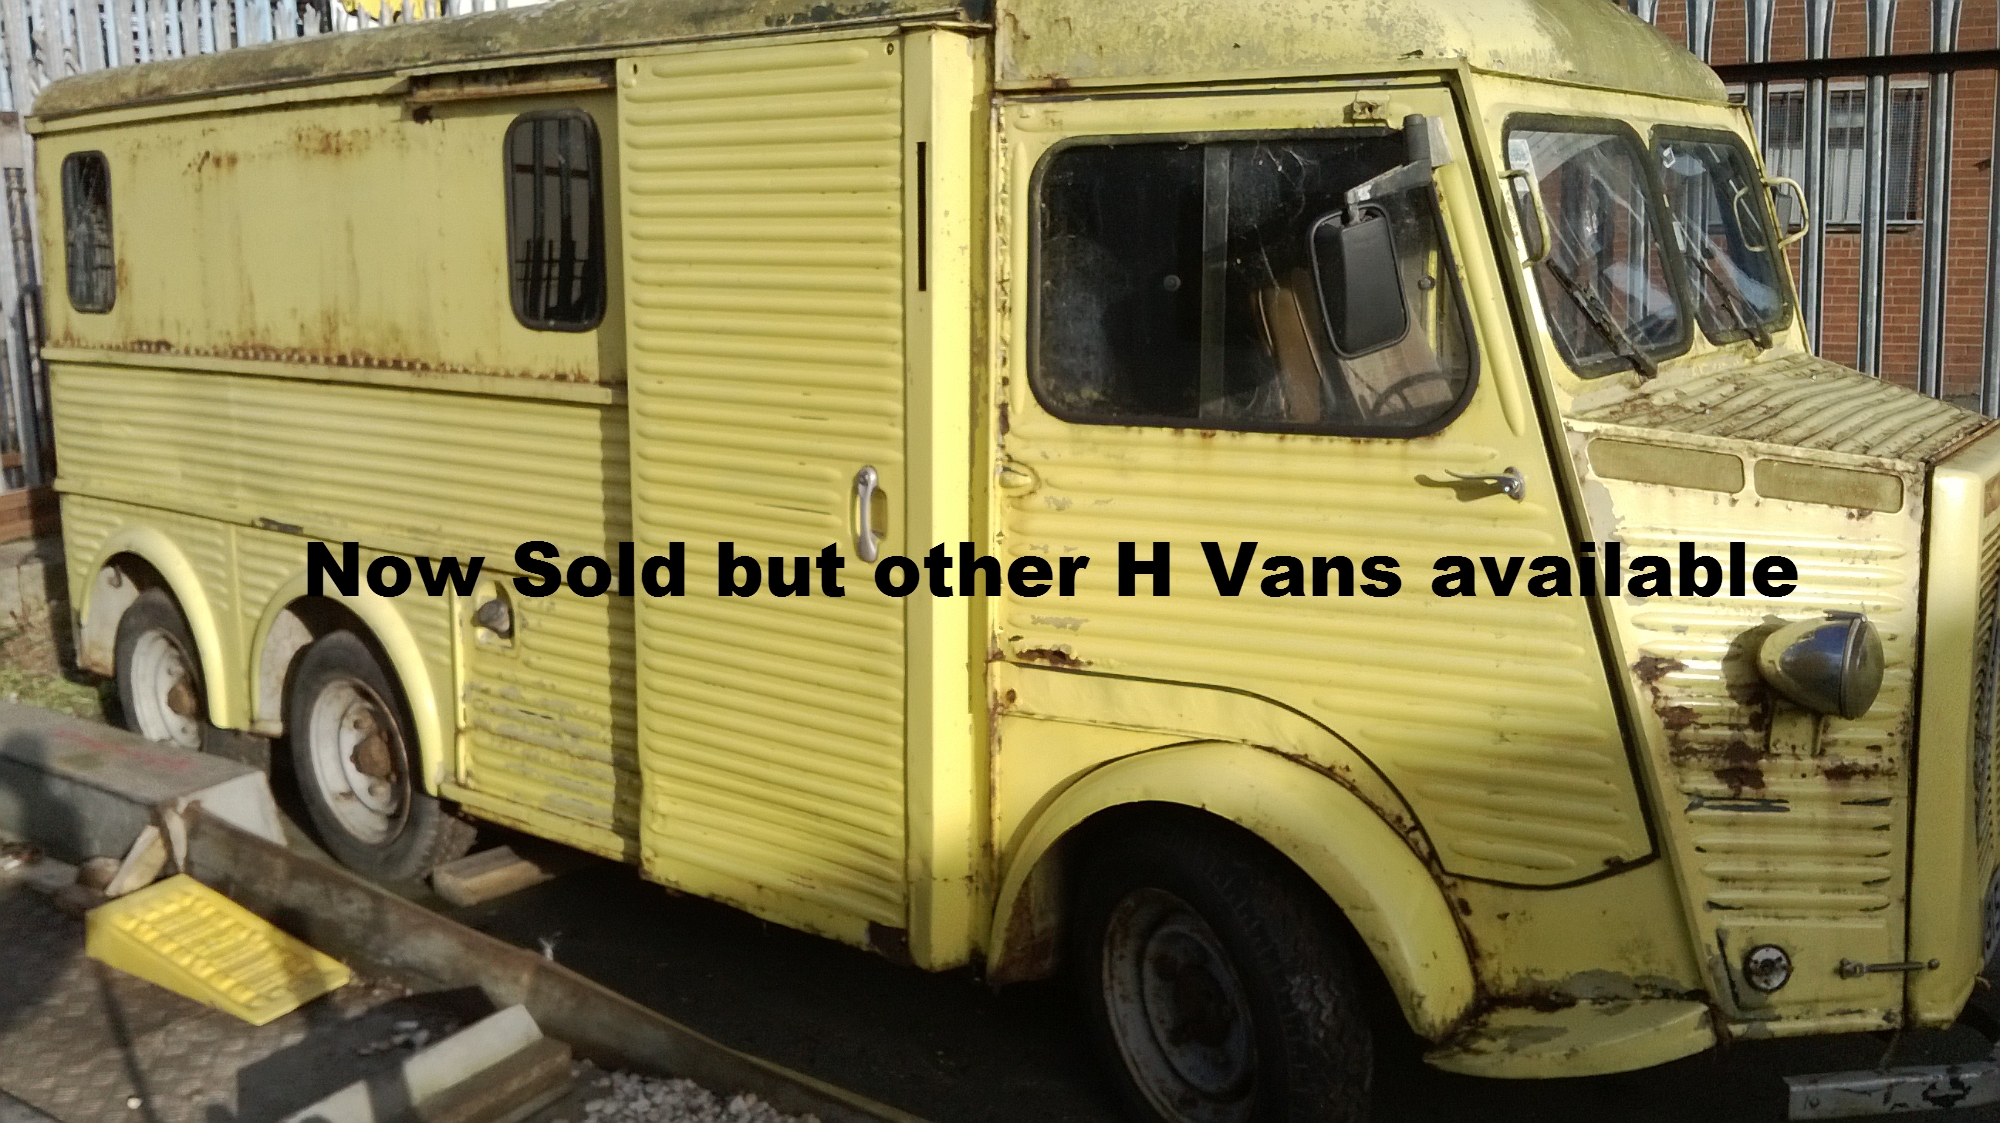
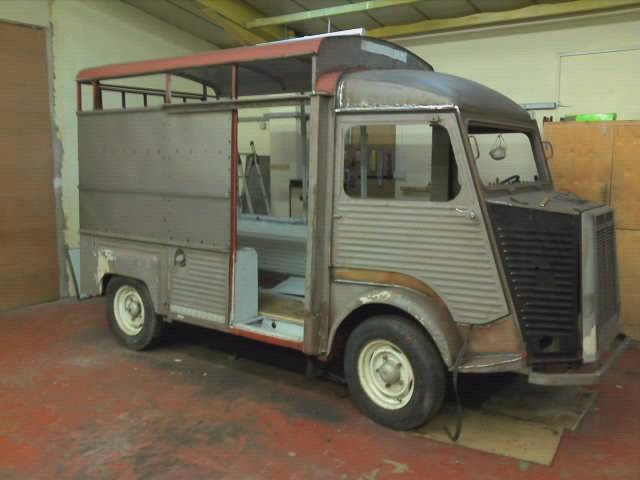
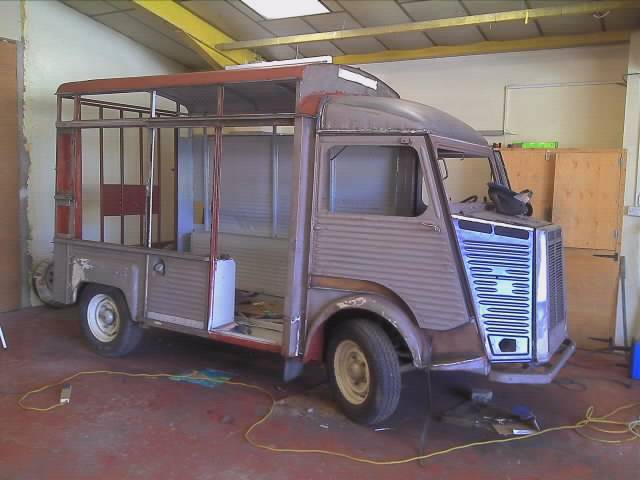
 18th October 2013 - Hugo is no longer ours, he has been sold and will become a Coffee van painted Cream and Burgundy. 

Hugo now has a Catering opening ready for his new role. Hugos progress and transformation will still be documented here.


We are a little disappointed we never achieved our dream of turning Hugo into a Camper Van, however the sale of Hugo has funded the purchase of a unique 6 wheeler, twin rear axle H van. We think it is the only one in Europe. 


We have several potential parallel plans for this van, but not sure yet which path we will go down. 


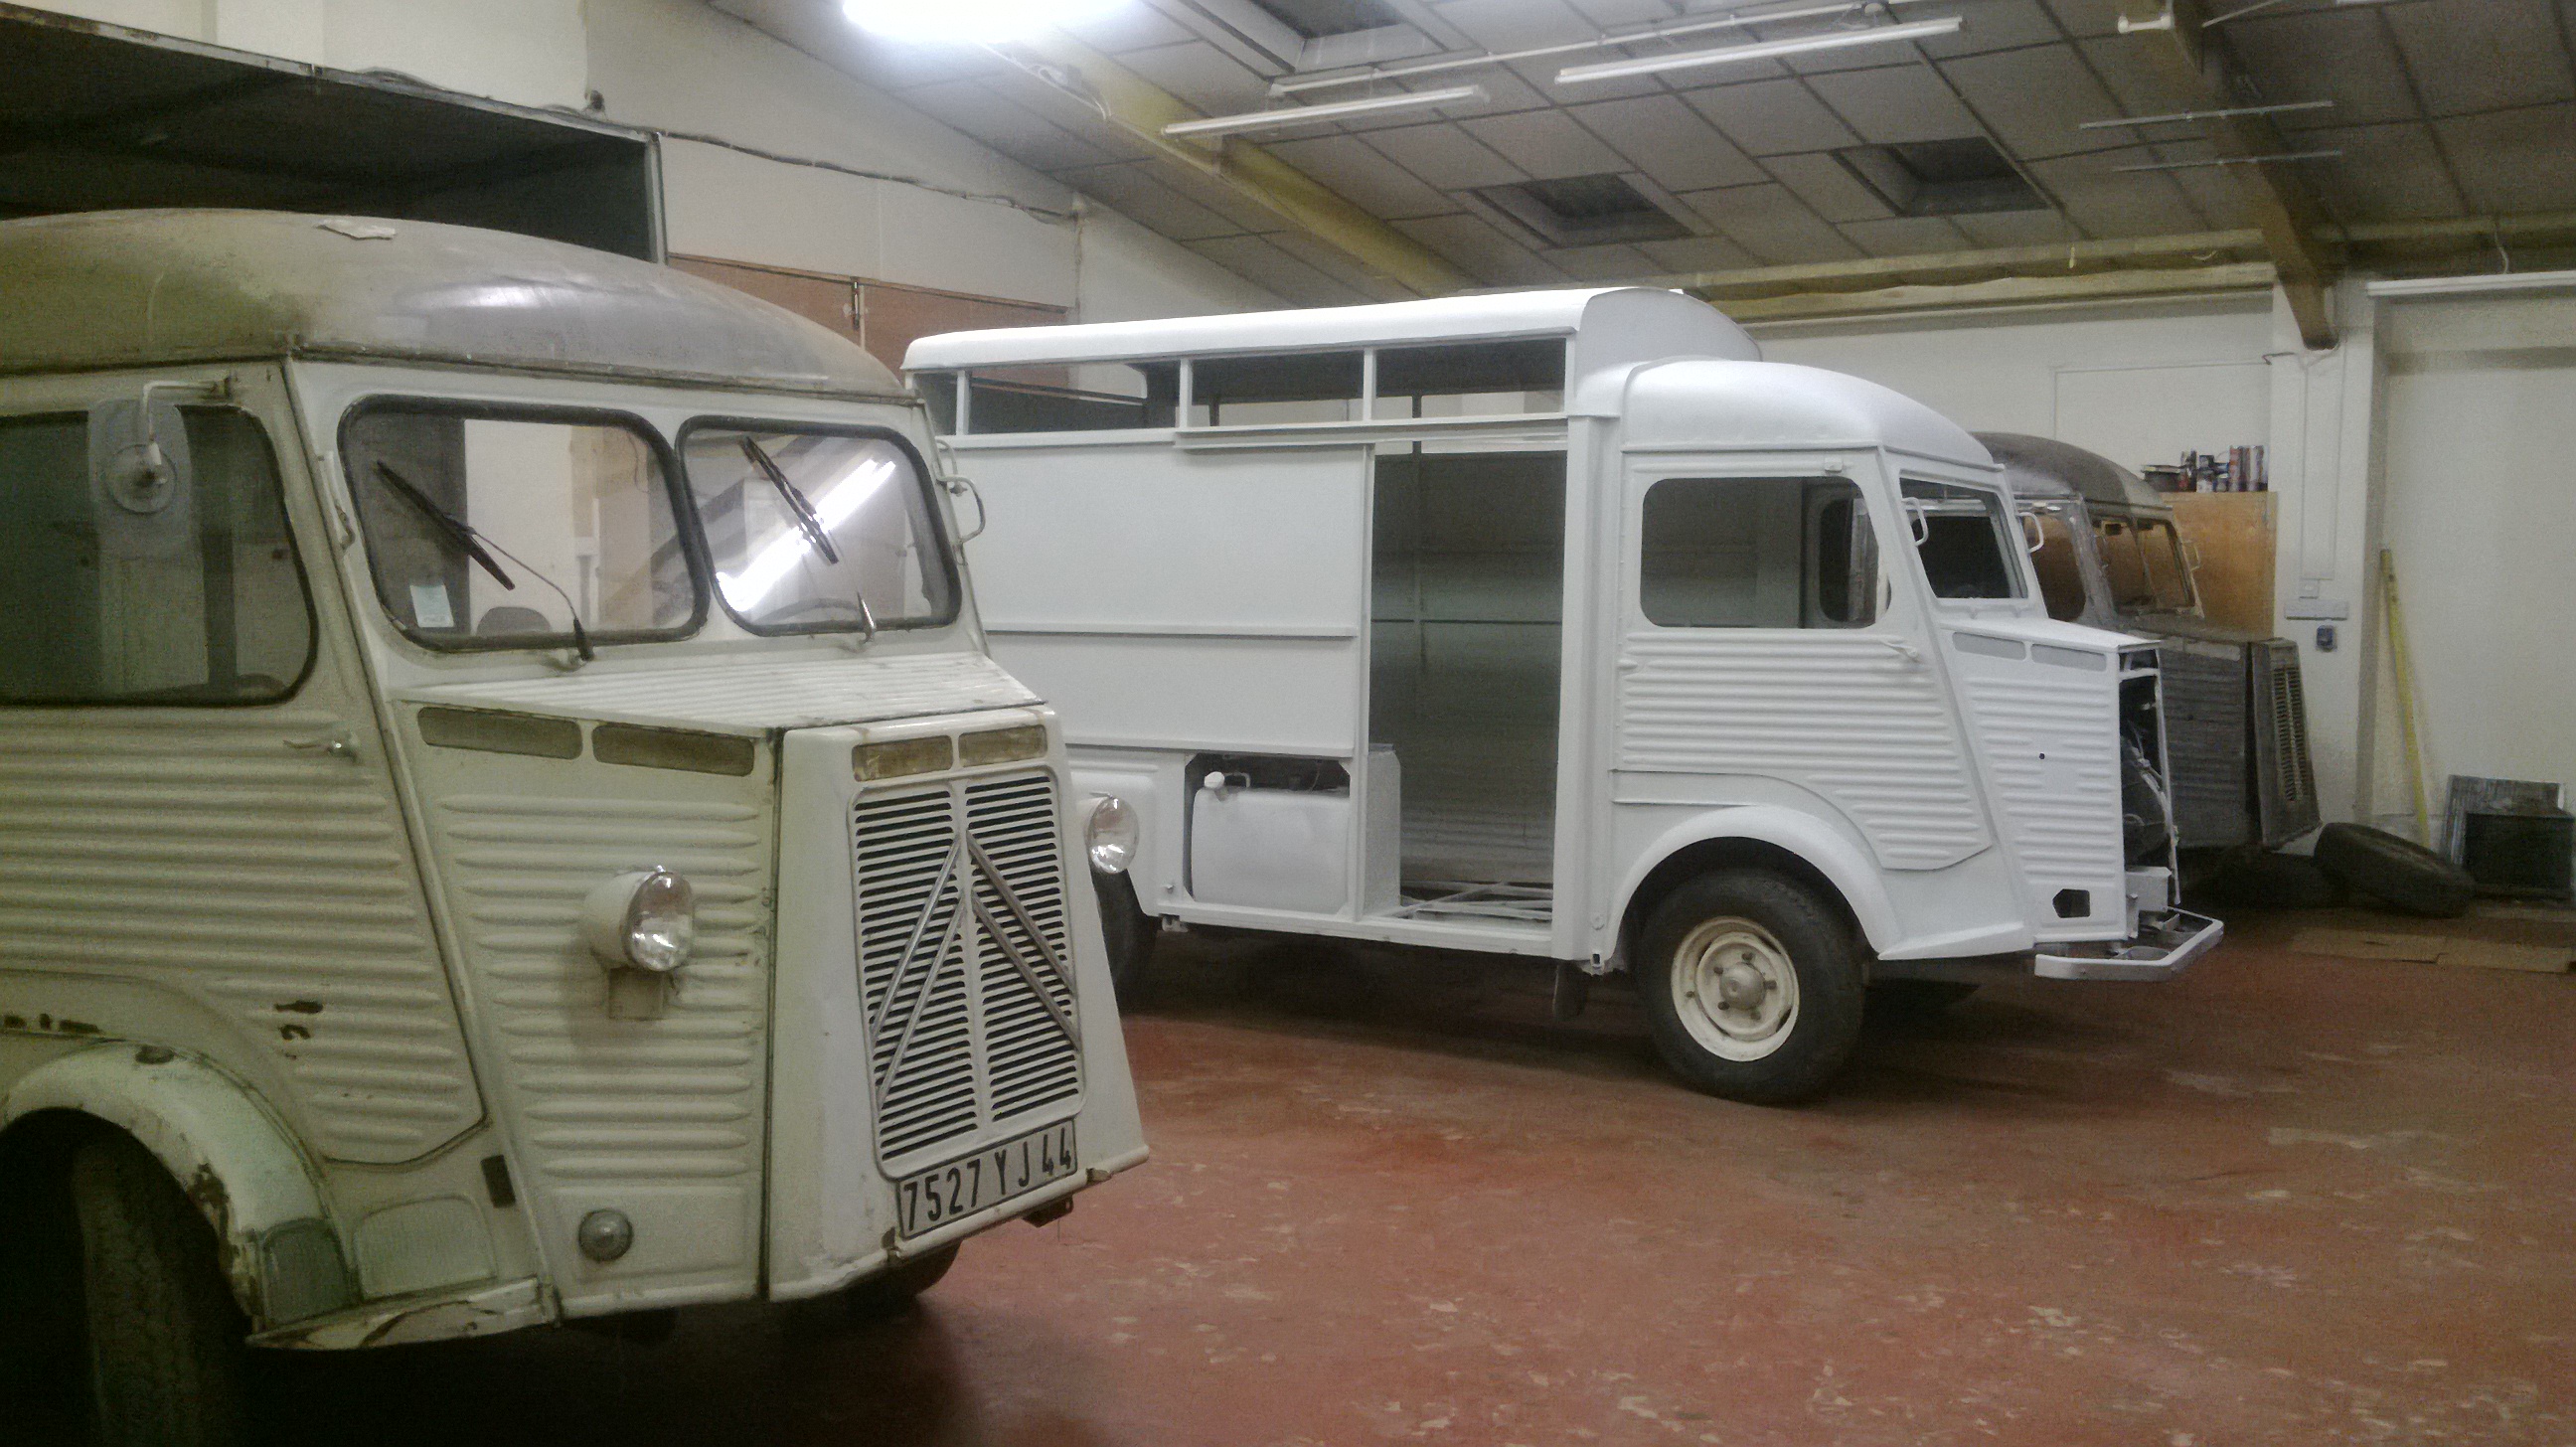
 28th September 2013 - We have had so many requests for a catering Citroen H van that we are going to convert Hugo into a Catering unit, he is therefore up for sale. We have recalled him from the Paint shop, where he sat for almost 3 months without much being done, back to our workshop.

In the photo below he can be seen in White Primer between 2 split screen Citroen H vans, one a HY and one a HZ. 

The Split Screen HY van in the foreground is also for sale and in the process of being converted back into a Standard van, but with a Hi-Top and 900mm rear extension.  

The HZ van in the far background is a Customers in for restoration.

Hugo, now one of the most famous vans in the UK, will be fitted with a Catering hatch ready for full conversion. It is a shame he never made it to conversion as a Camper Van, but we have our eye on another vehicle that will suit us much better. The sale of Hugo will help us fund the new project.

His rebuilt 1,911cc high compression engine and rebuilt Gearbox are waiting to be fitted.


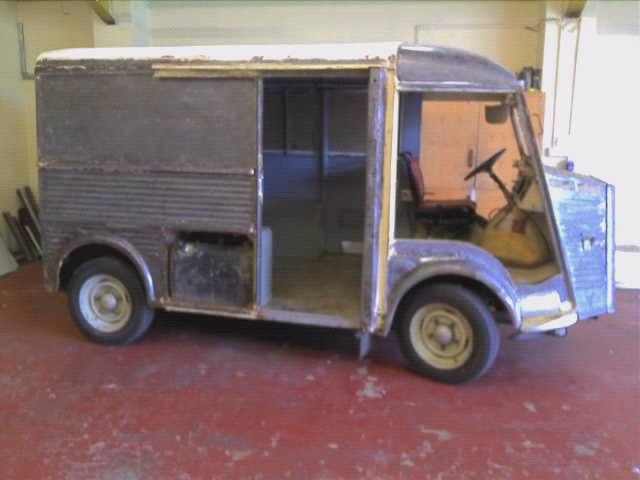
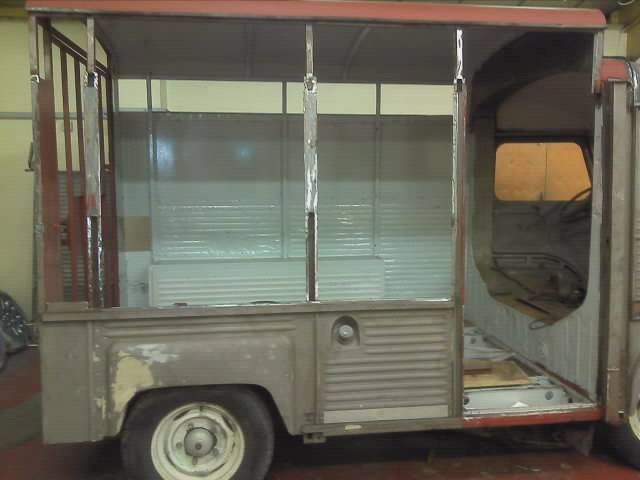
In the foreground can be seen the new Horse box we have acquired, a 1963 split screen, HY, 1,911cc petrol. This is also being converted to a Catering unit. My 3 year old boy has named this vehicle Gaston, after the Ladybird in a CBeebies Ben and Holly's Little Kingdom. Gaston is in much better condition than we thought, having covered just 37,800km. We have removed the Engine and Gearbox ready for rebuild. The Engine and Gearbox have already been stripped and are both in excellent condition, confirming the 34,800km to be genuine!! Despite their good condition the gearbox will still be rebuilt with all new bearings, likewise the Engine plus Pistons/Liners, head rebuild, etc.

The rear floor is rotten, as we expected, and is being removed to make way for a new, light weight, Insulated floor that won't freeze the feet of any workers standing on it, unlike the standard steel floor. When working these vehicles in Winter anyone baking a Pizza in Gaston will have feet as toastie as their face as they peer into the Oven!!  We will cut back all the 'Horse Box' bodywork and rebuild it to look more like the Standard van that rolled off the production line. 

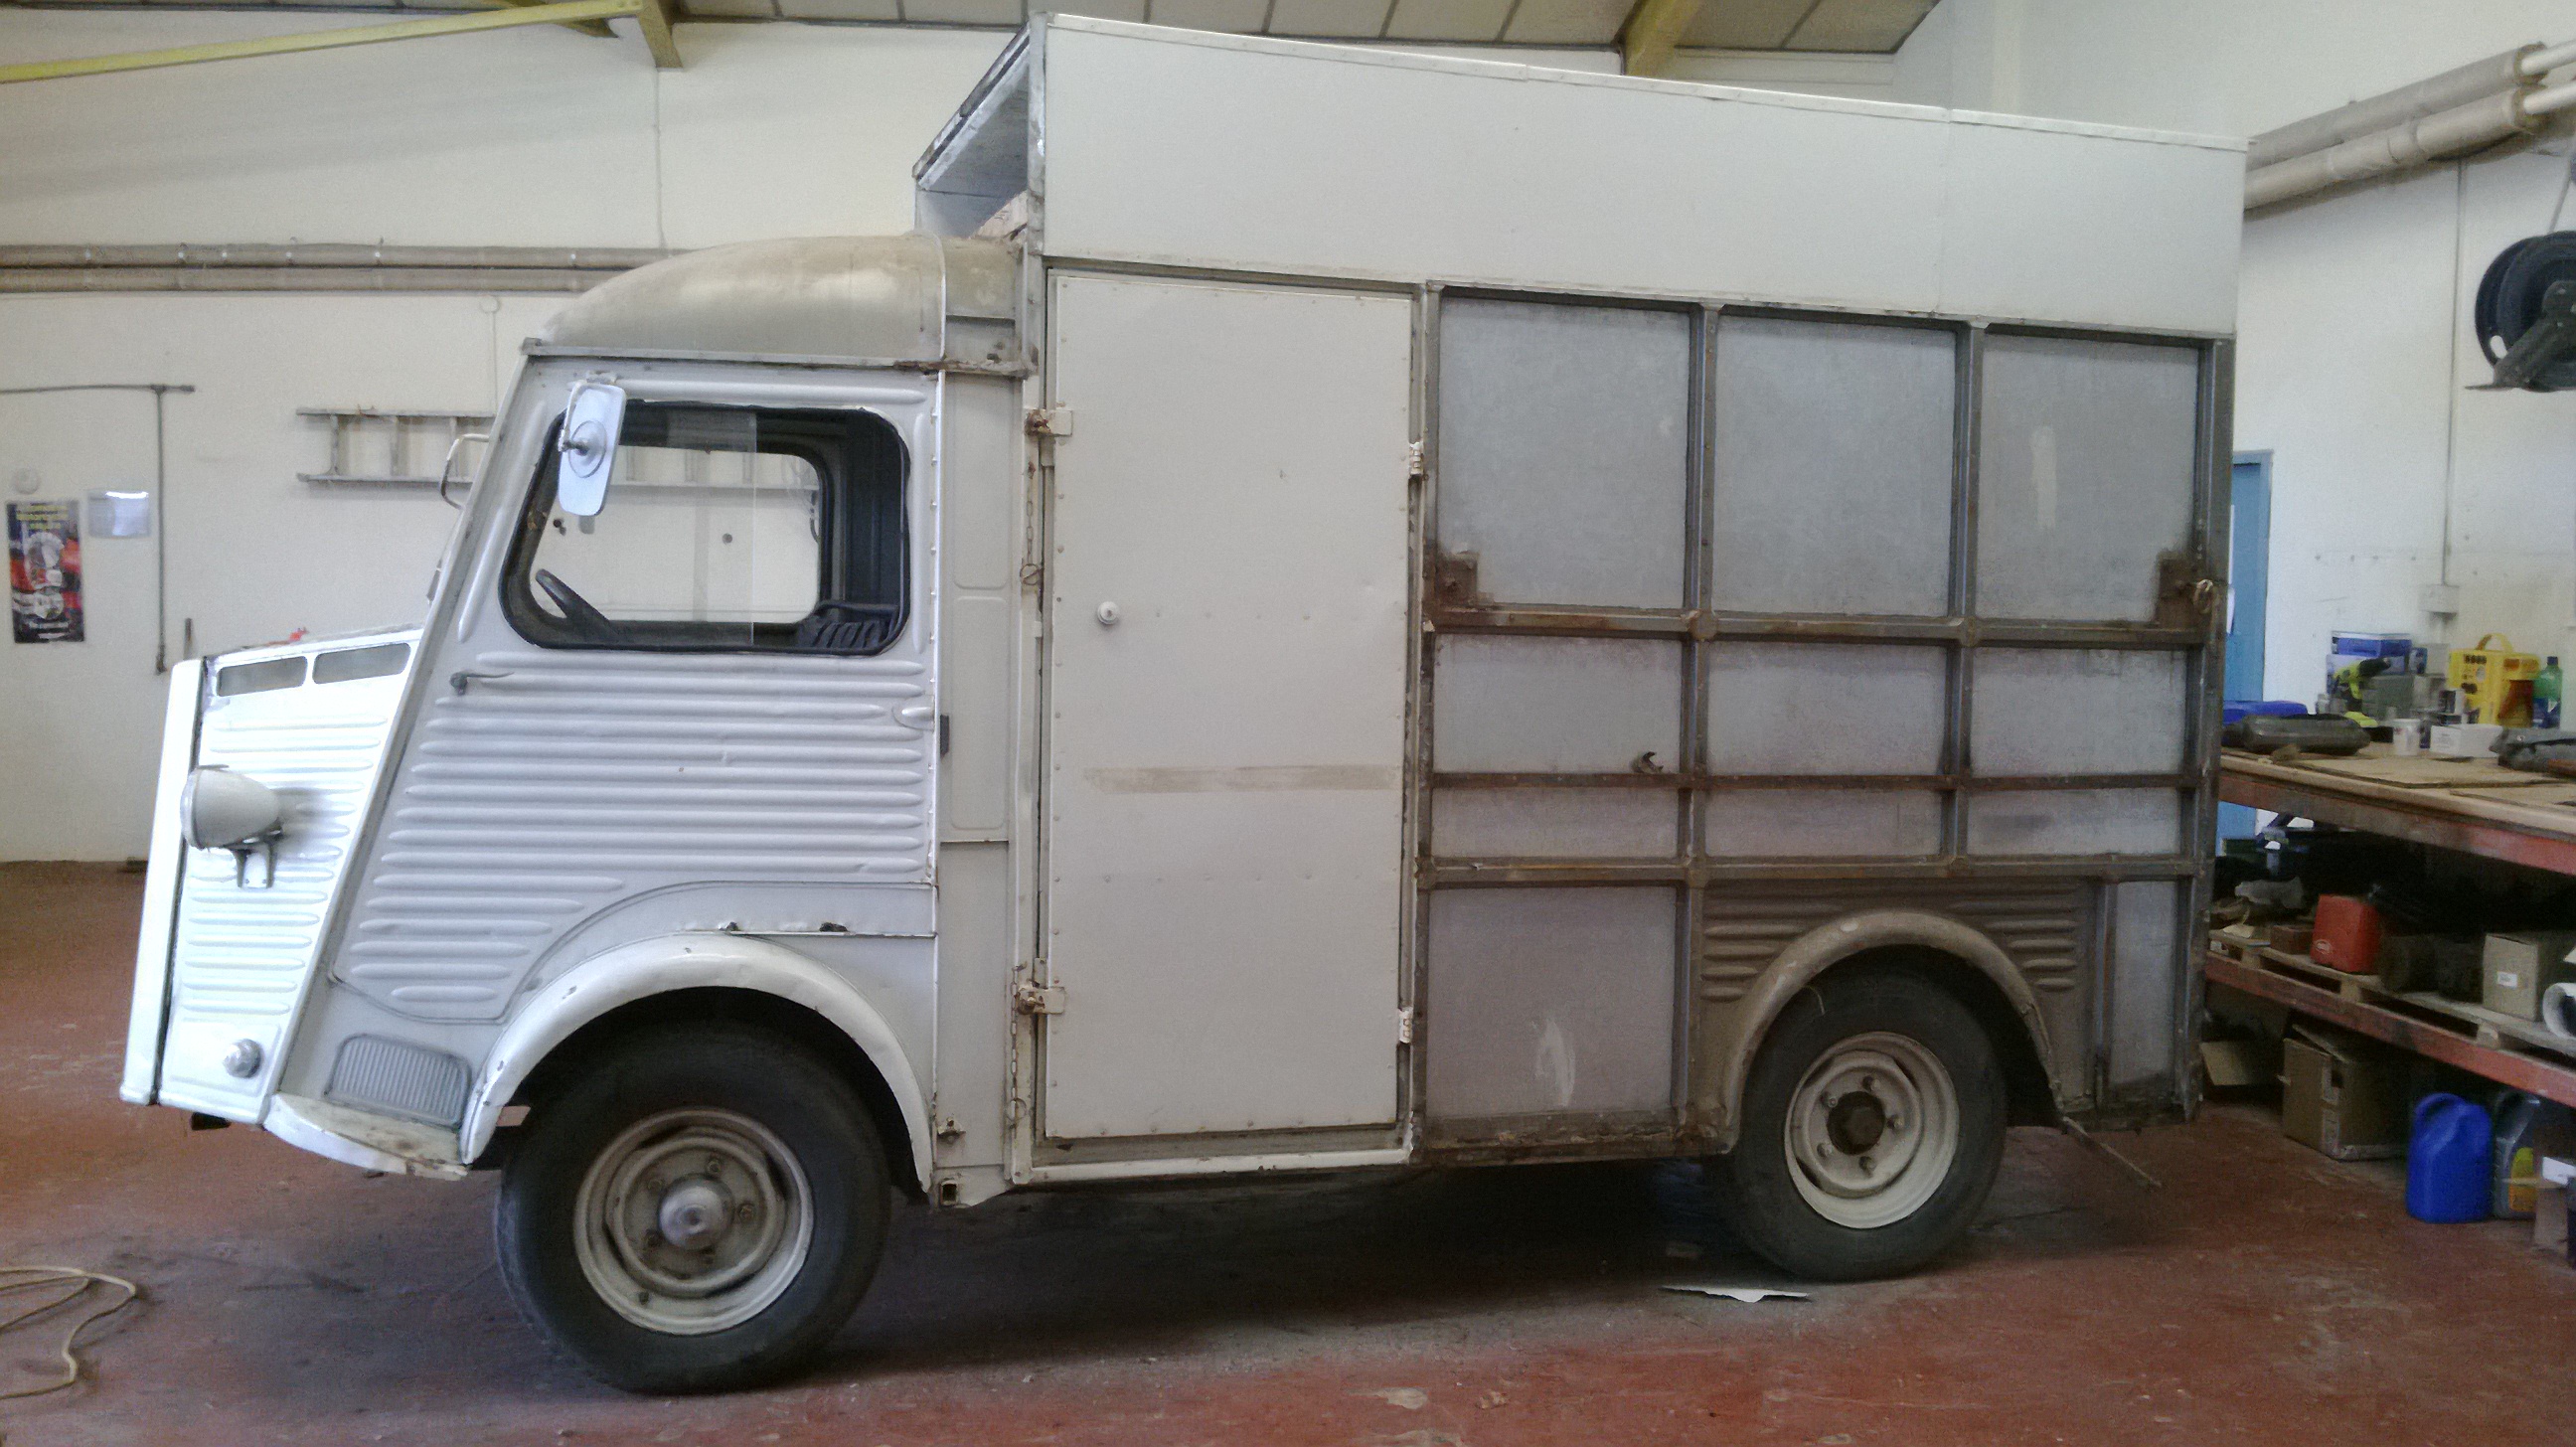
The very high flat roof roof will be cut away and rebuilt with a steeper curvature than standard to increase height by about 6 inches yet not look it from the outside. We will take the opportunity to extend the rear by about 800mm at the same time. 


 8th August 2013 - We are still waiting for our van to be painted, in the mean time into the work shop drives a Citroen HZ78 1954 split screen Customer Restoration. The owner Paul wants to do as much work as he can himself, we are going to help with the bits he can't do.

He has already stripped much of the paint and discovered a LOT of filler.

The major issue with buying a van that has been restored is what lies beneath the new paint. When you are buying a H van we would advise that you go for an unmolested example so you can see exactly what you get. It is very easy to hide all many of ills beneath paint on these vehicles so you watch it changing from a smart £12k van to a shabby £4k vehicle in as little as one winter.

Unless the seller can give you DETAILED photographic evidence that the restoration was done properly assume it hasn't.  


 27th July 2013 - We are working on a rusty, old, slow, creaky, 1970's, cramped Citroen HY Camper conversion when something like this comes in for work and reminds us how good it can be. A fantastic conversion on a 10ton Mercedes chassis with self levelling air suspension and corner jacks.........

Uummm? Now where is that Hydraulic pump and suspension strut off that old Citroen DS we had............

 Yes that is a baby Seagull by the rear tyre. It fell off the roof and we made the mistake of putting out water and food. Now we get followed around whenever we venture outside the workshop!!


14th July 2013 - We have demonstrated how we have been able to restore the metalwork on our van at a realistic cost. Our van had rust every where, a totally rotten floor, rusty sides and side top hat sections. It is now solid.

In taking the van apart to replace the metal we had to learn about the structure, the vans strengths and weaknesses. We were lucky that our van was both an extended version and a HiTop. We now know how to both extend and raise a standard van to make it both taller and longer. More importantly, how to make it stronger without incurring a weight penalty. 

Following requests from people tracking our vans progress we have decided that we will take on the restoration of Citroen H vans for Customers.

This website will try to stay true to its original aim of providing free information and help to those who want to restore and care for their vehicles. For example the Suppliers page will still list other restorers, and convertors. As we discover more about the vehicles that content will still be added and we hope readers will still contribute to the pages. We will try to keep the commercial pages separate from the general pages, such as Technical, Buyers Guide, etc.


There are some new Pages  on Catering Conversions, Restorations/Camper conversions and a HiTop-Extensions page. This same page also covers raising the roof, HiTop conversions. 

We will try to offer a commercial service with minimal intrusion.


 13th July 2013 - Look at our shiny Engine!!!

 The new  Cylinder Liners are in place in the rebuilt block ready for the domed High compression pistons. More photos and text on the engine rebuild will be added to the ENGINE WORK page soon


 11th July 2013 - Hugo our Citroen H van (named by our 2.5 year old son when he first saw him) is in the paint shop. There is a small queue ahead of him, but preparation/painting should be well underway by the end of July.  


9th July 2013We have now cut out every piece of rusted metal, sometimes replacing whole panels where only a small section has failed, and inserted new metal in its place. As we went through the process, it became clear just how much damage had been done by the De-Fleet Grit blast. The H van metal is only 1mm thick, a key reason the van is so light for its size, but such thin material is completely unsuited to grit blasting. We think that about 0.25mm has been blasted off the surface because the blasted surfaces are really pitted. That is a very high percentage of lost metal.

Grit blasting is traditionally used to strip rust and paint from Classic vehicles where steel thickness is general around 3mm. It saves time over the manual removal of old paint and rust. We do not think this process is appropriate to the H van and we suggest you consider very carefully before you let anyone do it on your van.

An example of a H Van restoration that also thinks Grit Blasting is too severe is Karans Camper by Classic Car Revivals. They are using a very soft media to clean the rust away, crushed Walnut Shells!! Crushed Walnut shells have uneven but soft edges leaving a clean finish without damaging the metal structure. Karan probably didn't realise how good Classic Car Revivals were when she choose them, but they certainly seem to know their art. See the page Karans Camper for progress.


Stripping out all the corroded metal and putting in new has been time consuming, but now it is done. Our Van is almost ready to go to the PAINT shop!!  

Every panel is now solid and rust free, we have some dents and surface blemishes to fill, but it is ready to paint.

We still have to repair the Side Sliding door but we estimate that will be about 4 hours labour, cutting and welding.


8th July 2013 - The web site counter shows 3,018 visitors over the previous 30 days.


 4th July 2013 - We start looking at what we need to do to get it mechanical sound while waiting for the Engine and Gearbox rebuild. We notice one tyre is showing cracks and will probably be an MOT failure. Further checking of all tyres reveals they are mostly the more desirable 19r400 metric tyres, but the spare is a modern 195/75 16 Radial tyre. The top of the 'Spare' 195/75 16 tyre is about 22mm lower than the 19r400, indicating its a better match to the 17r400 and not suitable to replace our degraded, cracking tyre.

Try to buy a new 19r400 tyre, find them available but for £310 EACH!!!

We start researching tyres and talking to the trade, see our new Tyres page for what we found.


 1st July 2013 - Photo below shows offside now rebuilt with new top hats and panels. The spot welds give away the extra bracing inside to locate the 2 bunk beds on this wall. In order that the main bed has sufficient clearance below the lower bunk bed, which sits just above the inner wing, the main bed will need to drop down about 200mm as in converts from a seat. I think this might be as big a challenge as the high level nets which will store the bedding during the day!!

I am not sure we have gone down the right route with spot welding the side panels on as there is noticably heat ripple.  We are going to try a different approach when we rebuild the drivers side.


The photo below also shows the rebuilt offside, ready for the door and you can also see through the van that the far side top hats and side panels have been cut out ready for new metal


26th June 2013Photo below showing the fitment of the Nose Cone and repair to the joint between the cab roof and main body roof along with a new Cab roof gutter. Removal of the side panelling and mid upper Top Hat is also clear.


Then removal of the upper Top hat and side door runner.:

The above photos clearly show the interior and how little space there is yet we want to try and make this a 6 berth Camper!!

We need to start putting more time into planning the interior. It is this stage of the build the details become important, such as thinking about the location of the Fridge Gas chimney which we want to exit on the roof with less visual impact than side vents. Location of the water tanks, now is a good time to put them in while the floor is still open.


Some thinking has already been done, such as when the above side panel closest to the camera is rebuilt we will be adding additional internal square tube inside to provide extra wall strength for the two fold away bunks beds that will pivot off this wall. This space is about 1.8 metres long from the van rear to the back edge of the side sliding door opening. This will hopefully mean we can create 2 roomy bunks suitable for small adults. This side of the van will be the 'walkway' from the side door through to the rear Veranda so keeping the wall space clear will be important, hence the fold up bunks location here.


Over the next 2 weeks I will sit down with a scale floor plan and draw everything out, from Water tank location to cable runs and document it HERE.. 


17th June 2013 - Progress on the body restoration moves forward. 

We have commisioned a Sheet Metal worker to tackle the body restoration, following an email from a 'Club Member' who said that the approach was significantly less cost than giving the entire job to a Paint Bodyshop. They used the metal worker to restore the body which was then passed to the Paint shop for painting.  

Although this first seemed like a strange thing to do, the more we thought the more it made sense. You wouldn't ask a Baker to plumb you bathroom, so why ask a Painter to replace Metal in a van body and weld it together? By employing a Metal worker (at two thirds the hourly rate of a body shop) we get the best skillset and someone who has a full back up of Sheet metal cutting and bending tools to make the body parts.  

He started this week, cutting out all the rotten metal, making new panels to fit, then welding them in place.

The photo below shows the restoration work, prior to grinding/finishing to the previously broken Step, the panel above it and the new curved panel that the bottom of the door closes on to and the new O/S Jack Panel.

I think it is interesting to note that it is this work shown here, and the N/S, where the parts alone were billed at £358 and £329 (plus labour) by DeFleet in their quote. The sheet metal worker did both n/s and o/s and charged £26 materials + £165 labour. A saving of £660 + 1/3rd saving on labour, £20 p/h as opposed to £30 p/h.

It really does put the De-Fleet quote into perspective. 

Maybe our approach will all go horribly wrong, but I really like the results and savings so far!! We will see.  

Next we tackle the Nose Cone restoration.


 13th June 2013 - Nose cone and repair panels arrive from Franzose only 3 days after payment. Goods arrived very well packaged and undamaged. Quality is superb and at £355 they are £10 cheaper than I was quoted by UK supplier. Transport costs were what I had anticipated for the UK ordered parts. If you need anything from a bolt to a body part email Ansgar Biemann, ansgar.biemann@franzose.de, his English is excellent. I have posted the Franzose catalogue on the Suppliers-Contacts page, it has excellent photos of items to help identify them.

Catalogue also available here :

Franzose price list UK12 cat.pdf Franzose price list UK12 cat.pdf
Size : 7849.538 Kb
Type : pdf


7th June 2013 - Nose Cone and repair panels ordered from Franzose in Germany using an email in English. They sent me a catalogue so I can be certain I was ordering the correct parts. Order confirmed and payment made on the 10th June.


6th June 2013 - Nose Cone and repair panel that was ordered on 4th May has still not arrived after one month. Poor communication from the supplier, I still can't get an estimated delivery time, so order cancelled.


 14th May 2013 - Gearbox and Engine restoration is progressing. They have stripped down the 2 Gearboxes we sent with our Engine. Unfortunately the Diesel HG gearbox was full of Water and every bearing has quite bad corrosion. The Petrol HY 72 Gearbox report said : "Both end nuts on the two shafts have been loose for some time, the shafts have been moving back and forth. The bearings on the lower shaft have excess play. The 3rd gear synchroniser ring is broken in half. The output bearings are noisy (outboard of the diff). Sliding 1st gear is badly chipped".

The good news is that the Diesel HG gearbox has a good set of gears and diff so we can use those bits to rebuild the HY box with a new set of bearings/seals.

The Diesel box, seems to have almost exactly the same internals as a Petrol box. Only the end gears that determine the overall gear ratio are different, the HG gearbox in question here has a very low set of gears so this is presumably an early Perkins Diesel or an Indenor 1,816cc motor or possibly just a van that was expected to be heavily loaded?

Our Petrol gearbox seems to have the medium ratio, being an extended horse box and only a 1,628cc engine it would have been unable to carry a high ratio gear set.


3rd May 2013 - We order an offside front wing/nose cone in metal at £290 and a nearside wing/nose cose metal repair panel at £75 from a supplier with a base in the UK. Quoted one week for parts to arrive.


4th April 2013 - We have removed our Citroen HY 72 from the De-Fleet workshop after the the original De-Fleet quote to repaint the van increased, without warning or explanation, from £1,800 labour + parts to 400hours at £6,000 labour and over £5,000 parts, Paint, VAT, etc,

Without the discount, the labour would have been £12,000 + over £5,000 parts, paint, etc. More than £17,000 just to paint the van.  CLICK HERE for full details.

From the time that De-Fleet agreed to do the work to now has been over 3.5 months elapsed time. Yet because they couldn't start work on it for several weeks plus delays due to bad weather and then other unknown reasons the total effort expended by them has been less than 1 day in 3.5 months. This has left us a long way behind schedule, as the van was hoped to be painted by the 1st April. There is no possibility of catching up to have it at Shows by the early summer, but we will commision it as early as we can.

We have now had 3 new quotes and have engaged someone else to carry out the work. We will update this page as work progresses.


2nd April 2013 - We don't have much progress to report, but we now have two new members from South Africa looking for a Rear Brake Compensator Valve, see the Sale and Wanted page for more info. 

With this becoming an 'International' website, it is not surprising that we exceeded 2,504 visitors over the last 30 days!! 


20th March 2013 - Not really an item of progress but our latest Club member is a 'Celebrity' in the H van world, John Sobey. John has owned a Citroen HY78 since 1989!. He ran the H van register for about 18 years and started the hvan.co.uk website. There can not be many who know more about Citroen H vans than John Sobey so to have his endorsement of the website is a big milestone.

See pictures of his Camper Van conversion HERE. The pictures look like they were taken, at a H van rally? This years H Van and Friends Rally is being organised by John Sobey at Donnington Park 17th - 19th May. There is a café, BBQ plus the opportunity to drive round the racetrack. Located near the centre of England so within reach for lots of H vans. Contact John Sobey hvan@bigfoot.com This e-mail address is being protected from spambots. You need JavaScript enabled to view it 01453 542220. More details HERE.


16th March 2013 - The Engine restorer's findings pretty well confirm the mileage on the speedo is genuine at 61,000km, 41,000 miles.

14th March 2013 - We are asked if we can help supply four, Citroen H vans with Catering conversions for a new Television show to be shot in London during June 2013. So if you have a Citroen H Van with a Catering conversion that you wish to become famous, contact us. See the Events and Activities page for more details. That this site has been contacted to help locate four vans is a very satisfying milestone, and a measure of our position in the Citroen H van community. It makes all the hard work very, very worthwhile.


4th March 2013 - We now have the first Corrugated side repair panel to cover our bady dented one.

As you can see from the photo it is a dual length item that fits both the standard wheel base van and the longer Horse Box. For a standard van the panel would be cut at the end of the first flutes on the right.

The Mold has taken 3 months to make by hand, so a limited production run of panels will be available at £199 each to recoup some of this cost.

The picture above shows the area highlighted in Blue where the panels would be inserted, on top/in place of the damaged items.

More detail will be added to THIS PAGE when available.


 2nd March 2013 - The Citroen HY Online Site has just exceeded a count of over 1,500 visitors in the last 30 days!! The site has grown beyond belief, we now get requests for help and enquires from all over the UK. See our latest visitor requesting help with sourcing carburettors.


21st February 2013 - No news on our van yet but we get confirmation about 2 beautifully restored HY vans that are to feature in a new Celebrity Chef show on BBC2 in March. See the Famous HY page.


1st February 2013 - We deliver our Citroen HY 72 to De-Fleet in Billingham at last!! The weather finally settled down for a day to transport it up there.


28th January 2013 - Snow disappearing to be replaced by floods and Gale force winds, still can't trailer our Citroen Hy to De-Fleet!! However, weather for the 1st February looks promising to tow a trailer with a Citroen HY on board from Conwy to Durham.


22nd January 2013 - Decide to remove the Engine and Gearbox so that these can be worked on while we wait to get it to De-Fleet. It will also make it easier for De-Fleet to grit blast and paint the vehicle.

We had the option of removing the entire front subframe assembly complete with front supension attached but we needed to keep the vehicle mobile to transport it So we opted to remove the engine and gearbox leaving the rest in place, which is the option we think most DIY'ers would take.

Engine and Gearbox came out in 4 hours, only broken part was a rusted exhaust manifold clamp.

We uncoupled the engine/gearbox unit from mountings, cables, exhaust, driveshafts, Rad etc. We then balanced it on a jack, while the Van body was rolled backwards by hand leaving the motor/gearbox assembly in mid air. So easy!!. We aim to document this more fully at a later date, along with reinstalling the engine.

21st January 2013 - Although here in Conwy the snow fall has been very light, there has been more heavy snow in the North East, putting a block on any travel this week from North Wales with the Citroen HY. Re-arranged for Monday 28th January.


10th January 2013 - De-Fleet tell us they are ready to start our Citroen HY so it is agreed we take it up to Billingham, near Durham on Wednesday 16th. Heavy Snow a few days before prevents us from taking it up there, re arranged for Wednesday 23rd January.


12th December 2012 - De-Fleet agree to Paint and restore the Vehicles bodywork. Most of the Resprayers we approached either did not reply or said it was too big a job. De-Fleet are on their sixth Citroen HY, so know what they are doing. They have also restored Classic cars and Coaches/Buses, so must have a really strong mix of skills The bad news is that they have got three other Citroen Hy's queued up waiting to be restored so it might be a few weeks before they can start ours.


9th December 2012 - Remove the wheels and drums on the drivers side to reveal the brakes in a sorry state. The rear cylinders are starting to leak, the Front shoes and cylinders have been renewed sometime in the not too distant past. However, because the van has stood for some time the brake cylinders have siezed causing the front brakes to drag and cook the 'new' front shoes.

Hopefully these 2 articles will help us get them back to full working order : http://jazzintransit.blogspot.co.uk/2012/01/refurbishing-front-b-rakes-on-citroen-h.html and : http://www.schaalbouw.nl/citroen/hyfbrakes.htm


29th November 2012 - Very, very heavy rain has delayed progress. But we escaped much better than the unfortunate people just down the road at St Asaph.


21st November 2012 - New Sandwich Ply/Styrofoam floor arrives :

The floor looks brilliant, real quality Far Eastern Ply. It is obvious the plywood has been carefully selected for strength and appearance by Panel Systems Ltd, the Supplier. The insulated floor sheets are 3,000mm x 1,200 x 3 and look huge!! I can't wait to see it down but we are still waiting for the floor bracing/welding to be done.


15th November 2012 - We have cut out the floor :

We have cut out the old Horsebox floor, we were right about the weight of it!!

We can now get into the top of the main deep chassis members and it all looks very, very good. We will now brace the floor area with the same 25mm square steel tube that is used almost everywhere on the Van. This bracing will support the sandwich insulated floor.

The old Horse ramp has also been removed, and again the weight was considerable. The new lighter replacement rear door/Veranda will be made up next with the light weight sandwich floor replacing the heavy timber ramp, saving another 50kg. The weight of the new rear door/Veranda will be important if we are to avoid straining our backs lowering and raising it each time we want to double the living space. Despite the lighter weight of the new veranda/door we are going to fit a hand winch to raise and lower it so that it is completely effortless.


11th November 2012 - We tackle the floor:

The floor is an integral part of the vans strength. It is a double skinned floor with a flat steel sheet on top and a corrugated steel piece welded beneath, visualise corrugated card board. However the floor is often corroded beyond salvation in the 'Beast carriers' but if you are planning on creating a camper with a bonded, insulated floor then this should not be an issue as it will be cut out anyway to save weight. However, if the floor is removed bracing with tubing is essential both to strengthen the van and provide a platform for the new bonded, lighter floor.

We have chosen to cut the floor out of our van, we estimate it weighs 150kg, then bracing with square tubing in a criss cross pattern before bolting the insulated floor at 300mm intervals both across and up the van floor.

The Insulated floor and steel bracing weighs just 70kgs giving an overall weight saving of 80kg (estimated) with a stronger end result. Weight will be a real factor as the engines were not exactly lively, even when new so we need to keep this as light as possible.


7th November 2012 - Ordered new Ply/Styrofoam sandwich insulated floor. We have been advised that the only insulation material that should be used in Motorhome conversion floors is styrofoam because of it's strength and it won't absorb moisture like some foam insulations. The ply used in our floor contains Weather and Boil Proof (WBP) glue, the category of glue used to make the most durable plywood. These floor panels are exceptionally strong, less than half the weight of the original steel floor but twice as strong. At 49mm thick overall the insulation value should be very high, I hate walking on a cold floor!. The same tough floor will form the base of the rear Veranda. We could have used plain plywood for the floor, as some converters do, and saved about £300 but it would not have been anything like as warm, strong or light. It is such an important part that it is well worth the extra money.


5th November 2012 - Find out that Long Life OAT Antifreeze is not good for Vehicles made prior to 1995. It can destroy the seals and attack the lead Solder in the Radiator and other metals no longer present in a modern engine. My research shows that Propylene based antifreeze has several benefits for Classic vehicle engines, in particular it has a propensity to seal small cracks (Ethylene Glycol based antifreeze seeks them out) and it is non toxic. Propylene supplier : http://shop.citroenclassics.co.uk/oils-and-fluids-13-c.asp

However the cost is around £20 a litre. With further work to be done on the engine, like replacing the 40 year old rubber hoses and the water pump (a known weakness) it is likely that we will be draining it again. So for now the Red Long Life OAT is flushed out and the system refilled with non OAT, Blue, Ethylene Glycol 40% mix.


28th October 2012 - Thought I would protect the engine through this cold spell with fresh Ant-freeze so drained it out and refilled with new. It was quite simple to do and only took 30 mins.


21st October 2012 - The engine is purring very nicely. There is no smoke, no rattles and it idles steadily. Still busy with regular work so not finding the time to get cracking on it.


2nd October 2012 - We bring our none running Citroen HY72 back on the ferry having bought it in Bayeaux, Normandy. We were helped enormously in our quest to find a Citroen Hy by friends Walter and Jane. We stayed at the most special Gite near Lessay while the transaction was completed. It was a beautiful barn conversion that sleeps 6. Highly recommended. French Gite.  


 OUr Partners/Suppliers on the project :


Citroen HY Engine and Gearbox rebuild and performance Tuning :

Devon Tractions will be stripping down our Engine and Gearbox and rebuilding them to better than new. 

These vehicles below are the ones that Mark Harding knows inside out, the Citroen Traction. It was this vehicle that donated the engine and Gearbox for the Citroen H van in 1949.

He has also worked extensively on H vans. 

 Mark is going to strip and clean the engine, replace the 1,628cc liners and pistons with a 1,911cc domed high compression piston kit that should improve the power by a big margin. A carburettor from a 1,911cc vehicle and a new distributor with a more advanced ignition curve (to take advantage of modern fuel) should see power rise from 45bhp at 4,250 to around 71bhp at 4,550. See the Technical Page for more info on making a Citroen H go faster.


Because all the changes are aimed at improving efficiencey I am hoping that fuel consumption will also improve by about 4 MPG, if we do not use all that extra power.


Citroen HY Paint and Bodywork Repairs and restoration :


Insulated Floor

Insulated Ply/Styrofoam Floor panel Supplier - Panel Systems, formed in 1974, has over thirty years experience of supplying insulated panel products into a diverse range of markets including building, caravan, education and leisure.

Chris Ibbotson
Panel Systems Ltd

web : http://www.panelsystems.co.uk
email : cibbotson@panelsystems.co.uk
Tel: 0114 2752881 Fax: 0114 2786840